> ## Documentation Index
> Fetch the complete documentation index at: https://help.voxdash.com/llms.txt
> Use this file to discover all available pages before exploring further.
# Create & Manage User Groups
> When an organization has added multiple users, it can simplify project access management by creating User Groups. A User Group allows you to assign access…
When an organization has added multiple users, it can simplify project access management by creating **User Groups**. A User Group allows you to assign access permissions to several users at once, rather than configuring each user individually.
## How to Create a User Group
**Note:** Before adding a new user group, choose the organization from header first, then follow these steps to add a new user group to your organization:
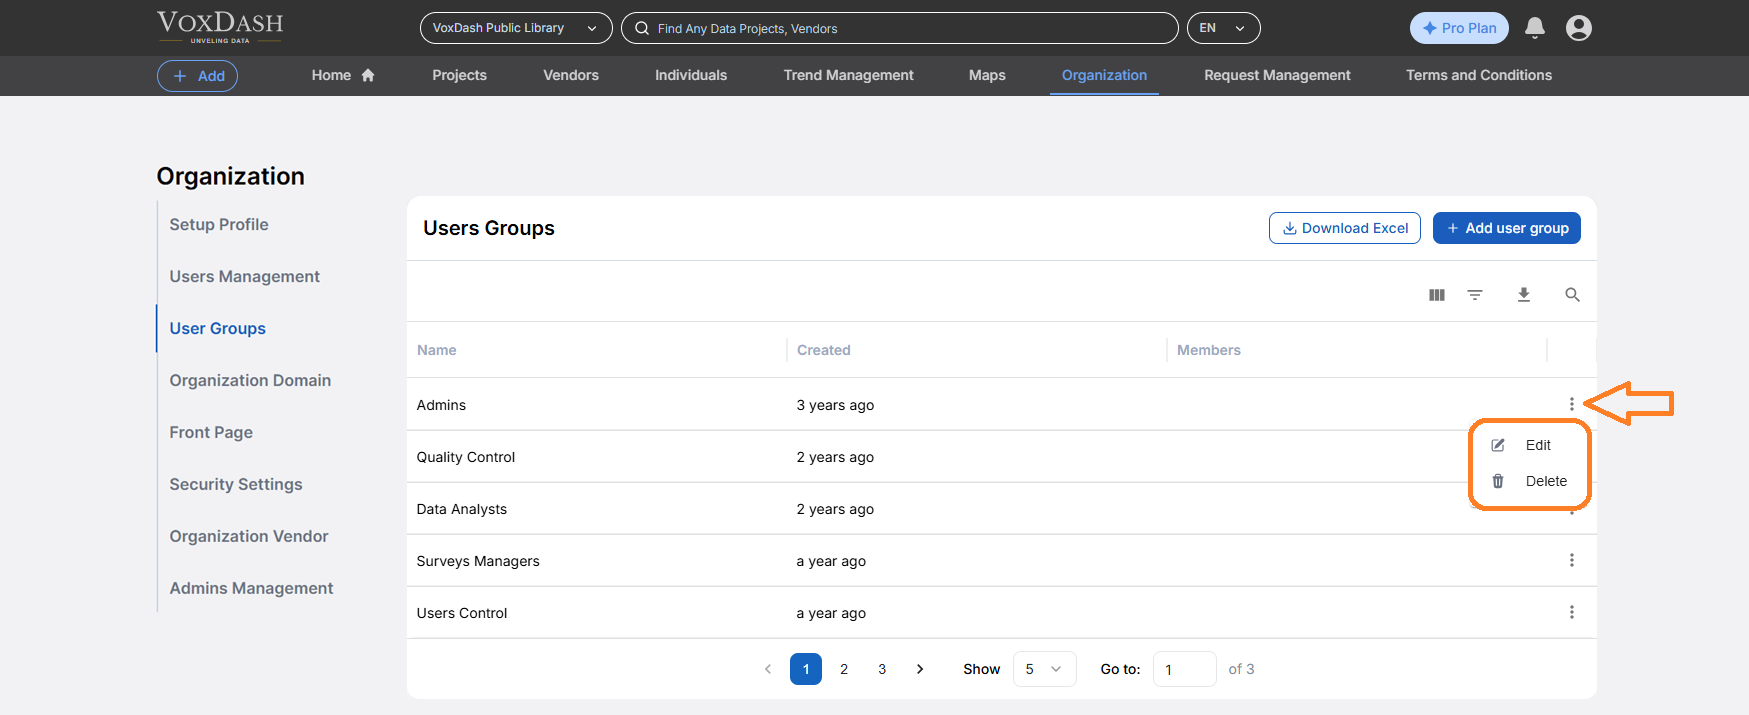
1. Navigate to the [User Group](https://dataprovider.voxdash.com/org/userGroups) section on the organization page.
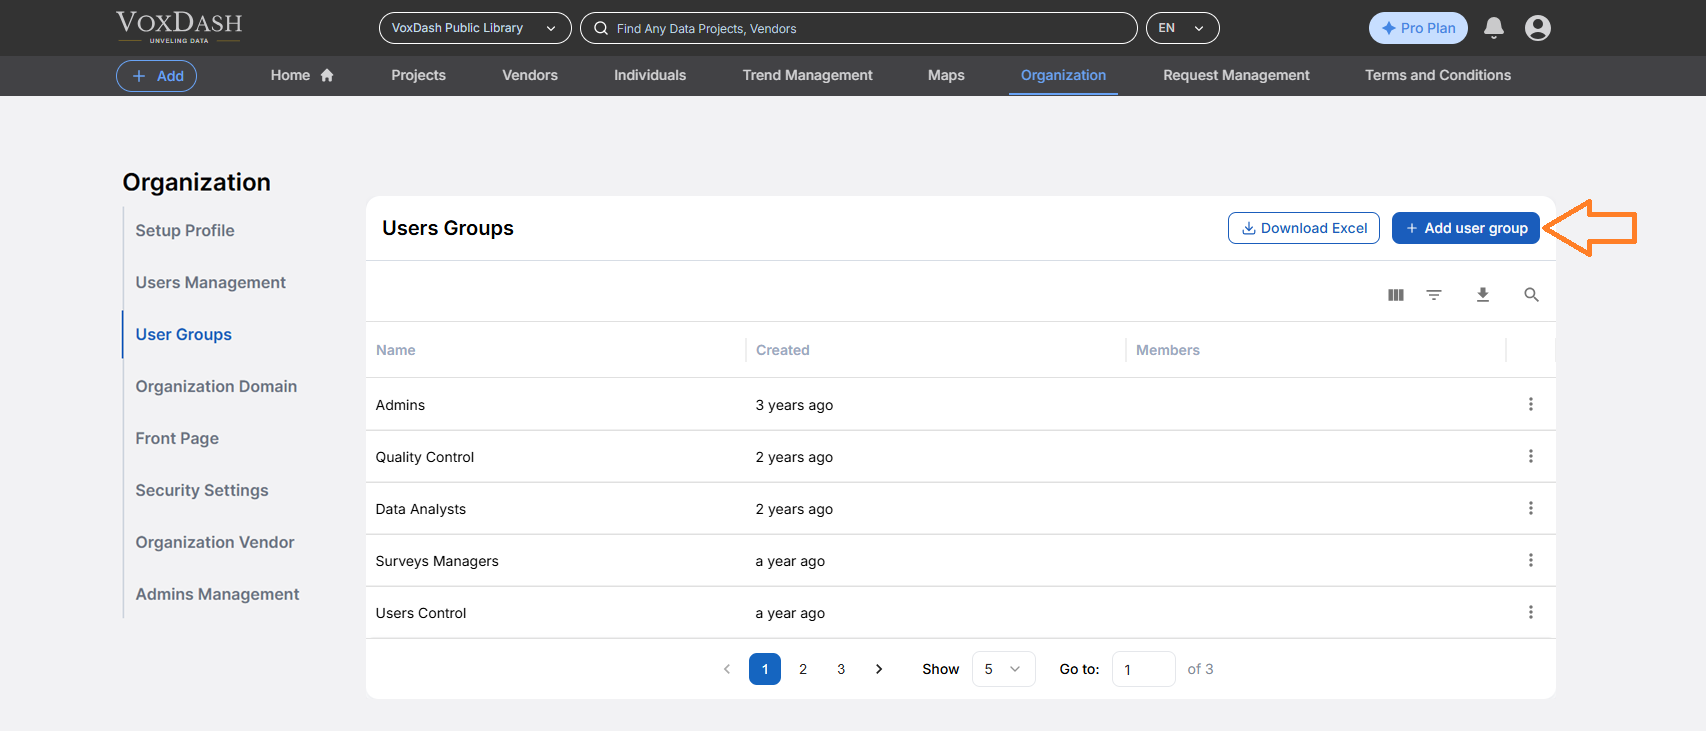
2. Click on the **Add User Group** button.
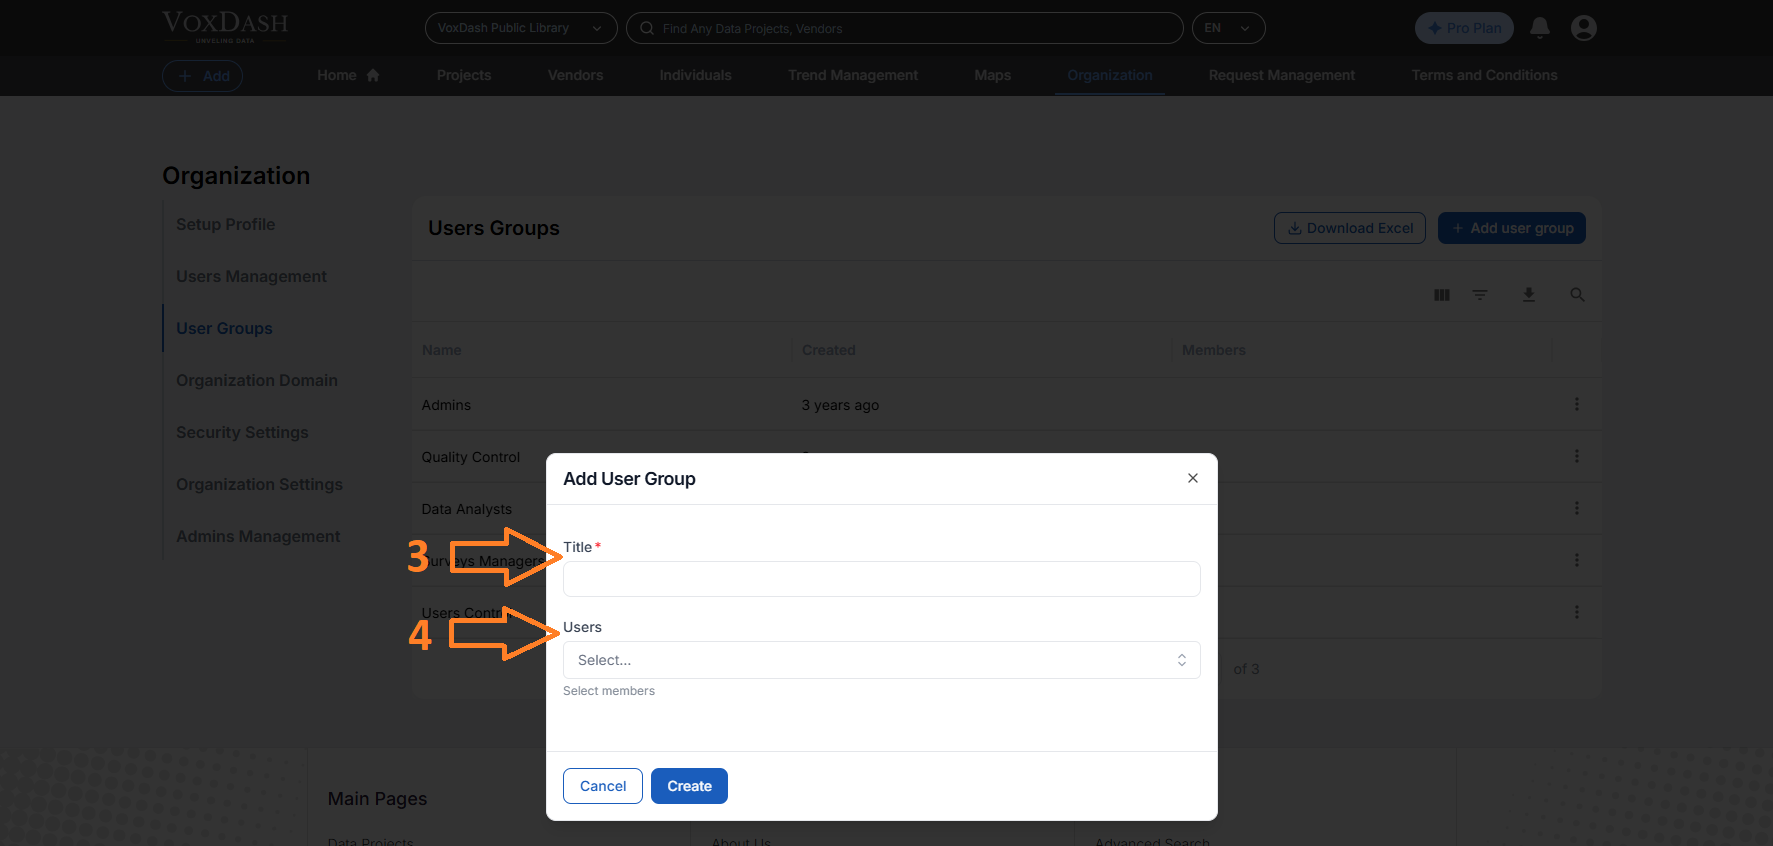
 3. Enter a **name** for the group. For example:
**Editors:** Users who can edit content or data
**Admins:** Users with full access and management permissions
**Viewers:** Users with read-only access
4. **Add users** to the group by selecting them from the user list.
3. Enter a **name** for the group. For example:
**Editors:** Users who can edit content or data
**Admins:** Users with full access and management permissions
**Viewers:** Users with read-only access
4. **Add users** to the group by selecting them from the user list.
 ## **Steps to Enable or Edit User Groups Access:**
Once created, you can assign the User Group to a project or set access levels for that group, making it easier to manage permissions across your organization. Follow these steps to give access to your user groups:
### **1. Locate the Entity Access Column**
* Navigate to the [Data Project](https://dataprovider.voxdash.com/projects) page in your application.
* Look for the **Entity Access** column, which is the eighth column from the left.
### **2. Open the Editing Menu**
* Click on the arrow icon next to the relevant entry in the **Entity Access** column.
* A menu will appear, allowing you to adjust access settings.
### **3. Add New Access Permissions**
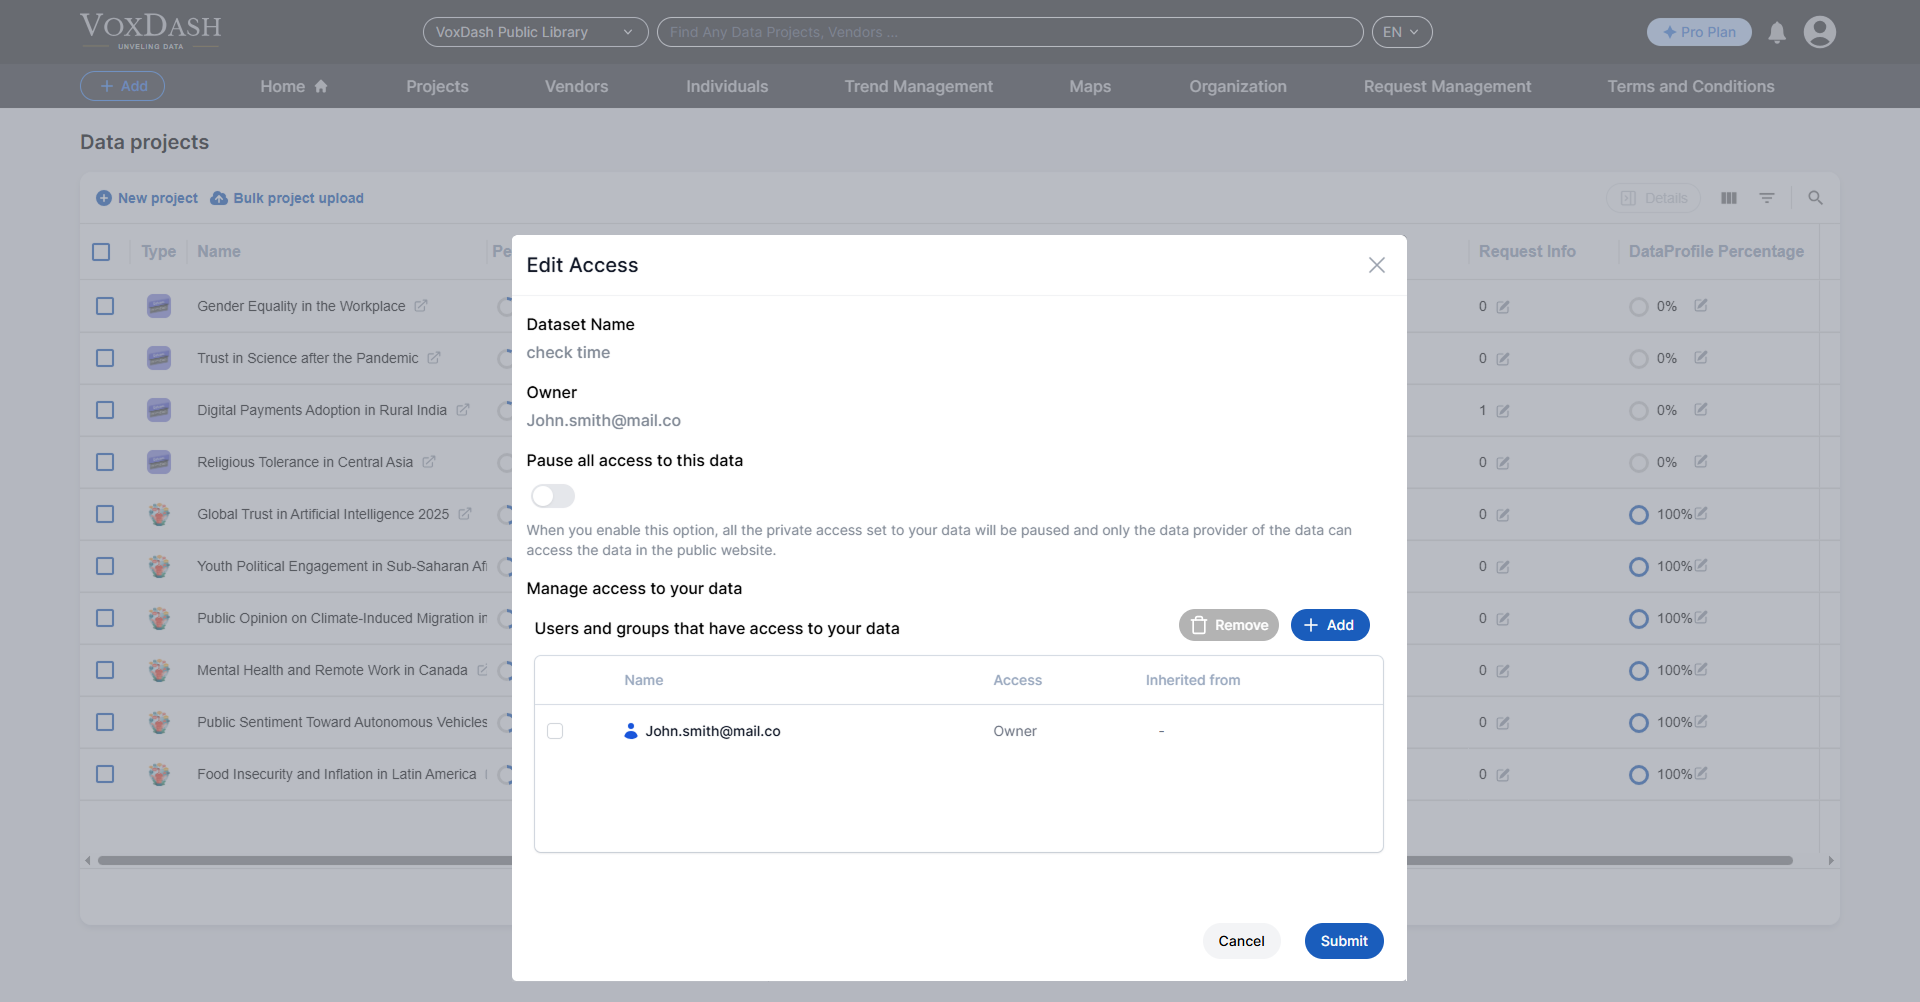
* In the editing menu, locate and click the blue **Add** button in the bottom-left corner of the menu.
## **Steps to Enable or Edit User Groups Access:**
Once created, you can assign the User Group to a project or set access levels for that group, making it easier to manage permissions across your organization. Follow these steps to give access to your user groups:
### **1. Locate the Entity Access Column**
* Navigate to the [Data Project](https://dataprovider.voxdash.com/projects) page in your application.
* Look for the **Entity Access** column, which is the eighth column from the left.
### **2. Open the Editing Menu**
* Click on the arrow icon next to the relevant entry in the **Entity Access** column.
* A menu will appear, allowing you to adjust access settings.
### **3. Add New Access Permissions**
* In the editing menu, locate and click the blue **Add** button in the bottom-left corner of the menu.
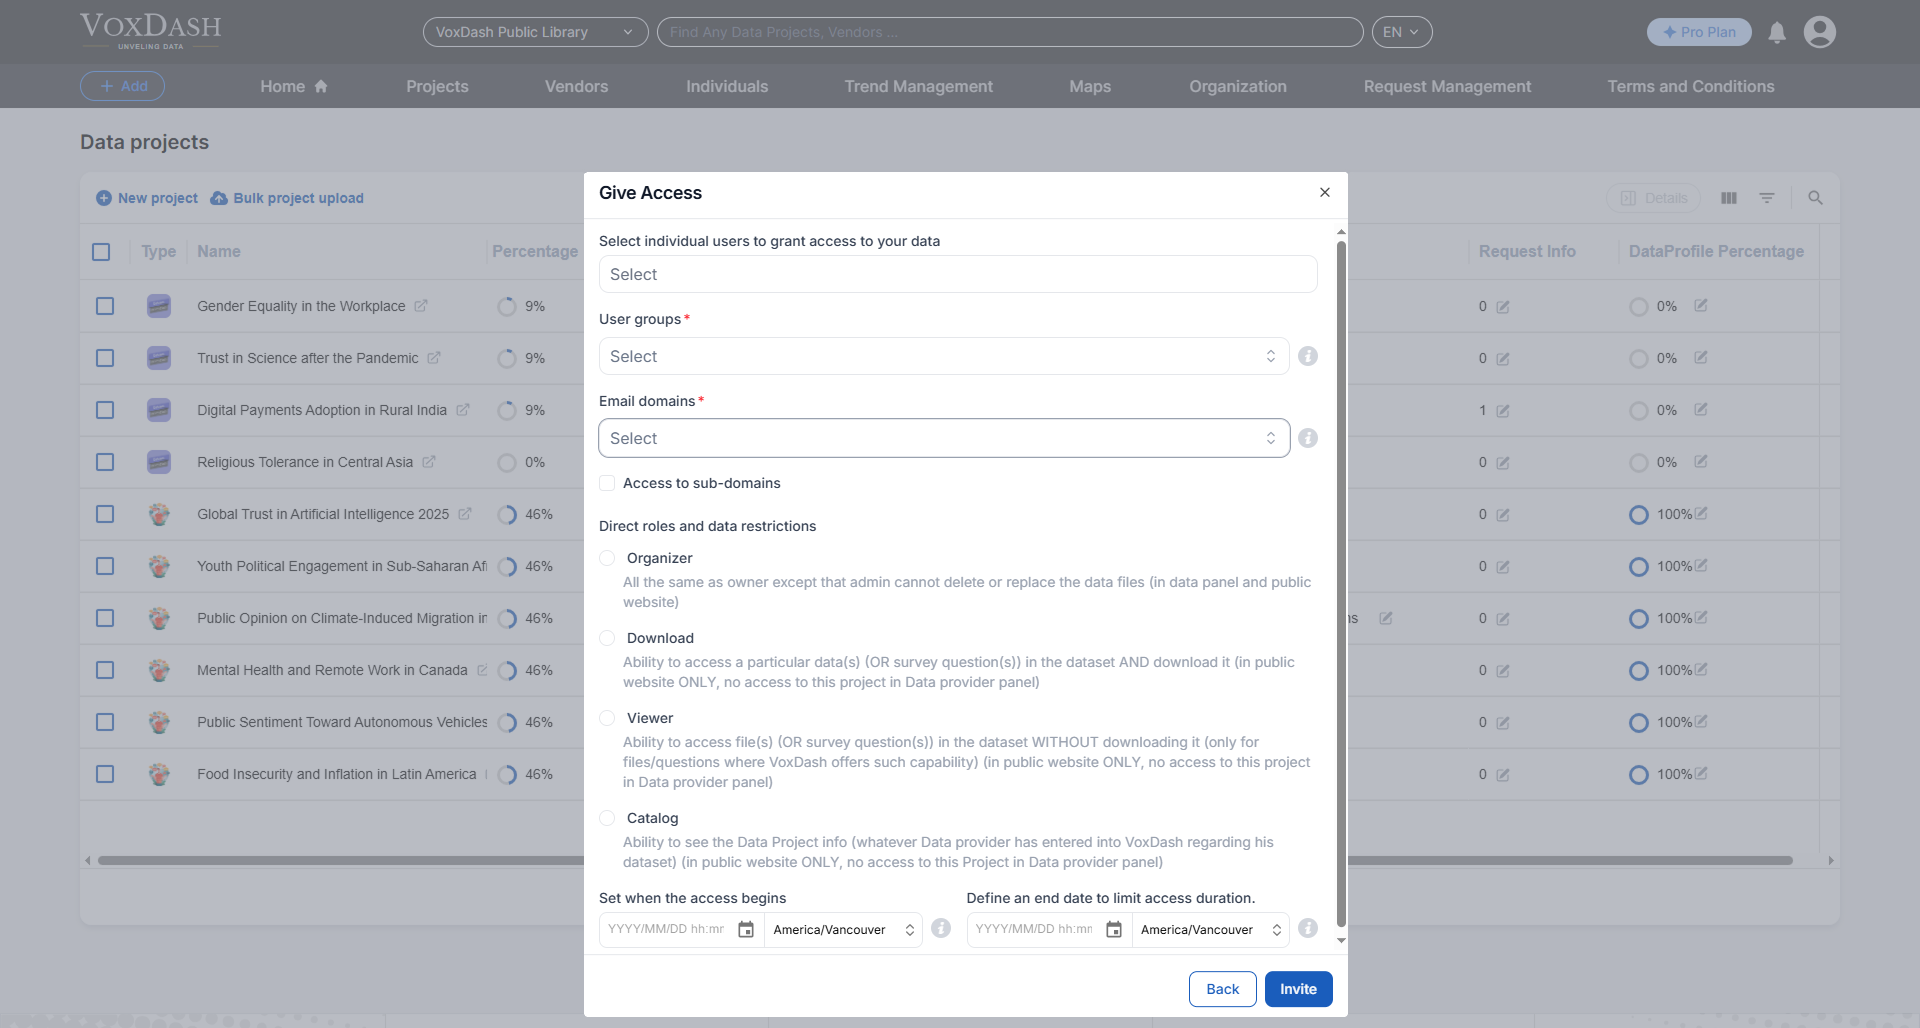
 ### **4. Configure Access Details**
* **Select User Groups:** Choose the groups you want to grant access to.
* **Assign Roles:** Assign a role to the selected group (e.g., Viewer, Editor, Admin) based on the required access level.
**Note:** If a user group has an **organizer** or **owner** role, they can access the **data provider panel** for the specific data; otherwise, users have access only via the **public website**.
* **Set Data Restrictions:** Optionally, limit user access to specific datasets or functions within the project.
* **Define Expiration Date:** If necessary, set an expiration date for access permissions to ensure temporary access.
### **4. Configure Access Details**
* **Select User Groups:** Choose the groups you want to grant access to.
* **Assign Roles:** Assign a role to the selected group (e.g., Viewer, Editor, Admin) based on the required access level.
**Note:** If a user group has an **organizer** or **owner** role, they can access the **data provider panel** for the specific data; otherwise, users have access only via the **public website**.
* **Set Data Restrictions:** Optionally, limit user access to specific datasets or functions within the project.
* **Define Expiration Date:** If necessary, set an expiration date for access permissions to ensure temporary access.
 ### **5. Save Changes**
Click the **Invite** button to send a notification to the selected users.
Finally, click the **Submit** button to save your changes and update the access list.
### Tip:
You can edit a group at any time to add or remove users, or to change its name and permissions.
### **5. Save Changes**
Click the **Invite** button to send a notification to the selected users.
Finally, click the **Submit** button to save your changes and update the access list.
### Tip:
You can edit a group at any time to add or remove users, or to change its name and permissions.