> ## Documentation Index
> Fetch the complete documentation index at: https://help.voxdash.com/llms.txt
> Use this file to discover all available pages before exploring further.
# User Management
> The User Management page in VoxDash enables organizations to manage access and permissions for their team members. From this page, administrators can add…
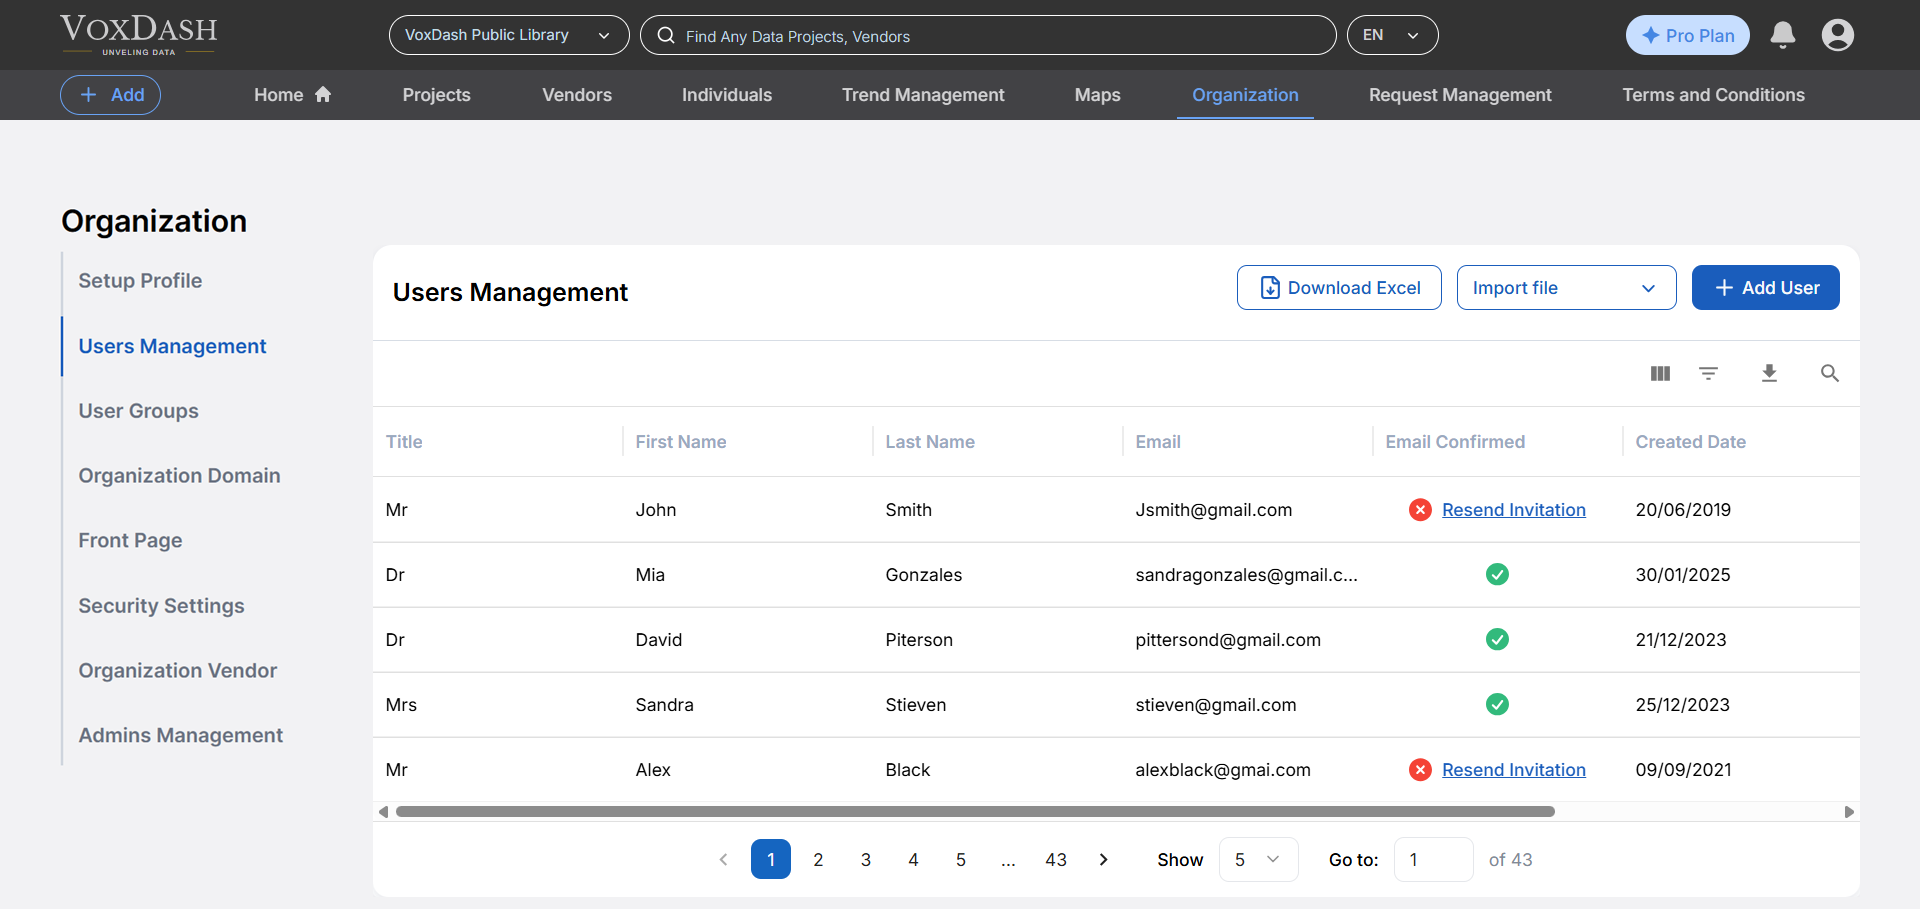
The **User Management page** in VoxDash enables organizations to manage access and permissions for their team members. From this page, administrators can add, edit, or remove users to maintain secure and efficient collaboration across projects.
 ## Adding a New User
**Note:** Before adding a new user, first choose the organization from the header, then follow these steps to add a new team member to your organization:
1\. Navigate to the [Organization](https://dataprovider.voxdash.com/org/userManagement) page.
2\. Click the Add User button located at the top-right corner of the page.
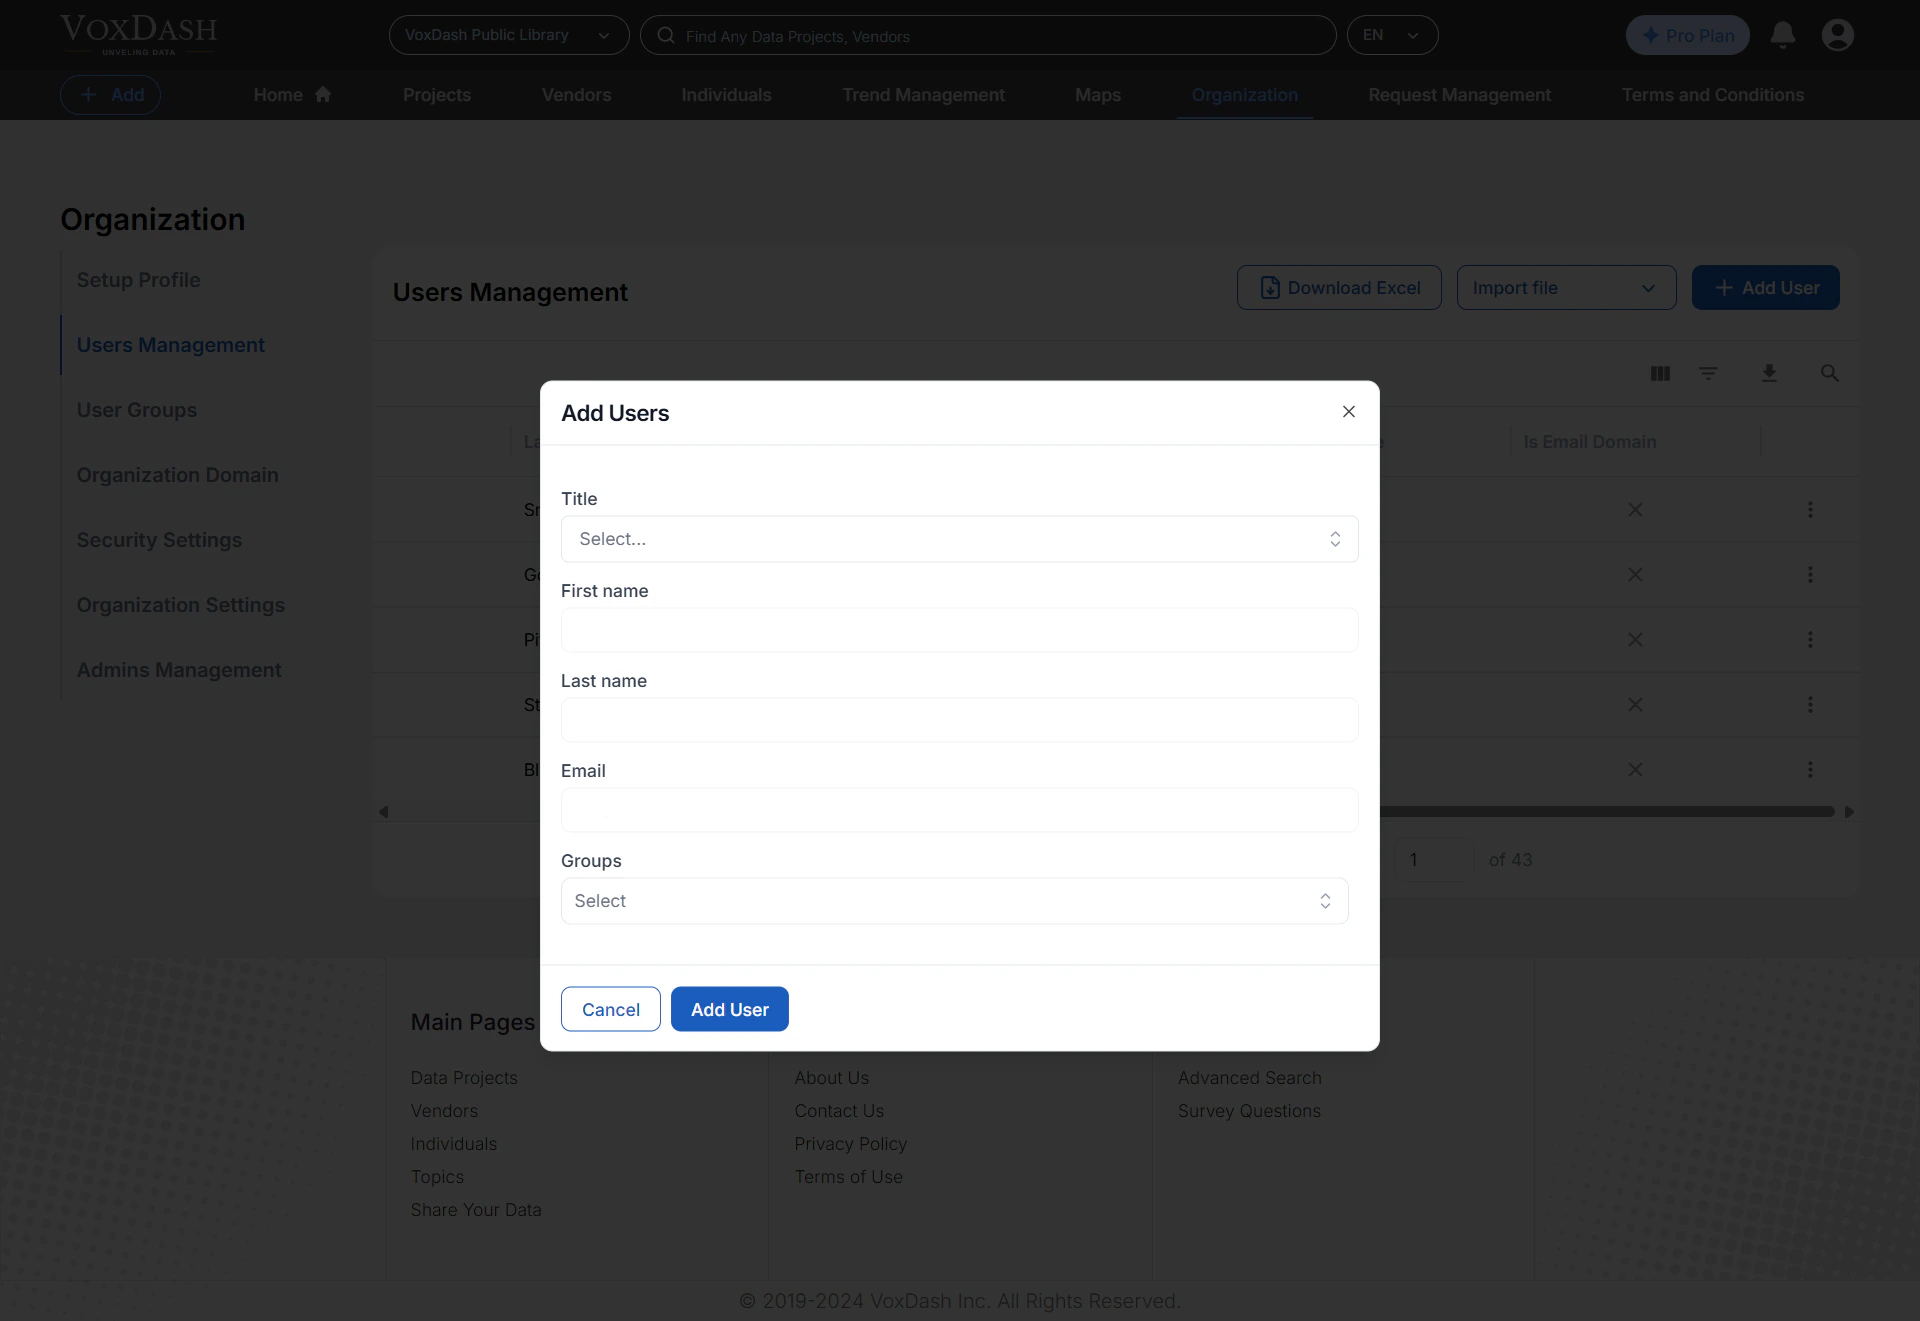
3\. In the pop-up form, enter the required details for the new user, such as their name, email address, and assign them to a user group if needed.
4\. Click Add User to confirm and send the invitation.
## Adding a New User
**Note:** Before adding a new user, first choose the organization from the header, then follow these steps to add a new team member to your organization:
1\. Navigate to the [Organization](https://dataprovider.voxdash.com/org/userManagement) page.
2\. Click the Add User button located at the top-right corner of the page.
3\. In the pop-up form, enter the required details for the new user, such as their name, email address, and assign them to a user group if needed.
4\. Click Add User to confirm and send the invitation.
 Once submitted, an invitation email will automatically be sent to the new user, inviting them to join your organization in VoxDash.
When the invited user accepts the invitation and logs in, they will see your organization’s name displayed in the header on the public website, confirming that they have successfully joined your team.
**Note:** You can invite many users to your organization in one step by uploading a spreadsheet of names and email addresses. Read [Bulk-Invite Users](/Import-Export/Bulk-Invite-Users) to learn more.
## Managing Existing Users
After users have been added, you can manage and update their details directly from the [User Management table](https://dataprovider.voxdash.com/org/userManagement).
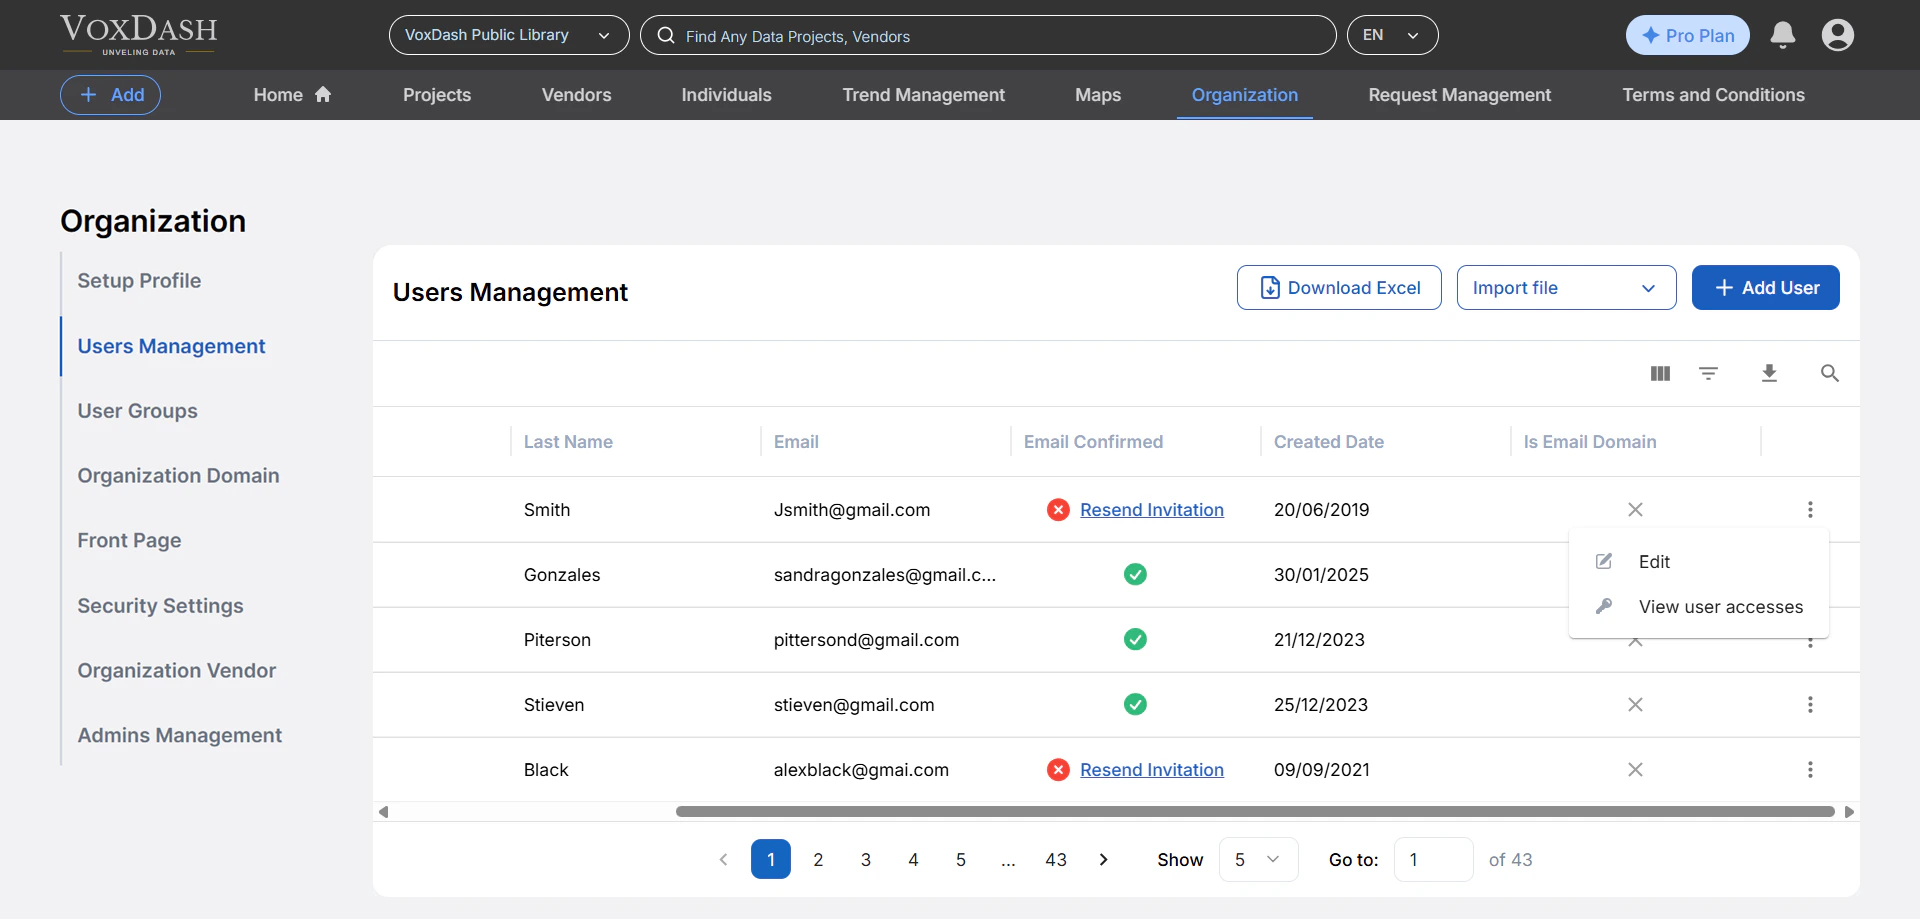
**Edit a User:** Scroll to the right of the user list and click the **More (⋮)**, then Select Edit to update their information.
**Delete a User:** From the same More menu, select Delete to remove the user from your organization.
Once submitted, an invitation email will automatically be sent to the new user, inviting them to join your organization in VoxDash.
When the invited user accepts the invitation and logs in, they will see your organization’s name displayed in the header on the public website, confirming that they have successfully joined your team.
**Note:** You can invite many users to your organization in one step by uploading a spreadsheet of names and email addresses. Read [Bulk-Invite Users](/Import-Export/Bulk-Invite-Users) to learn more.
## Managing Existing Users
After users have been added, you can manage and update their details directly from the [User Management table](https://dataprovider.voxdash.com/org/userManagement).
**Edit a User:** Scroll to the right of the user list and click the **More (⋮)**, then Select Edit to update their information.
**Delete a User:** From the same More menu, select Delete to remove the user from your organization.
 **Note:** Deleting a user will immediately revoke their access to all projects associated with your organization.
## Email Invitation Tips
If the invited user doesn’t receive their invitation email promptly, ask them to check their **Spam** folders.
You can also resend the invitation by returning to the [User Management table](https://dataprovider.voxdash.com/org/userManagement) and selecting Resend Invite from the menu.
Managing users through this page ensures that the right people have access to the right data, helping maintain both efficiency and data security.
**Tip:** Make sure invited users check their spam or junk folders if they don’t receive the email promptly.
## **Steps to Enable or Edit User Access:**
### **1. Locate the Entity Access Column**
* Navigate to the [Data Project](https://dataprovider.voxdash.com/projects) page in your application.
* Look for the **Entity Access** column, which is the eighth column from the left.
### **2. Open the Editing Menu**
* Click on the arrow icon next to the relevant entry in the **Entity Access** column.
* A menu will appear, allowing you to adjust access settings.
### **3. Add New Access Permissions**
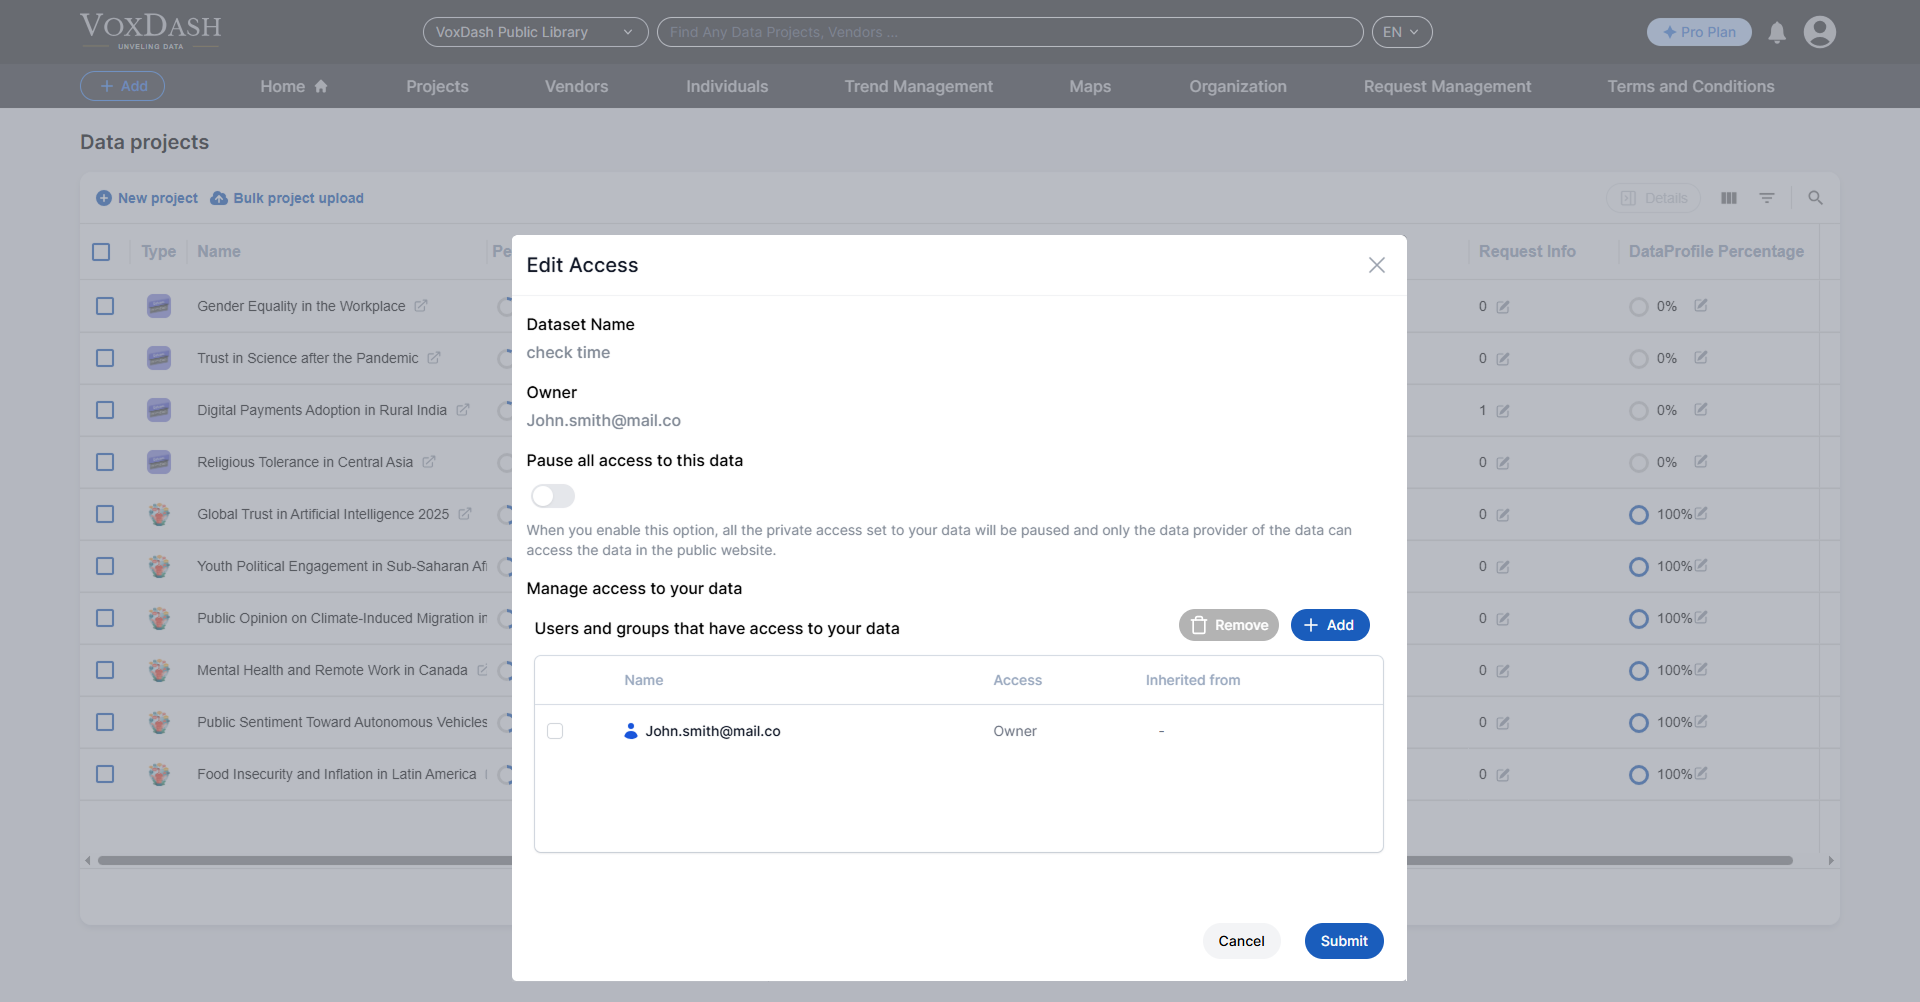
* In the editing menu, locate and click the **Add** blue button in the bottom-left corner of the menu.
**Note:** Deleting a user will immediately revoke their access to all projects associated with your organization.
## Email Invitation Tips
If the invited user doesn’t receive their invitation email promptly, ask them to check their **Spam** folders.
You can also resend the invitation by returning to the [User Management table](https://dataprovider.voxdash.com/org/userManagement) and selecting Resend Invite from the menu.
Managing users through this page ensures that the right people have access to the right data, helping maintain both efficiency and data security.
**Tip:** Make sure invited users check their spam or junk folders if they don’t receive the email promptly.
## **Steps to Enable or Edit User Access:**
### **1. Locate the Entity Access Column**
* Navigate to the [Data Project](https://dataprovider.voxdash.com/projects) page in your application.
* Look for the **Entity Access** column, which is the eighth column from the left.
### **2. Open the Editing Menu**
* Click on the arrow icon next to the relevant entry in the **Entity Access** column.
* A menu will appear, allowing you to adjust access settings.
### **3. Add New Access Permissions**
* In the editing menu, locate and click the **Add** blue button in the bottom-left corner of the menu.
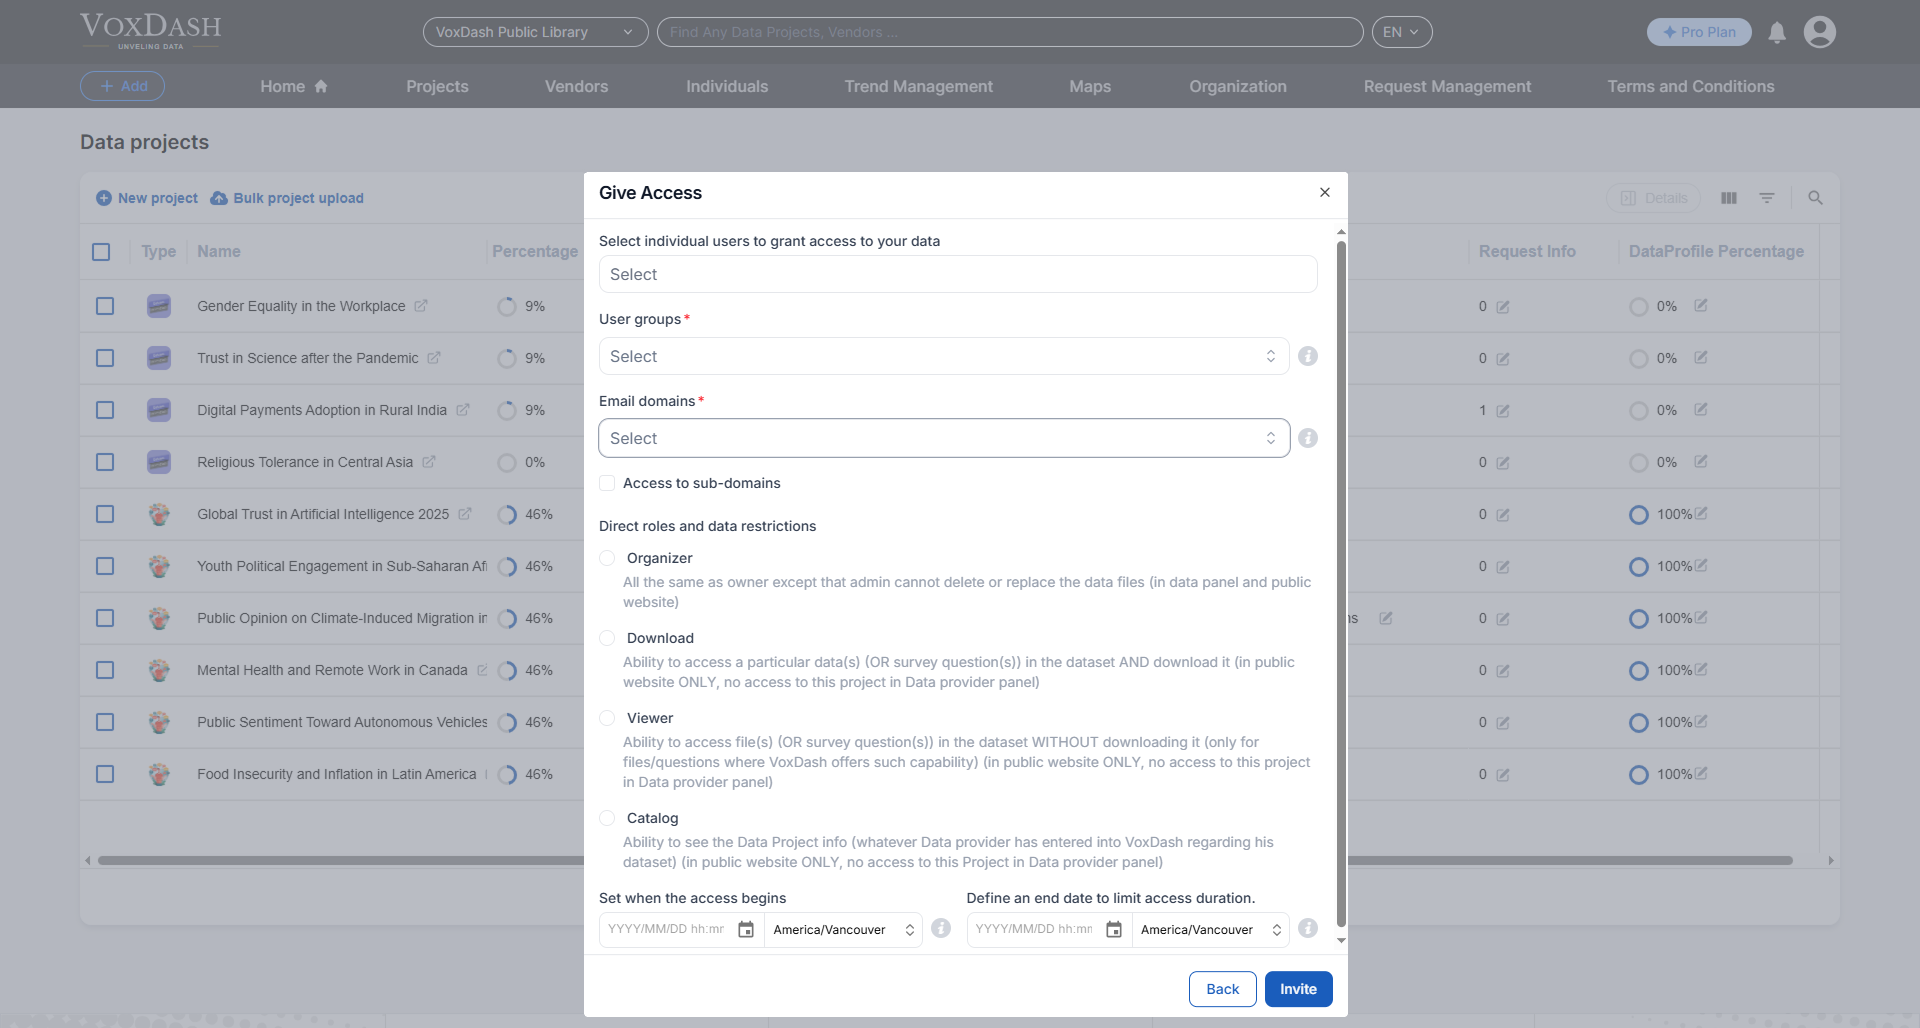
 ### **4. Configure Access Details**
* **Select Users:** Choose the users or groups you want to grant access to.
* **Assign Roles:** Assign a role to the selected users (e.g., Viewer, Editor, Admin) based on their level of required access.\
**Note:** If a user has an **organizer** or **owner** role, they can access the **data provider panel** for that data; otherwise, users have access only via the **public website**.
* **Set Data Restrictions:** Optionally, limit user access to specific datasets or functions within the project.
* **Define Expiration Date:** If necessary, set an expiration date for access permissions to ensure temporary access.
### **4. Configure Access Details**
* **Select Users:** Choose the users or groups you want to grant access to.
* **Assign Roles:** Assign a role to the selected users (e.g., Viewer, Editor, Admin) based on their level of required access.\
**Note:** If a user has an **organizer** or **owner** role, they can access the **data provider panel** for that data; otherwise, users have access only via the **public website**.
* **Set Data Restrictions:** Optionally, limit user access to specific datasets or functions within the project.
* **Define Expiration Date:** If necessary, set an expiration date for access permissions to ensure temporary access.
 ### **5. Save Changes**
Click the **Invite** button to send an invitation or notification to the selected user(s).
Finally, click the **Submit** button to save your changes and update the access list.
**Note:** If you haven’t added the user through User Management but gave access using their email, the user will be automatically added to your users list, and you can edit their information in the [User Management table](https://dataprovider.voxdash.com/org/userManagement).
You can learn more about giving entity access to the user via this [Link](/Access-Controls/Entity-Level-Access-Control).
By following these steps, you can easily add, manage, and organize your team members in VoxDash.
Proper user management ensures smoother collaboration, secure data sharing, and a better overall project workflow.
### **5. Save Changes**
Click the **Invite** button to send an invitation or notification to the selected user(s).
Finally, click the **Submit** button to save your changes and update the access list.
**Note:** If you haven’t added the user through User Management but gave access using their email, the user will be automatically added to your users list, and you can edit their information in the [User Management table](https://dataprovider.voxdash.com/org/userManagement).
You can learn more about giving entity access to the user via this [Link](/Access-Controls/Entity-Level-Access-Control).
By following these steps, you can easily add, manage, and organize your team members in VoxDash.
Proper user management ensures smoother collaboration, secure data sharing, and a better overall project workflow.