Steps to Enable or Edit Entity Access:
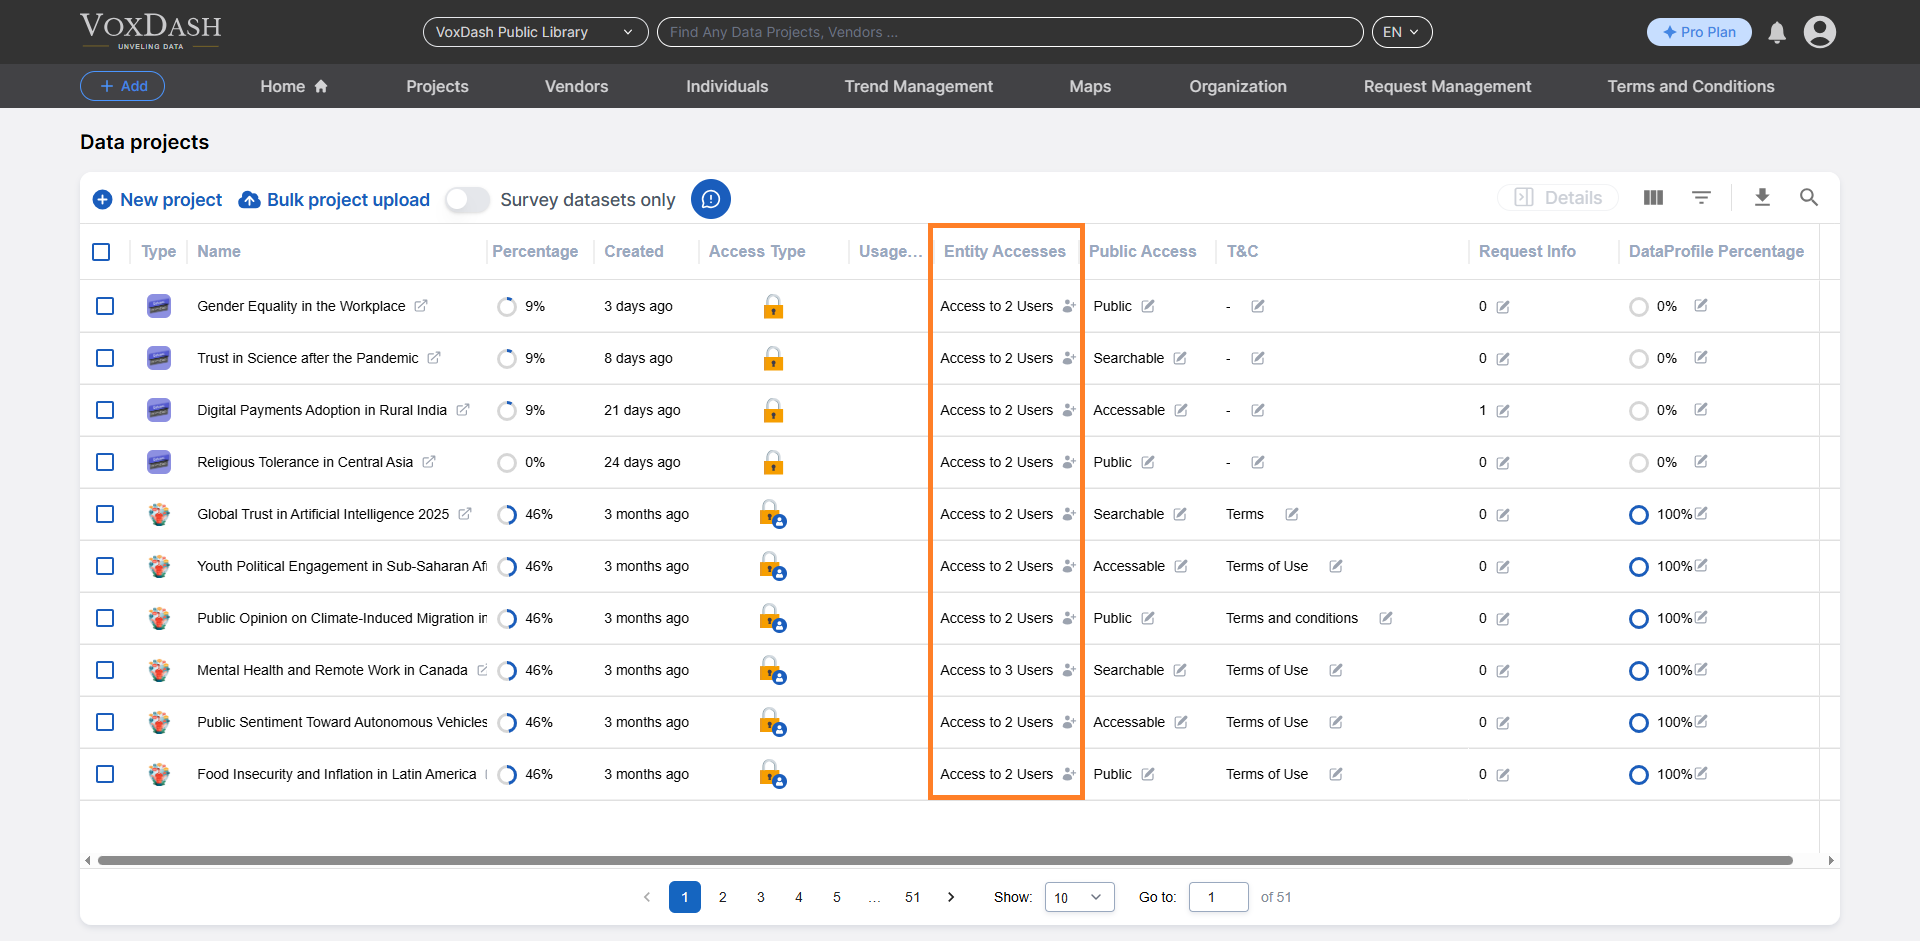
1. Locate the Entity Access Column
- Navigate to the Data Project page in your application.
- Look for the Entity Access column, which is the eighth column from the left.
2. Open the Editing Menu
- Click on the arrow icon next to the relevant entry in the Entity Access column.
- A menu will appear, allowing you to adjust access settings. Here you can add new users and give them access, delete previouse users or permanently pause all the access.
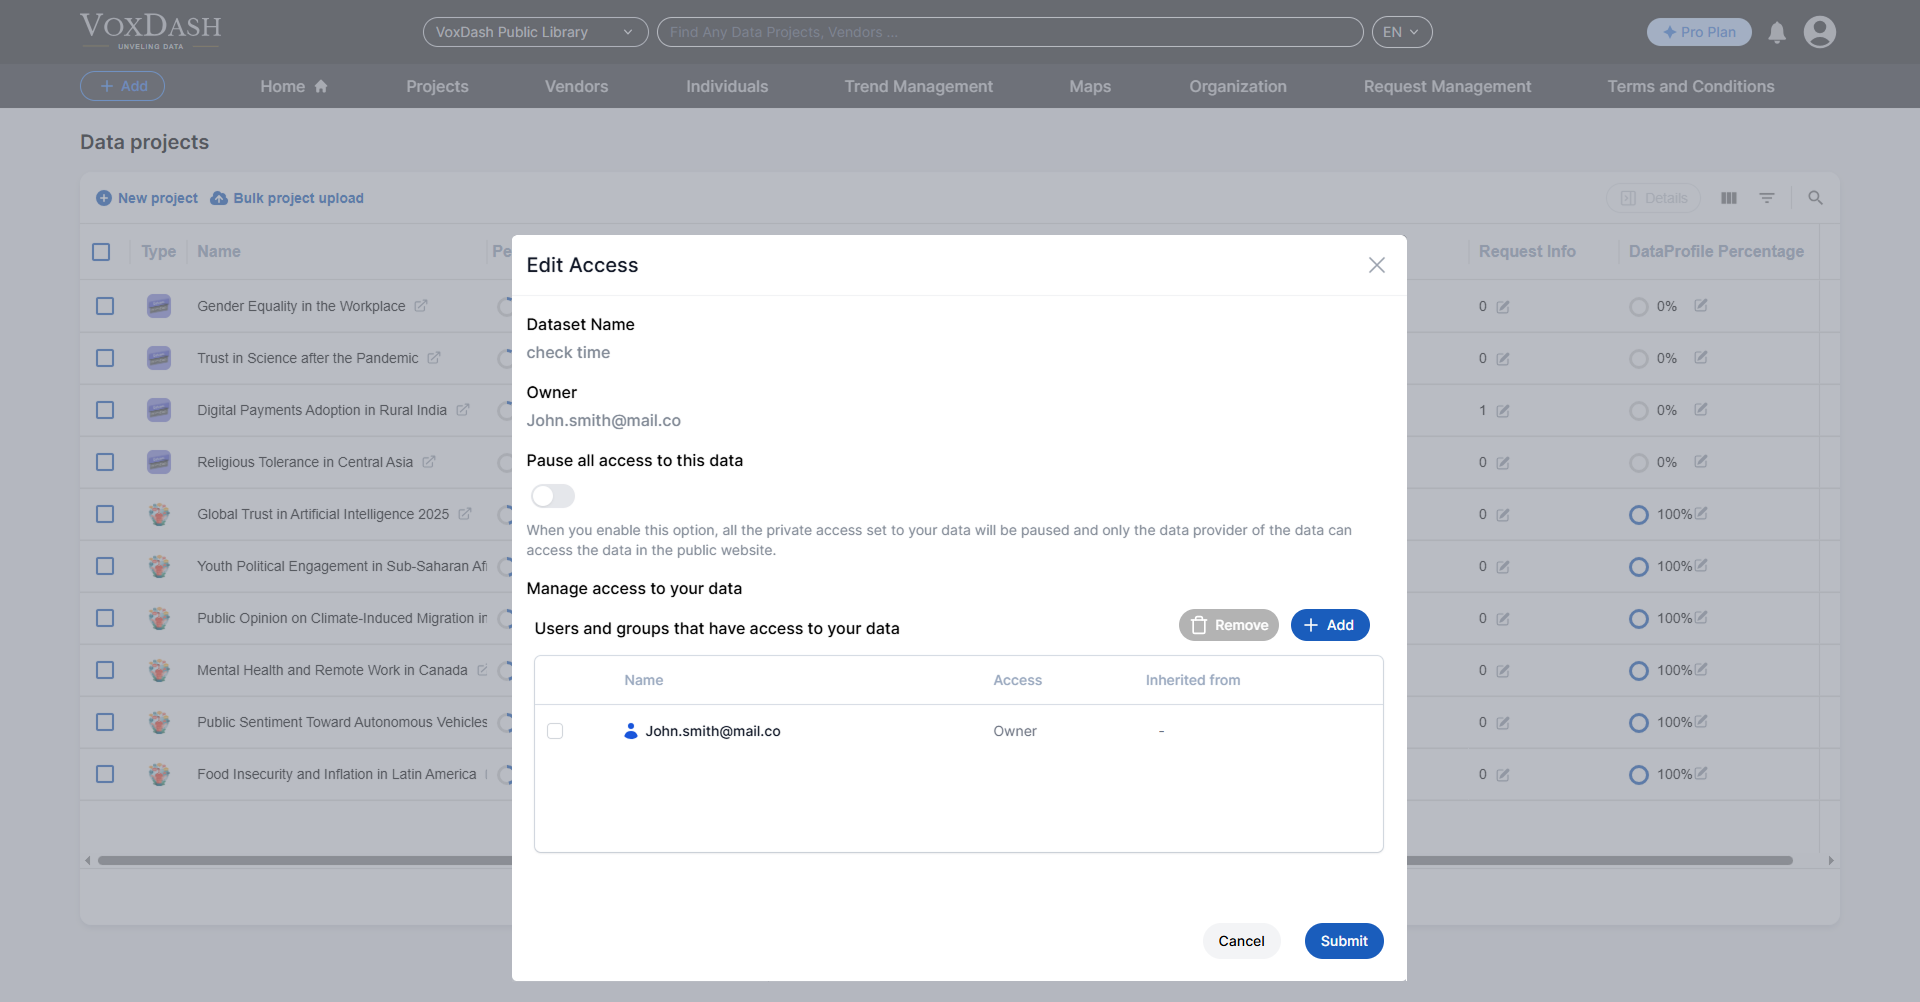
3. Add New Access Permissions
- In the editing menu, locate and click the blue Add button in the bottom-left corner of the menu.
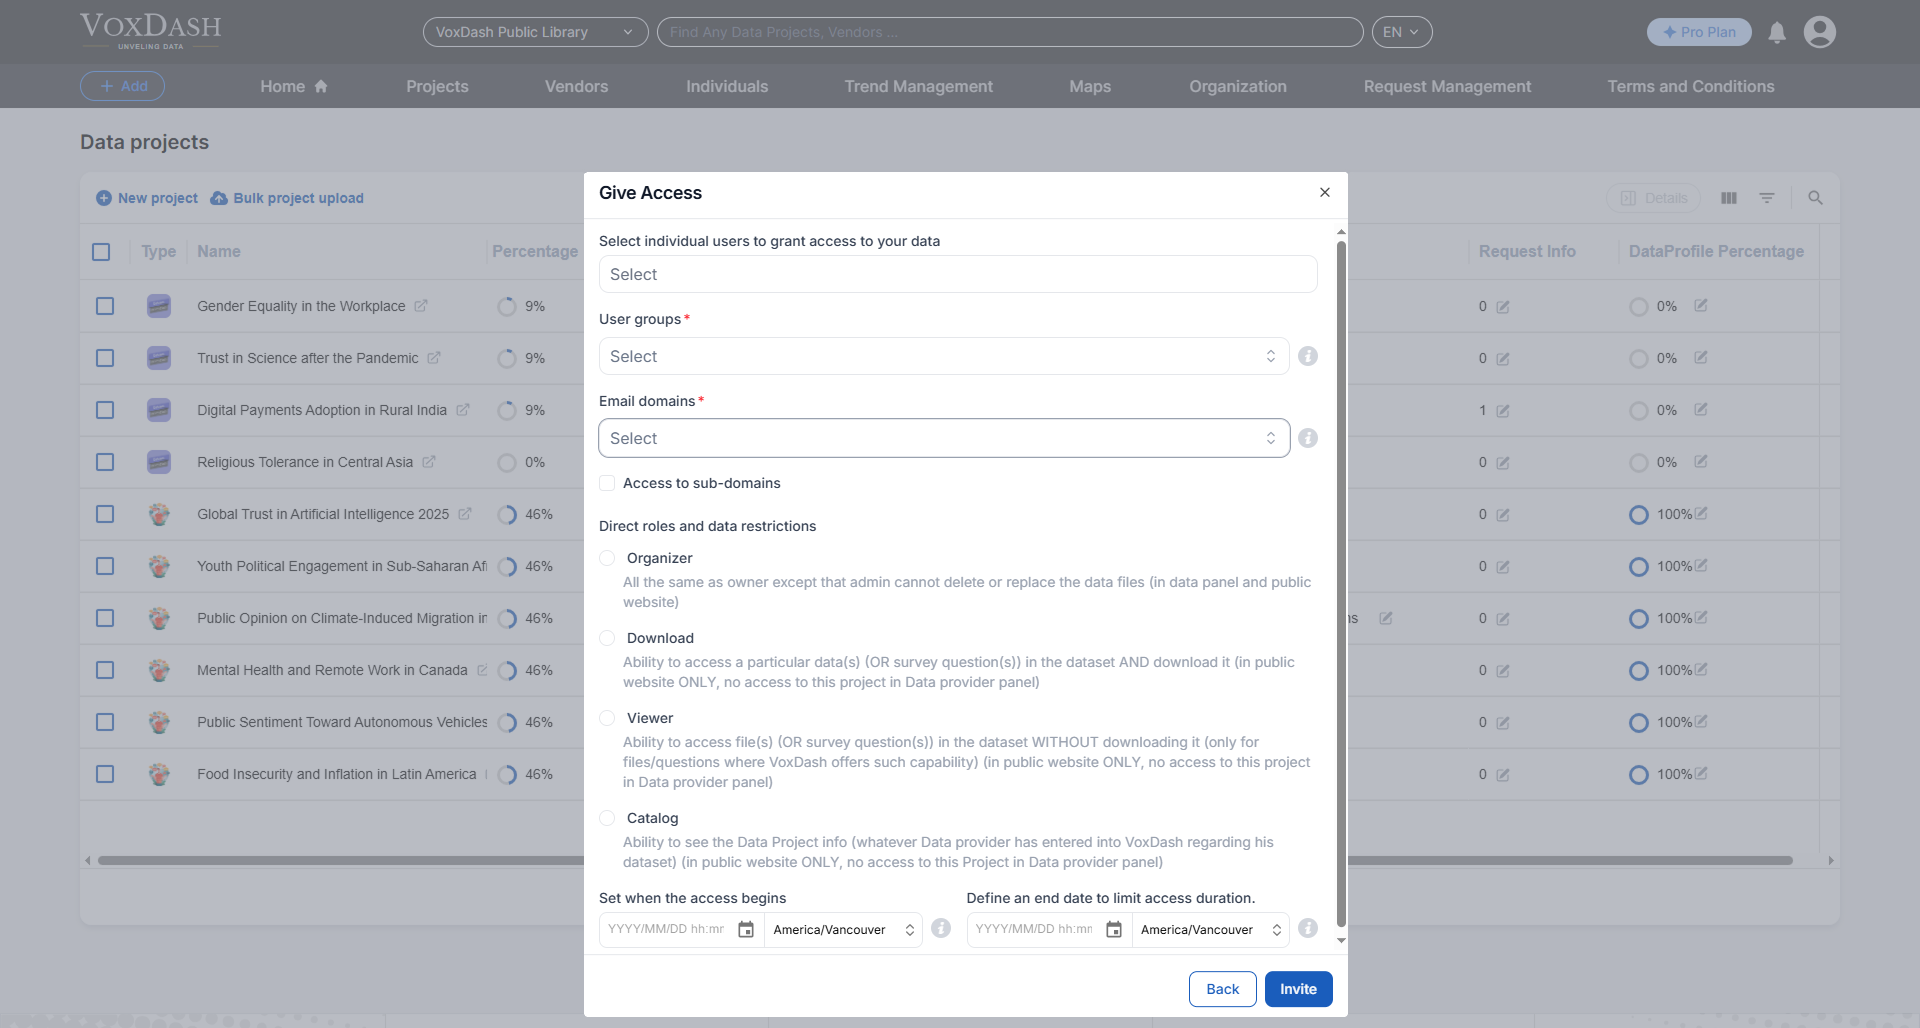
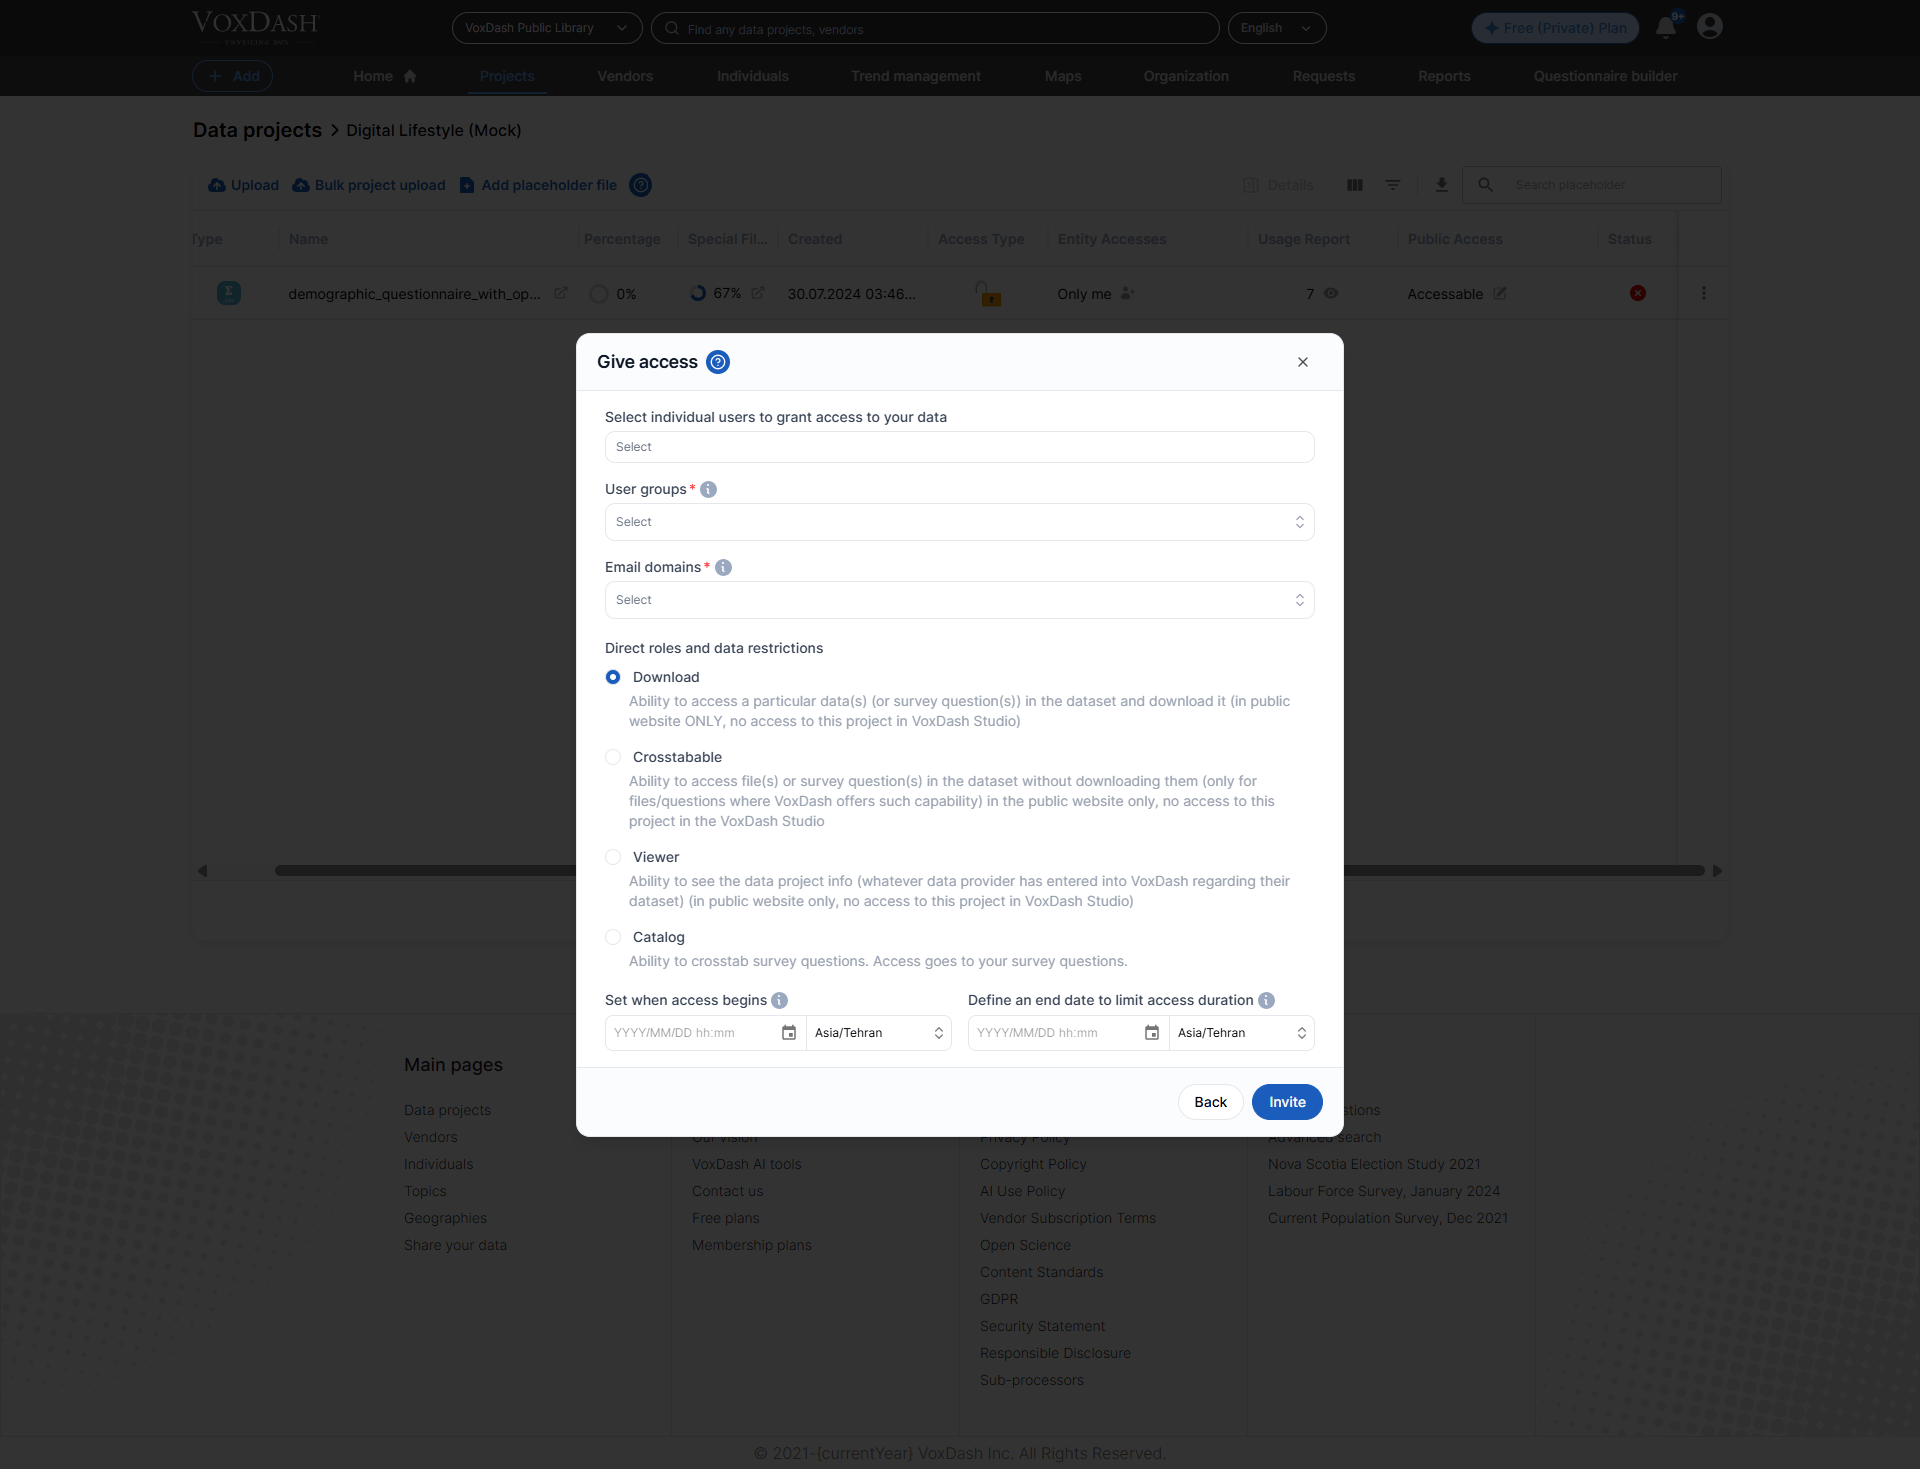
4. Configure Access Details
- Select Users: Select individual users or groups to grant access to your data.
- Select Email Domains: Grant access based on verified email domains. Authorized domains and subdomains apply access automatically to all matching users. You control whether access applies to the parent domain, specific subdomains, or both.
- Assign Roles: Assign a role to the selected users (e.g., Viewer, Editor, Admin) based on their level of required access.
- Set Data Restrictions: Optionally, limit user access to specific datasets or functions within the project.
- Define Expiration Date: If necessary, set an expiration date for access permissions to ensure temporary access.
4.1. Email Domains Explanation
When a user verifies a business or institutional email address in their profile (for example, name@umd.edu), VoxDash extracts and validates the email domain (umd.edu). Once verified:- The domain is marked as trusted and eligible for access control.
- The domain becomes selectable and enforceable in the Email domains field during access configuration.
- Users granted access:
-
Users not granted access:
- alice@cs.umd.edu (unless subdomains are enabled)
- bob@gmail.com
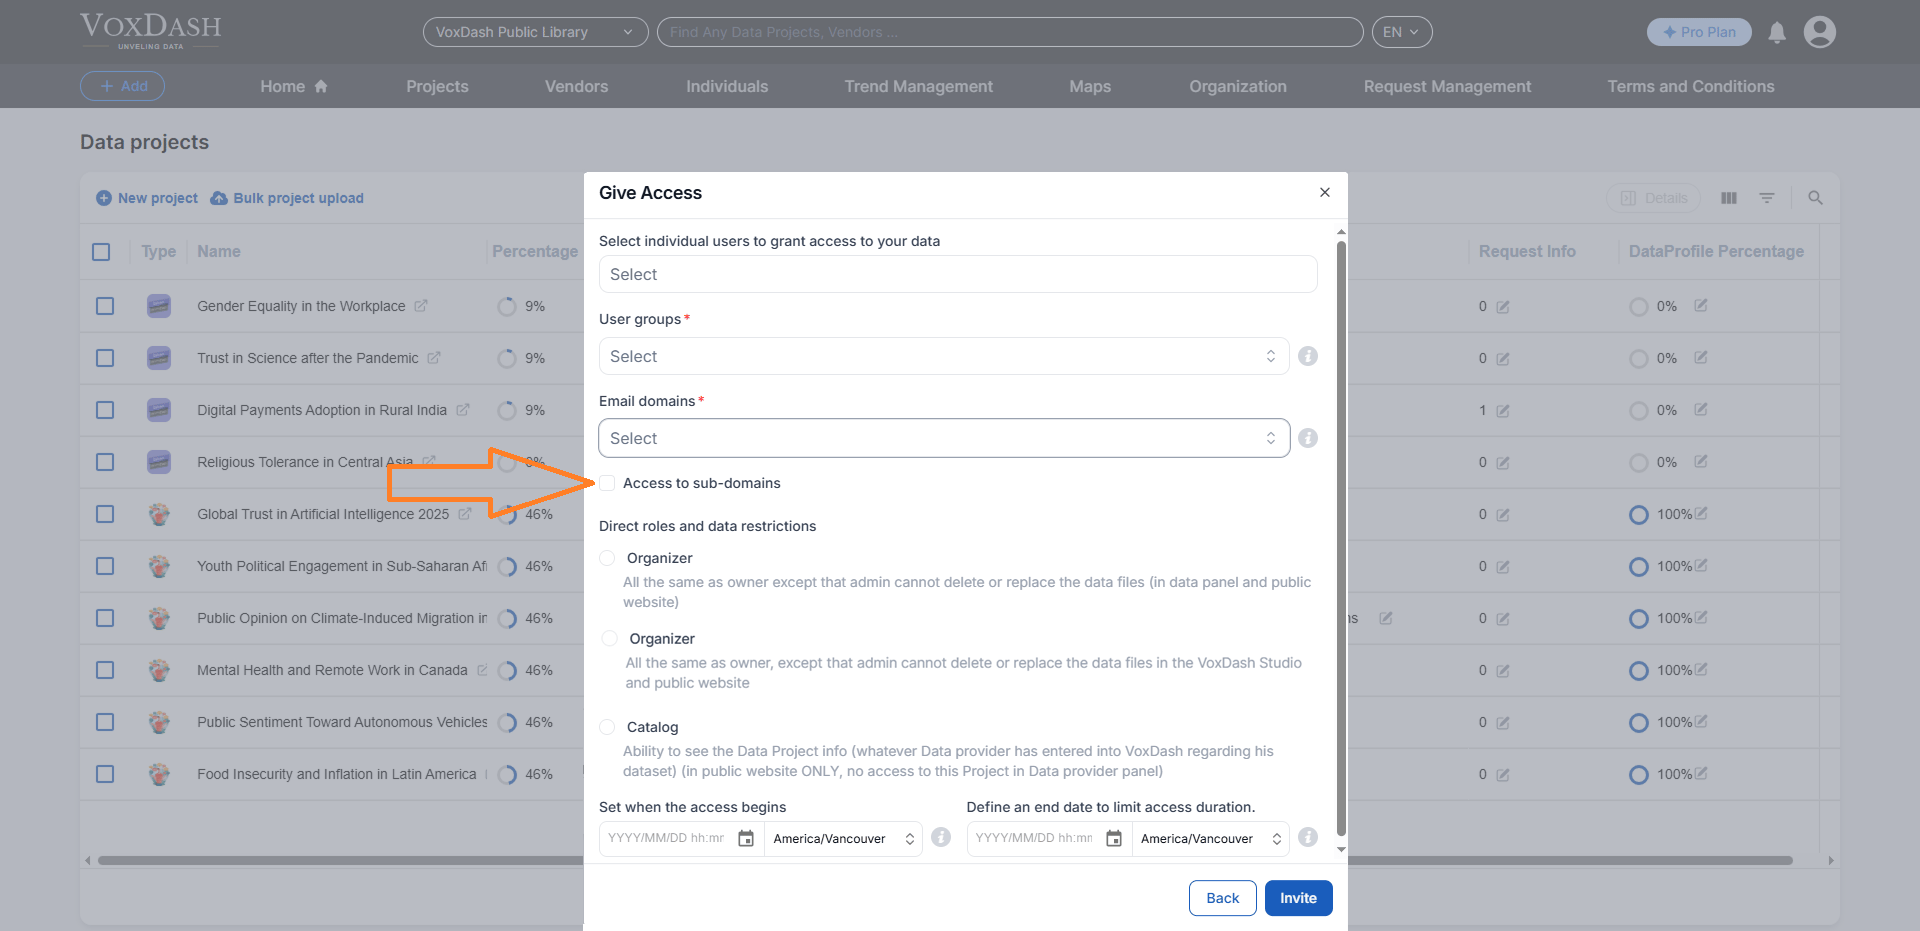
4.2. Optional Inclusion of Subdomains
The Access to sub-domains option extends domain matching beyond the root domain. When enabled:- VoxDash treats the specified domain as a parent domain.
- All verified subdomains are automatically included.
-
Example:
- Domain entered: umd.edu
- Subdomain access enabled
- Users granted access:
5. Save Changes
Click the Invite button to send an invitation or notification to the selected user(s).Finally, click the Submit button to save your changes and update the access list.
Ownership Access Levels
Ownership access lets you control who can interact with your data. It can be assigned to a user, user group, or domain user group, with an optional start and end date. Here are the levels explained in plain terms:For Data Projects:
Owner Level
What they can do: Full control over the data, including deleting and replacing files. Special role: The person who first uploads the data is called the “Data Provider.” They are the only ones who can:- Permanently delete (hard delete) the data.
- Add other owners.
Organizer Level
What they can do: Almost everything the owner can, including accessing data through the Data Provider Panel and Public Panel. What they cannot do:- Delete, replace, or cut files.
- Assign another organizer for the data.
Catalog Level
What they can do: View basic information about the Data Project added to VoxDash by the data provider. What they cannot do:- Access the data itself.
- Use the data-provider panel.
For Data Projects Files:
Download Level
What they can do:- Access specific data or survey questions.
- Download it from Public Panel.
Crosstabable Level
This access allows the file to be used in crosstab analysis. Enable this when the dataset includes variables suitable for grouping or comparison across categories. Grant this access if you want users to run crosstab breakdowns and view subgroup comparisons based on the file’s variables.Viewer Level
What they can do: View specific files or survey questions (if VoxDash allows it). What they cannot do:- Download the files.
- Access the data-provider panel.
Catalog Level
What they can do: View basic information about the Data Project file added to VoxDash by the data provider. What they cannot do:- Access the data itself.
- Use the data-provider panel.
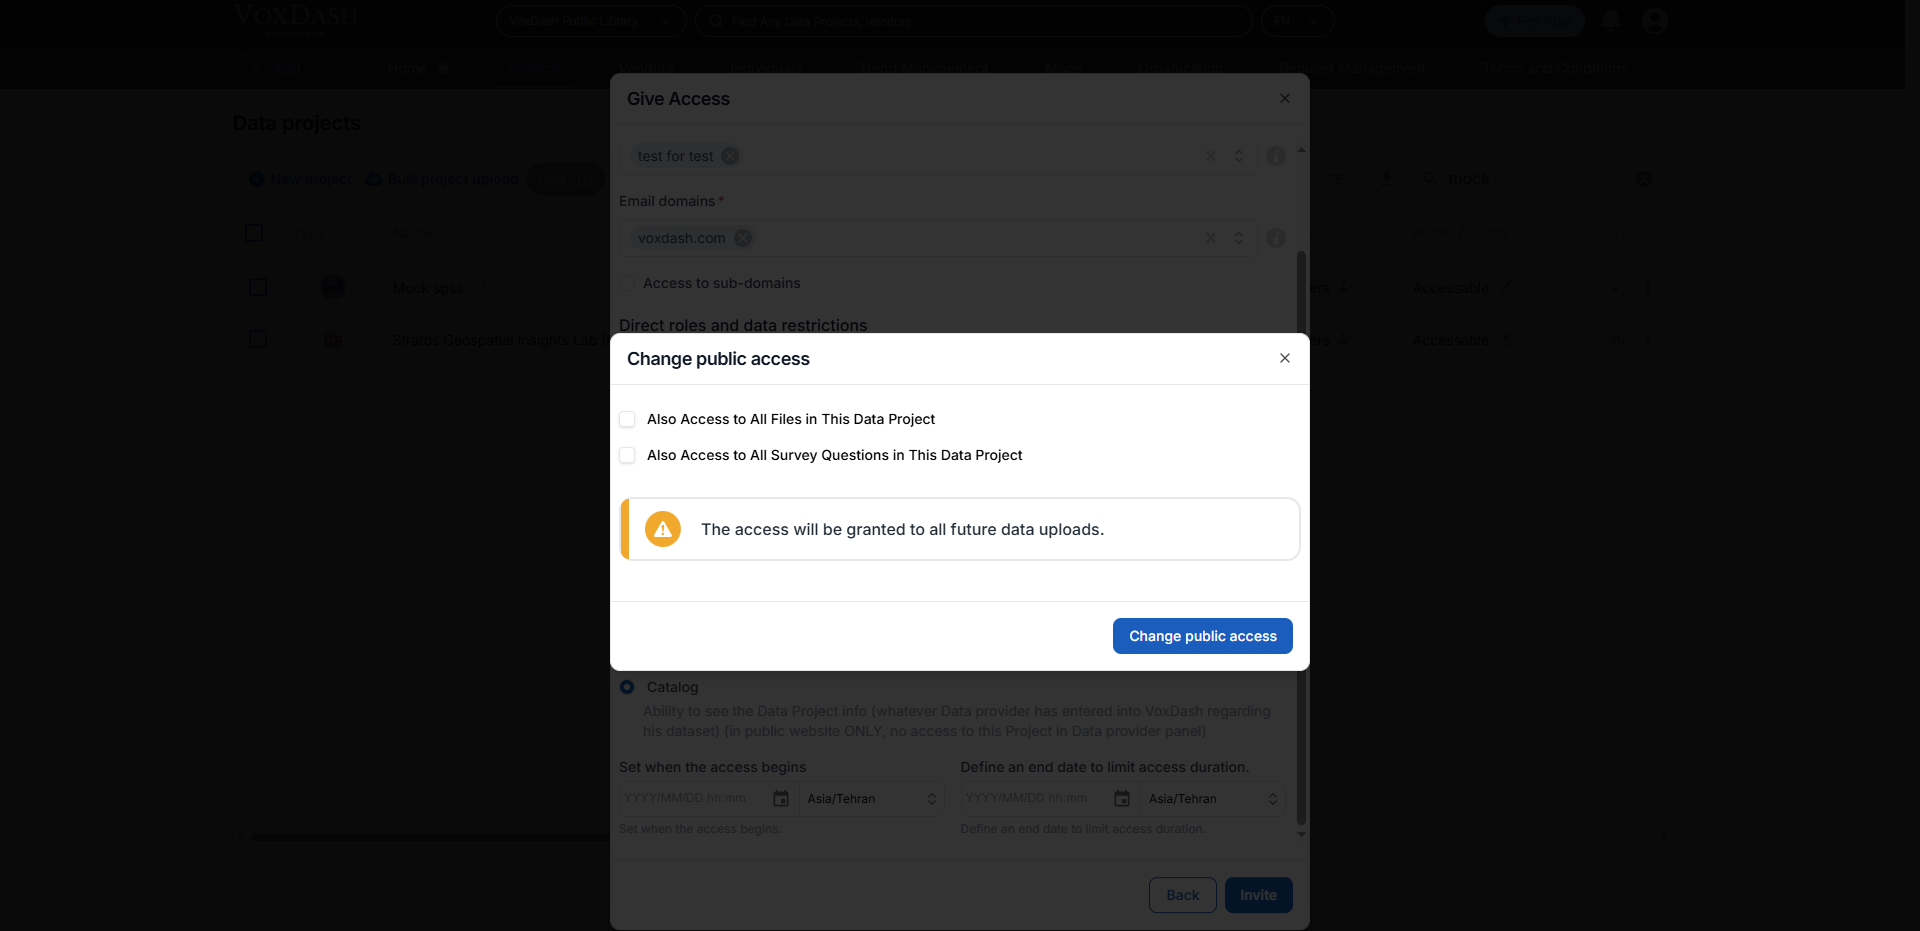
- You can also grant catalog access directly from the Data Project Files tab or from Wizard 4 of Survey Data Entry, where you can specify catalog access for selected questions.
- Pay attention to the data hierarchy (Data Project → Files and Survey Questions). If you grant catalog access at the Data Project level, you must specify whether the user can view only basic project information or also view its files and survey questions. A modal will prompt you to choose what additional information users can access.
- This access is available only for Data Projects with survey questions. It will not appear for projects that do not include Survey data or survey questions.
Tips:
- Notifications: The invited users will receive an email notification with a link to access the project, if applicable.
- If you haven’t added the user from user management, but you gave access to a user by using its email, the user will be automatically added to your users list, and you can edit their information in the User Management table.