- Protect sensitive business information
- Share data safely with partners or clients
- Maintain auditability of who accessed what
- Enforce internal compliance policies
Understanding Access Levels
When approving a request, you assign a permission level. Choose the lowest level that still allows the user to perform their task.
Recommendation: Avoid granting Owner access to external organizations unless required.
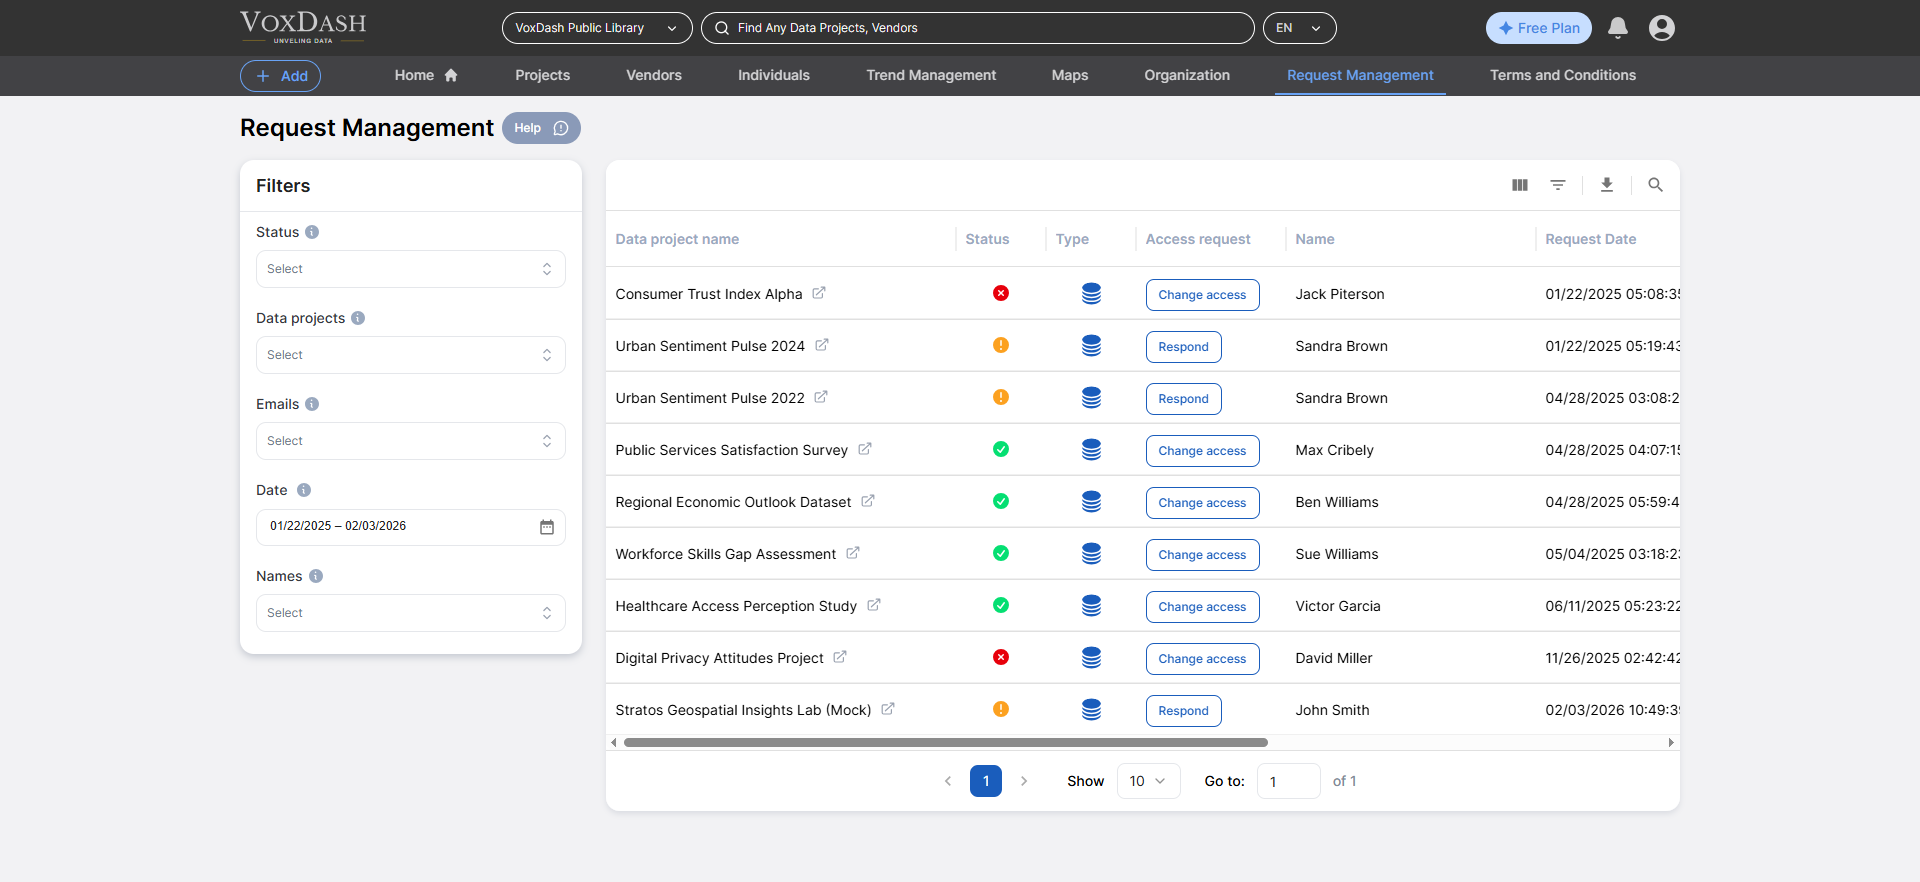
Accessing Request Management
Go to: Data Provider → Request Management This section centralizes all requests across every dataset you manage. You do not need to open individual projects to review permissions. What You See- All pending incoming requests
- Previously approved users
- Rejected attempts
- Active access holders
Request Information Panel
Contains:- Dataset name
- Dataset type
- Requesting user account
- Submitted email addresses
- Justification message
- Custom form responses
- Submission timestamp
- Current status
Status Meanings
Configure Required Request Information
You can require users to submit specific information before requesting access. This ensures you receive enough context to make a decision without repeated back-and-forth messaging.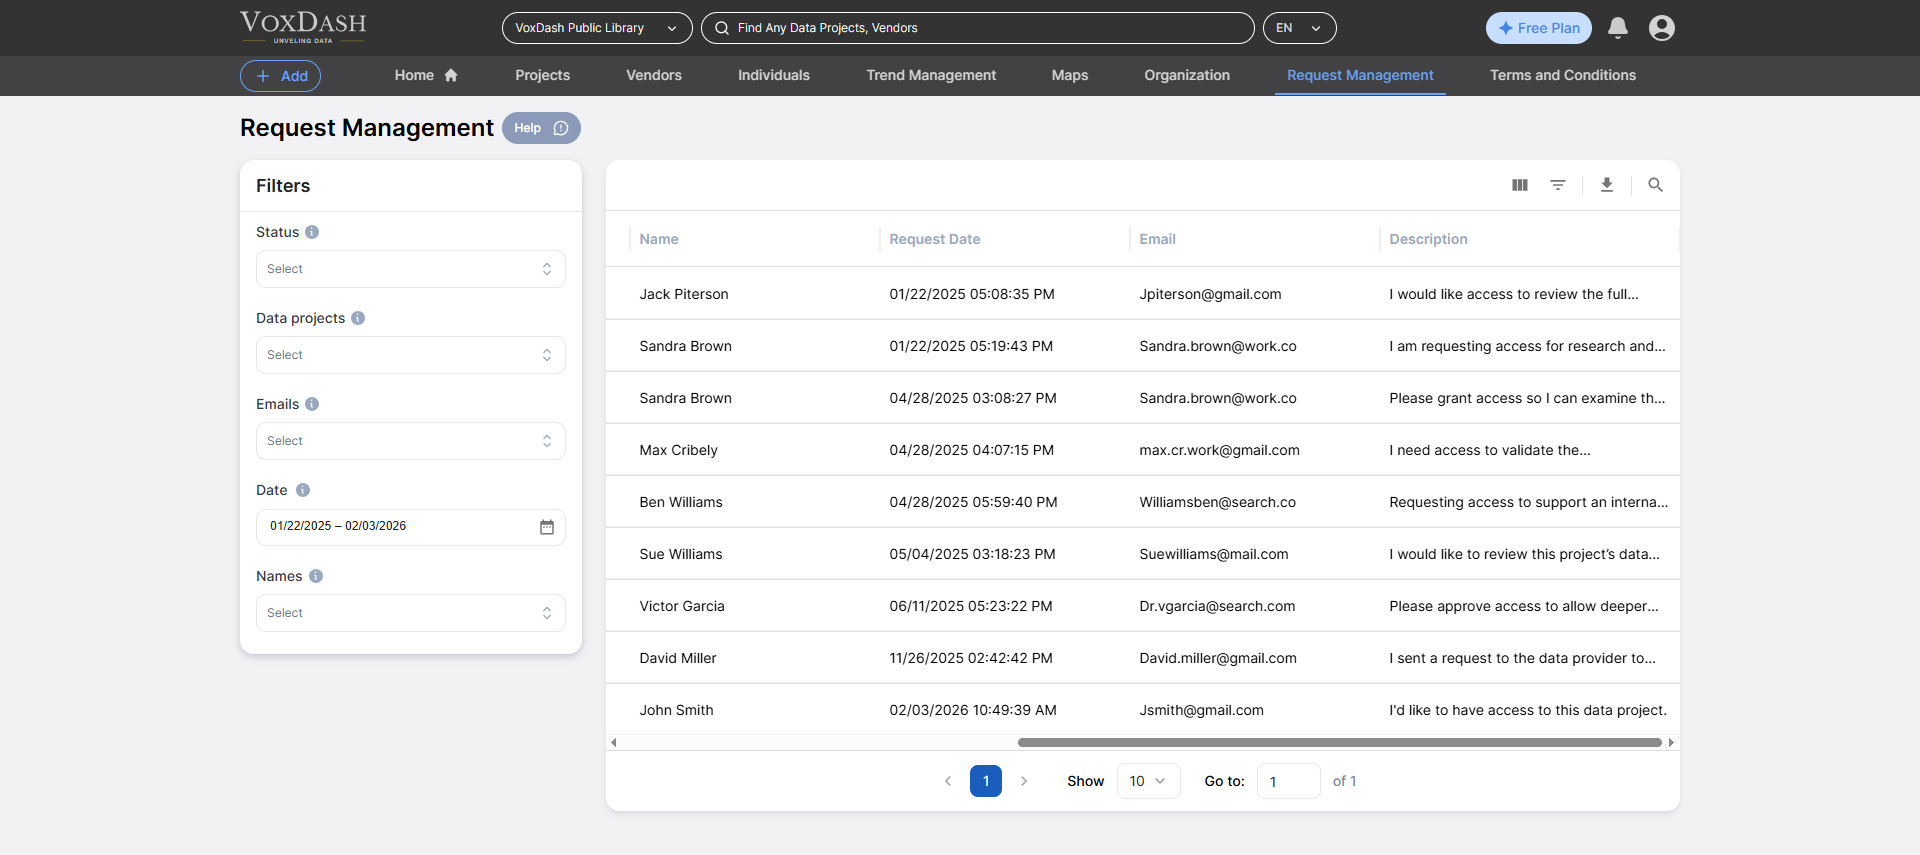
How It Works
Before the request form appears to users, they must fill in the fields you define.Recommended Fields
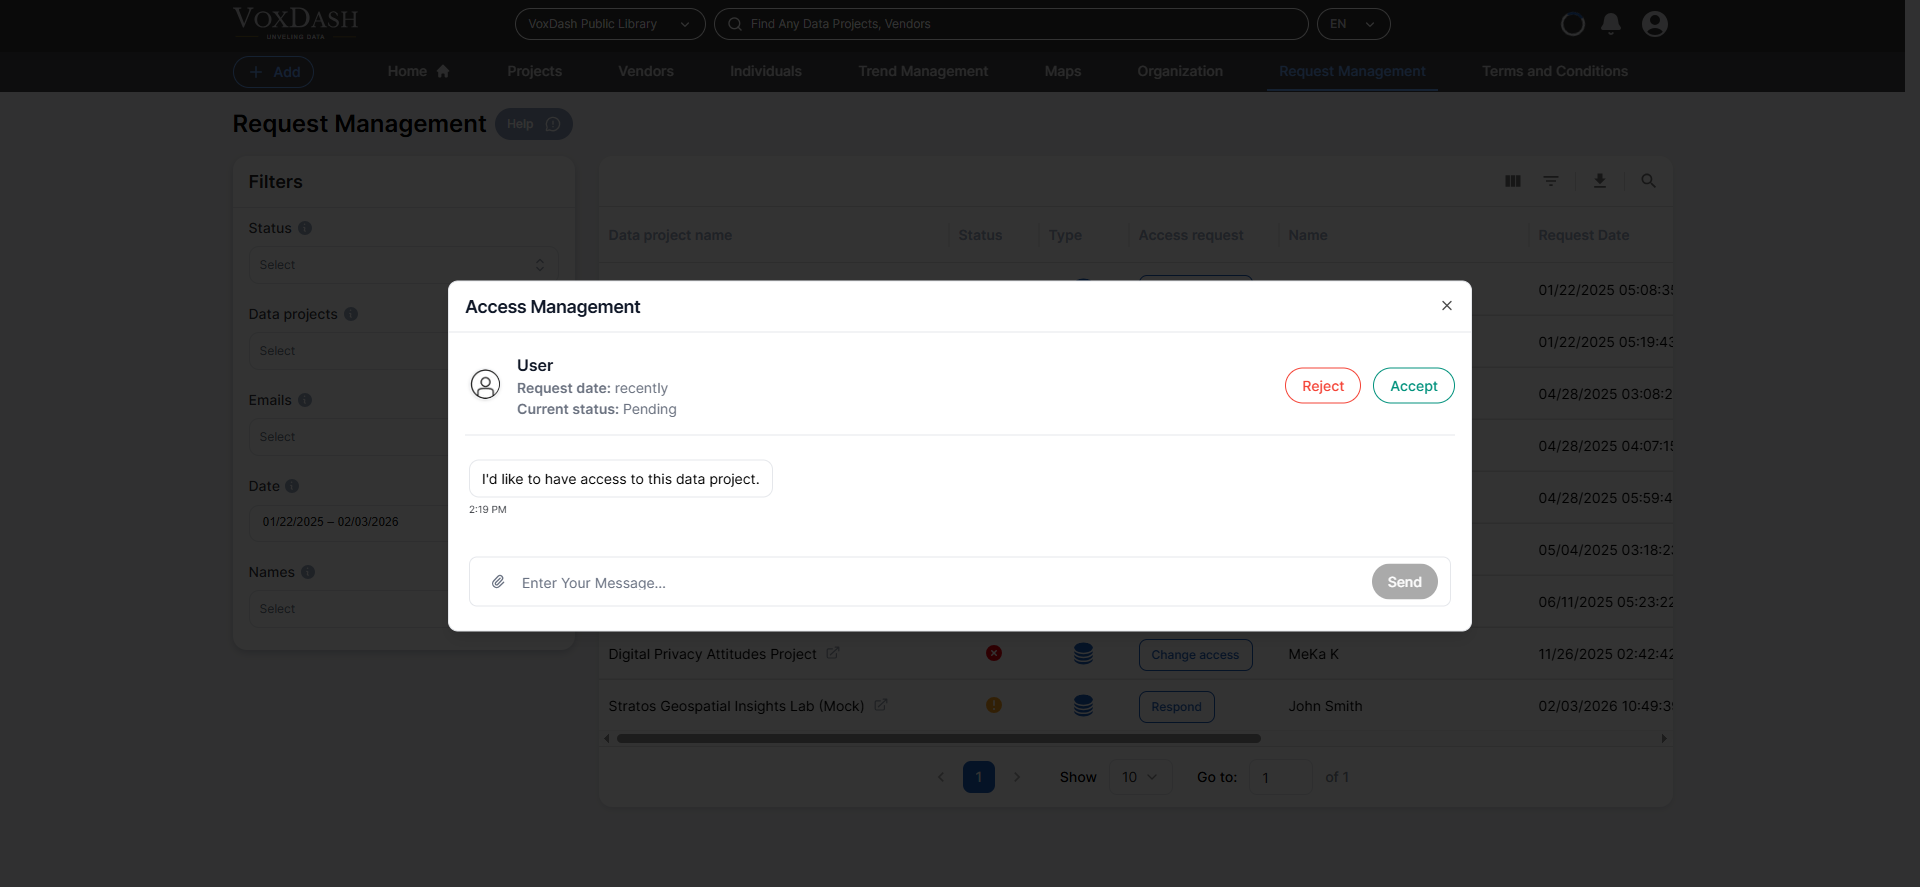
Reviewing a Request
Open any request to view full details, and decide whether to grant access or reject it.Communicating With Users
Each request includes a built-in conversation thread. You can ask for more information before giving an access.When to Use Chat
- The request purpose is unclear
- The user selected the wrong access level
- You need confirmation of business relationship
- You must explain compliance requirements
- “Will you export the data or only analyze dashboards?”
- “Is this for internal reporting or client delivery?”
- “How long do you need access?”
Approving Requests
To grant access:- Open the request
- Select permission level
- Click Approve
- Status changes to Approved
- Permissions activate immediately
- User receives notification
- Dataset becomes visible based on role
- Action recorded in audit history
Rejecting Requests
Reject a request when:- The use case conflicts with data policy
- The organization is unknown
- The purpose is vague or suspicious
- Legal agreements are missing
Steps
- Open request
- Click Reject
- Provide optional explanation
- Status changes to Rejected
- User is notified
- Dataset remains hidden
- Action logged for record keeping
Revoking Previously Approved Access
Access permissions are not permanent. You should periodically review and remove outdated permissions.Common Reasons
- Contract or partnership ended
- Employee left the company
- Project completed
- Security policy update
- Incorrect approval level
Steps
- Open approved request
- Click Remove Access
Immediate Effects
- User loses access instantly
- Analytics and downloads disabled
- Status updated to Revoked
- Event logged in history
Filtering and Managing Requests
As the number of incoming access requests grows, efficient filtering becomes essential. The filtering tools in the left sidebar allow you to quickly locate, review, and manage specific requests without manually scanning the entire list. Using filters helps you:- Prioritize urgent approvals
- Monitor sensitive datasets
- Audit user access
- Maintain clean permission control
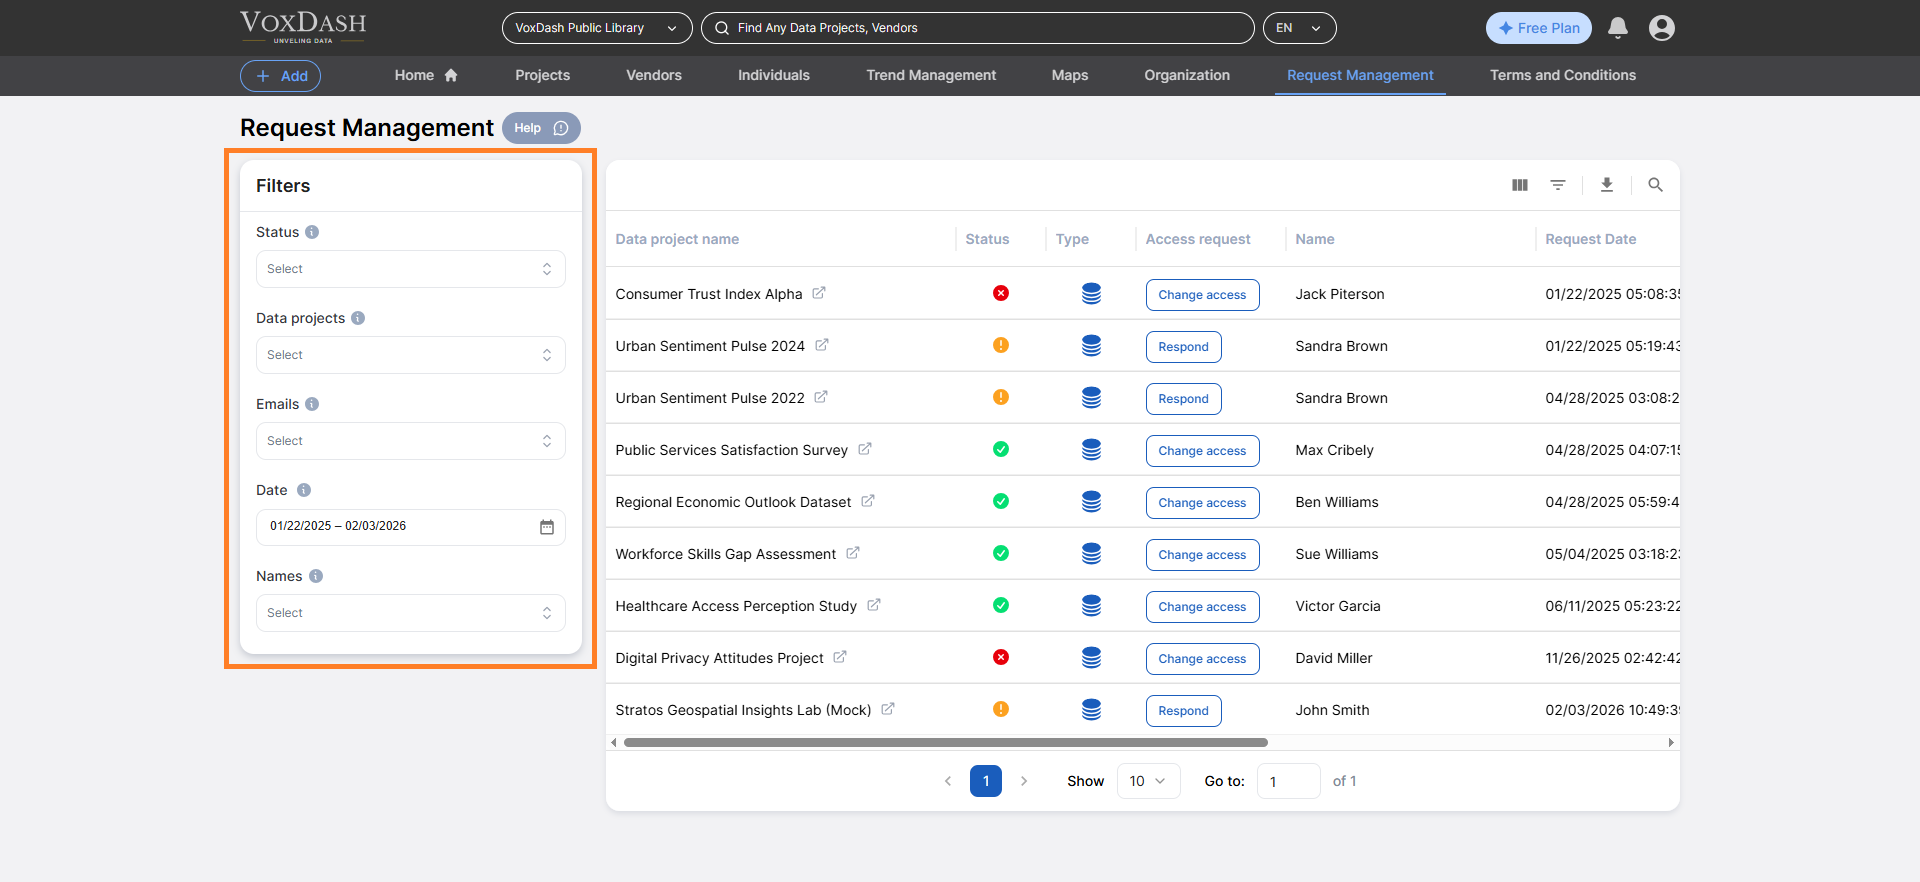
1. Status Filter
Filter requests based on their current state:- Pending → Requires action
- Approved → Review periodically
- Rejected → Audit attempts
2. Data Project Filter
Use this filter to display requests related to a specific project or dataset. This is especially useful when:- A project contains sensitive or high-value data
- You manage multiple projects across departments
- You need to audit access for a specific initiative
- Projects
- Questions
- Files
- Vendor datasets
3. Email Filter
Filter by submitted email address(es) to find:- All requests from a specific organization
- Multiple requests tied to the same domain
- Duplicate or repeated access attempts
- A company has several employees requesting access
- You need to verify consistency in permission levels
- You are auditing external partner access
4. Date Filter
Filter requests by submission date or recency. Use this filter to:- Review newly submitted requests
- Identify old pending requests
- Conduct periodic permission audits
- Monitor recent approval activity
5. Name Filter
Filter by the requesting user’s name. This allows you to:- Locate all requests from a specific individual
- Review access history before granting additional permissions
- Track activity related to key stakeholders
- A user changes roles
- You need to revoke or upgrade permissions
- You are reviewing access during compliance checks
Best Practices for Secure Data Sharing
- Require justification fields
- Prefer Analyst over Downloader
- Communicate before rejecting unclear requests
- Never grant permanent external Owner access
- Revoke access after project completion
- Document approvals through chat