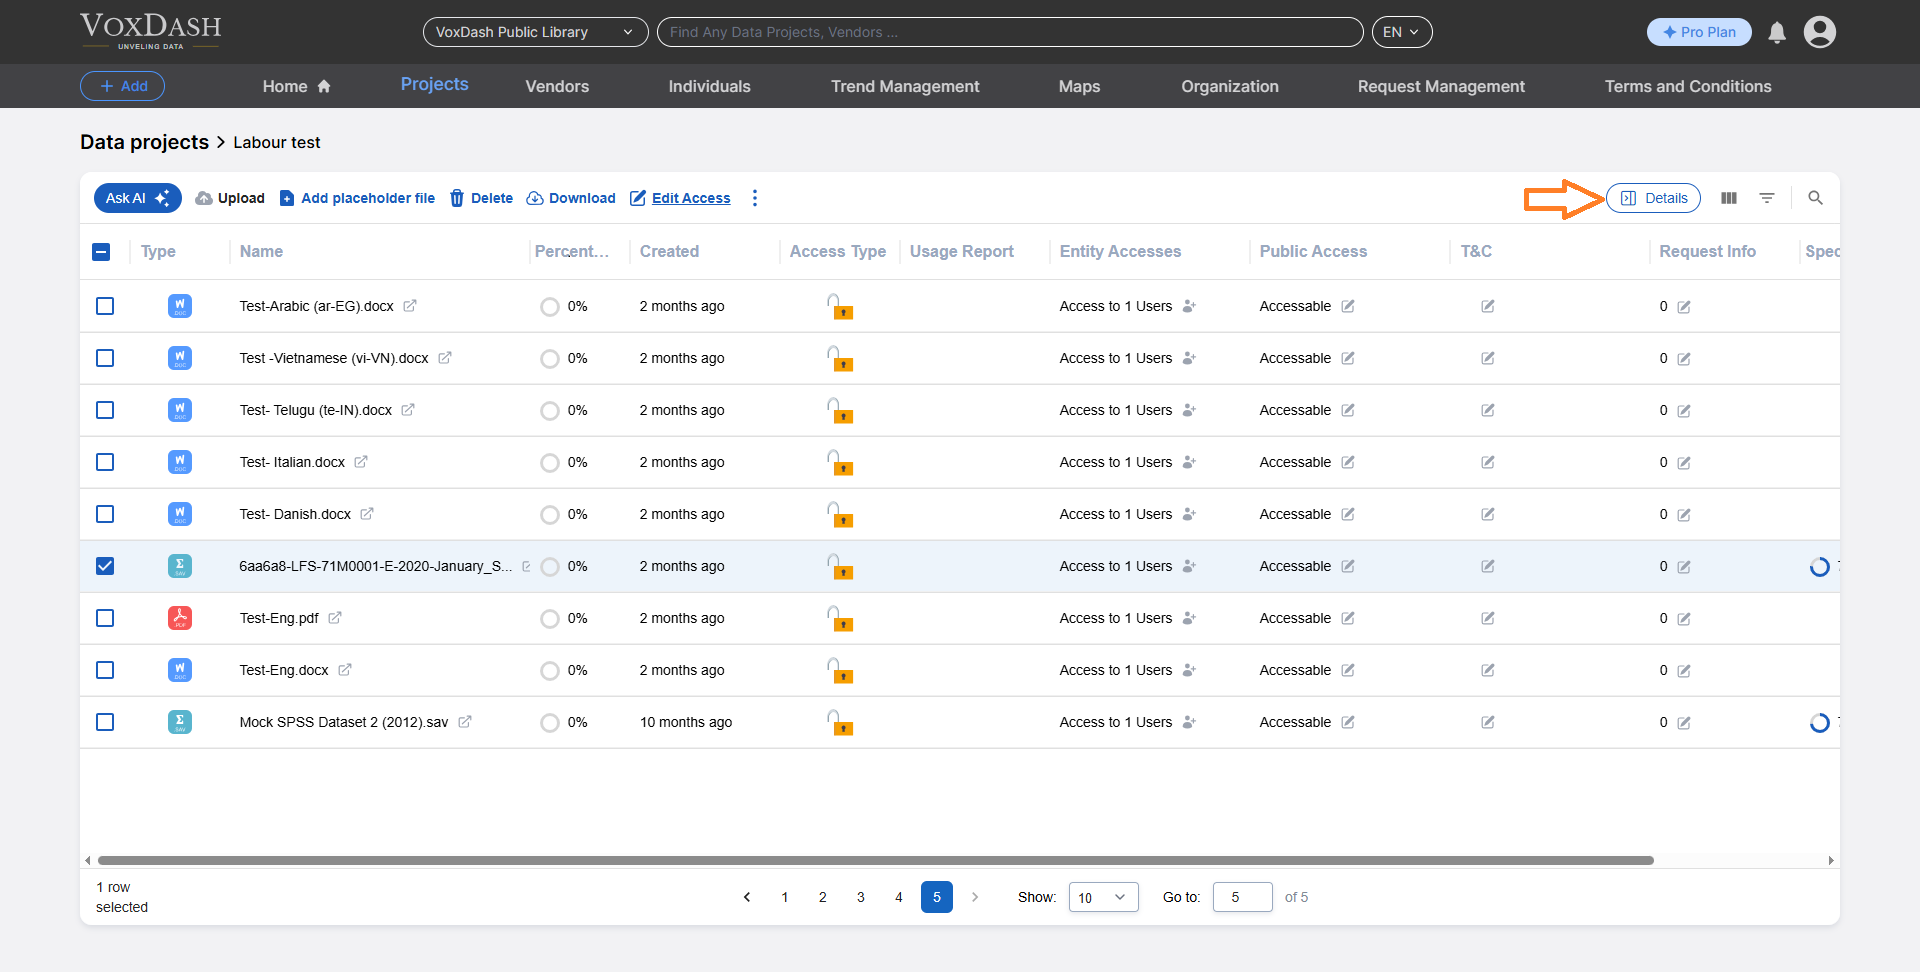
Steps to Start Data Entry
- Locate the Survey File
- Access Data Entry
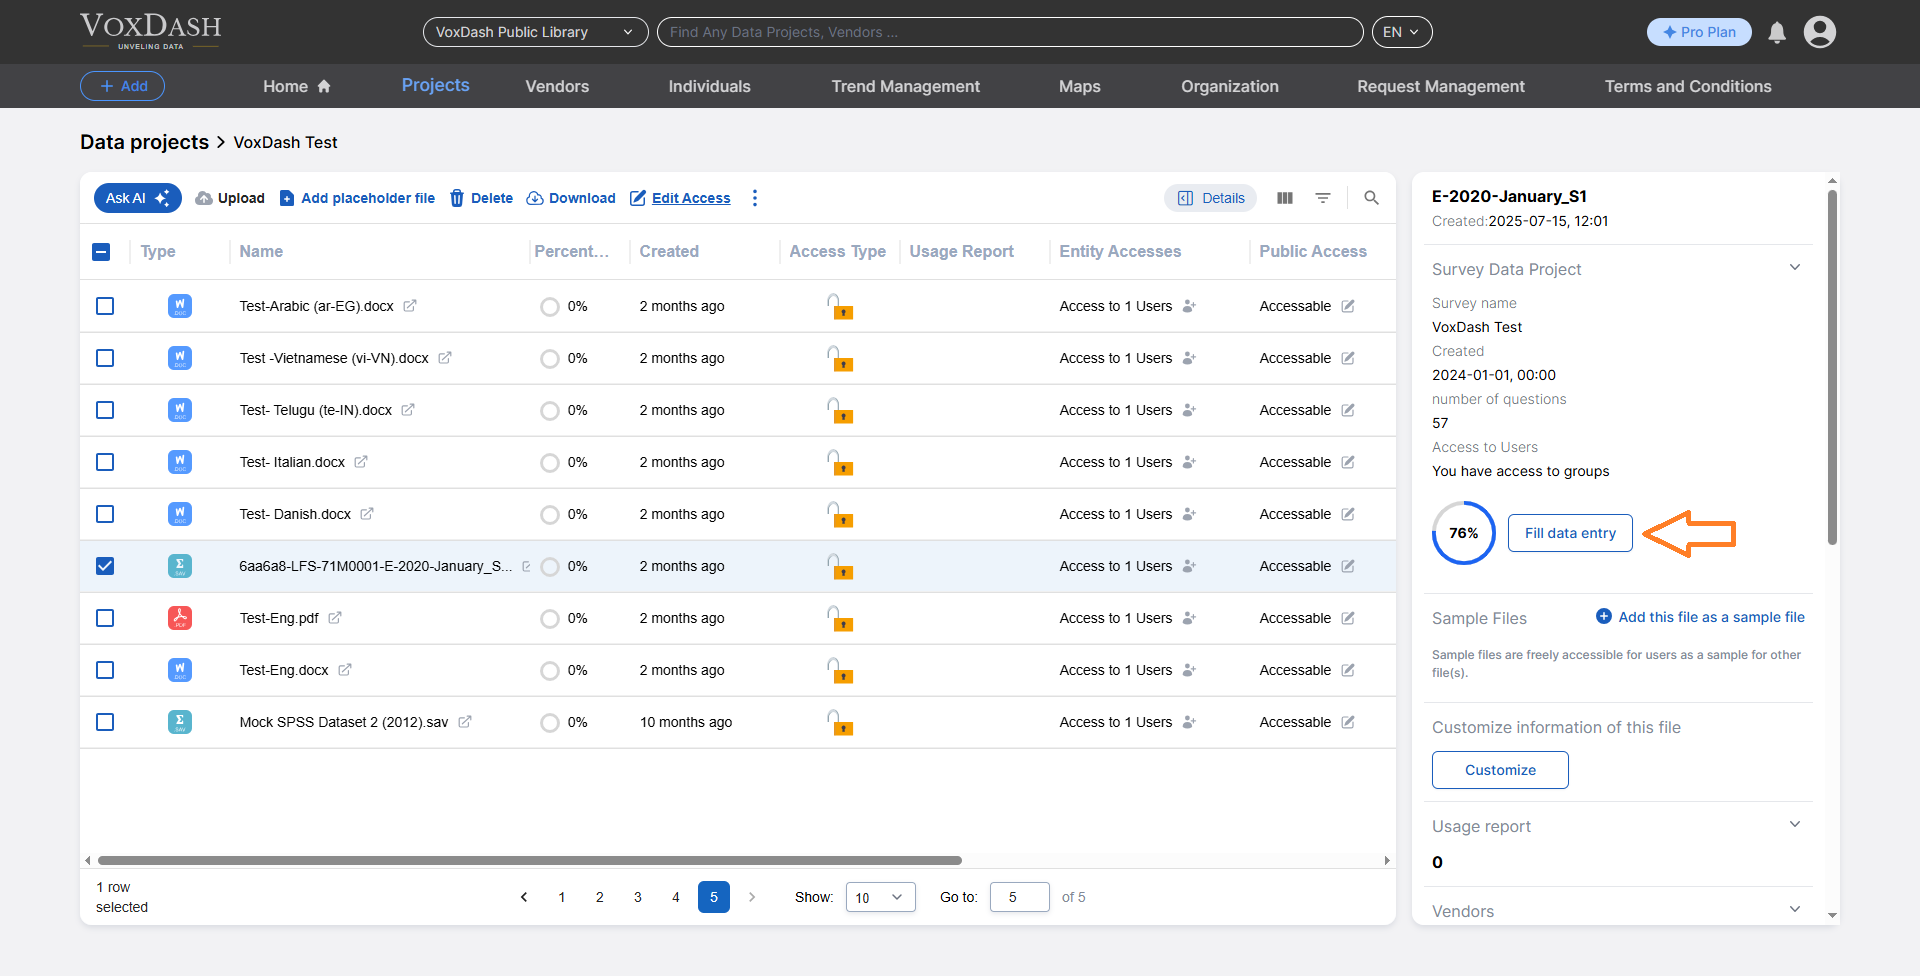
After Clicking Fill data entry
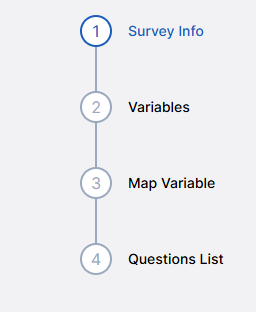
Once you click the button, a new page will appear featuring four wizards tailored for Survey-specific data entry. These sections include:- Survey Info: Document how the data sample was collected.
- Variables: Define and describe all variables present in the dataset.
- Maps: Attach relevant maps or spatial data (if applicable).
- Questions List: Provide a list of the questions used to collect the dataset.
4 Wizards Introduction
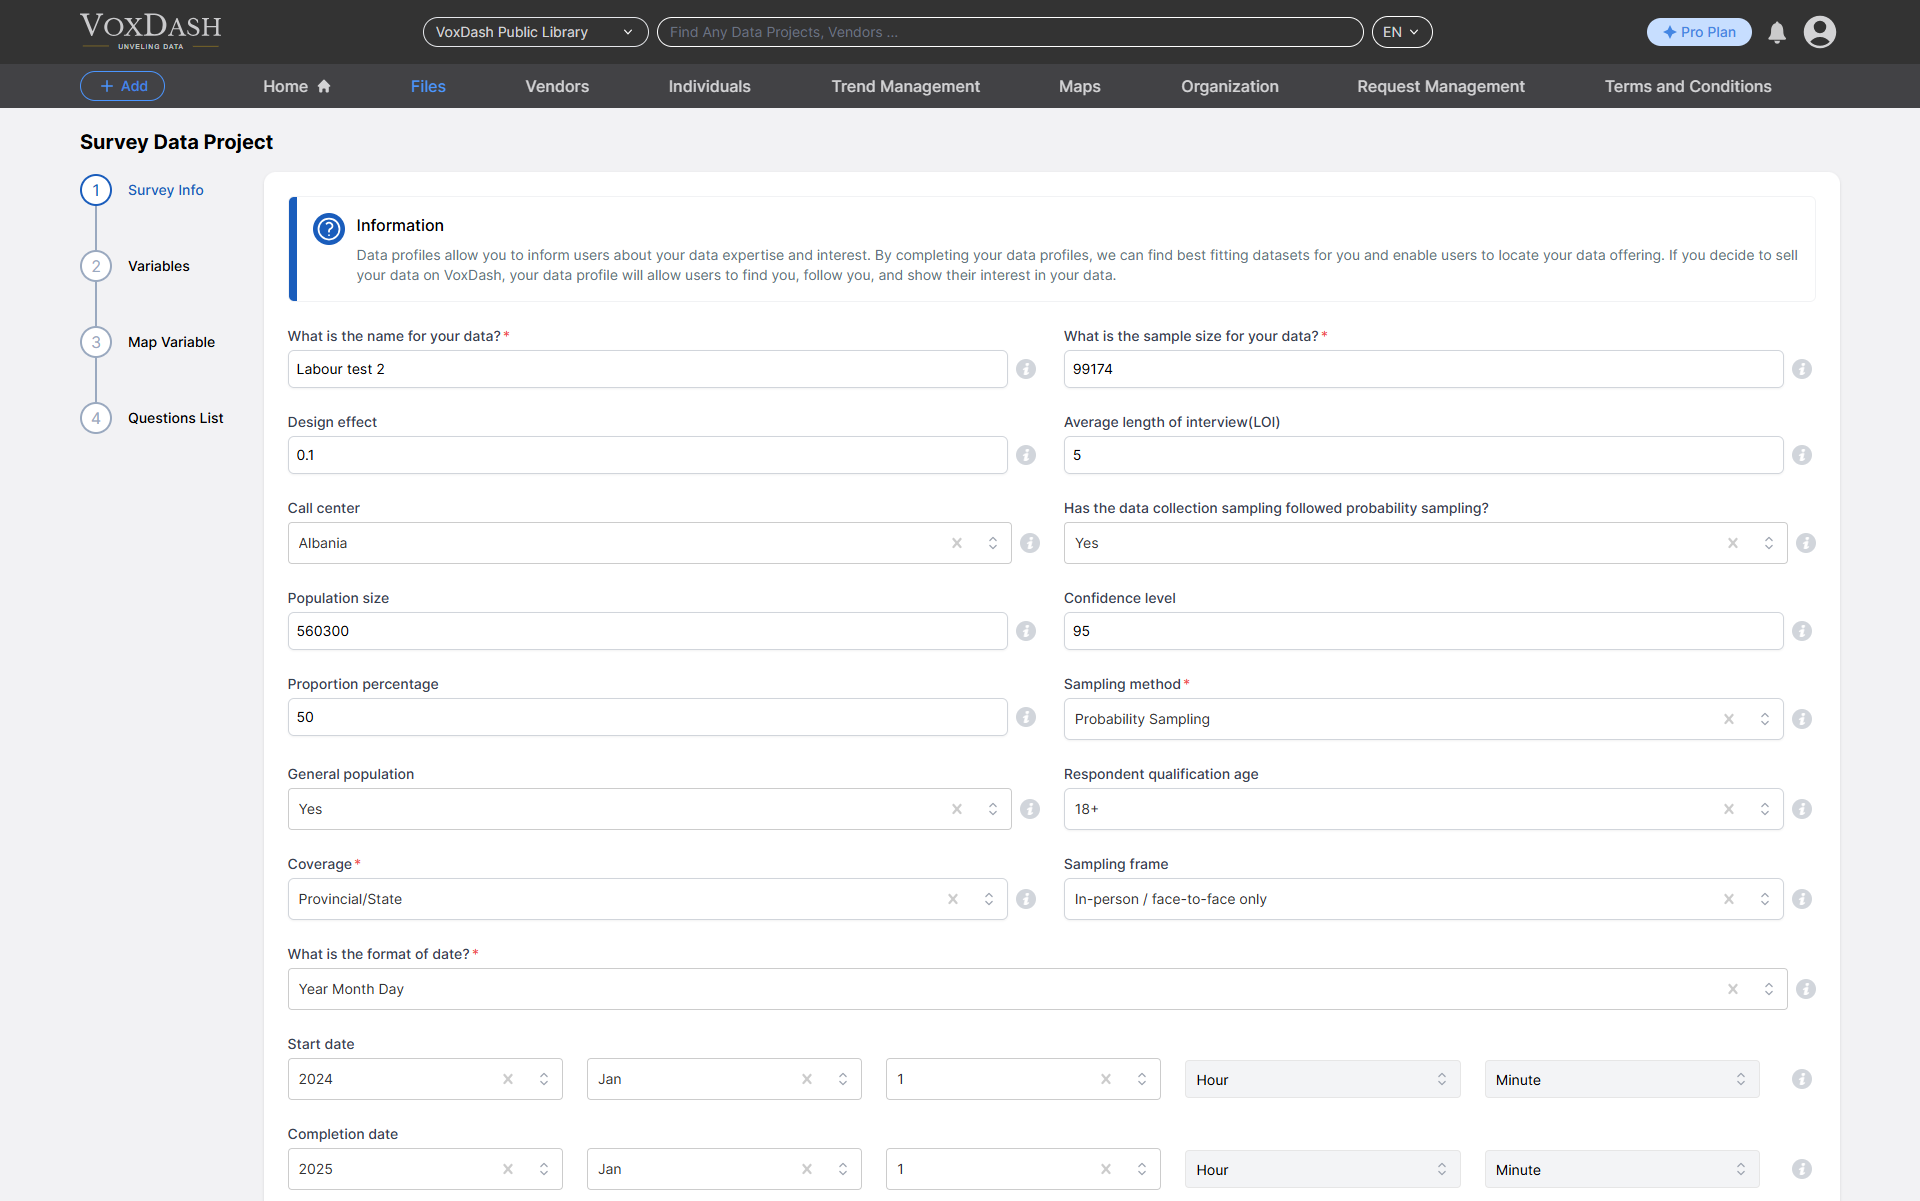
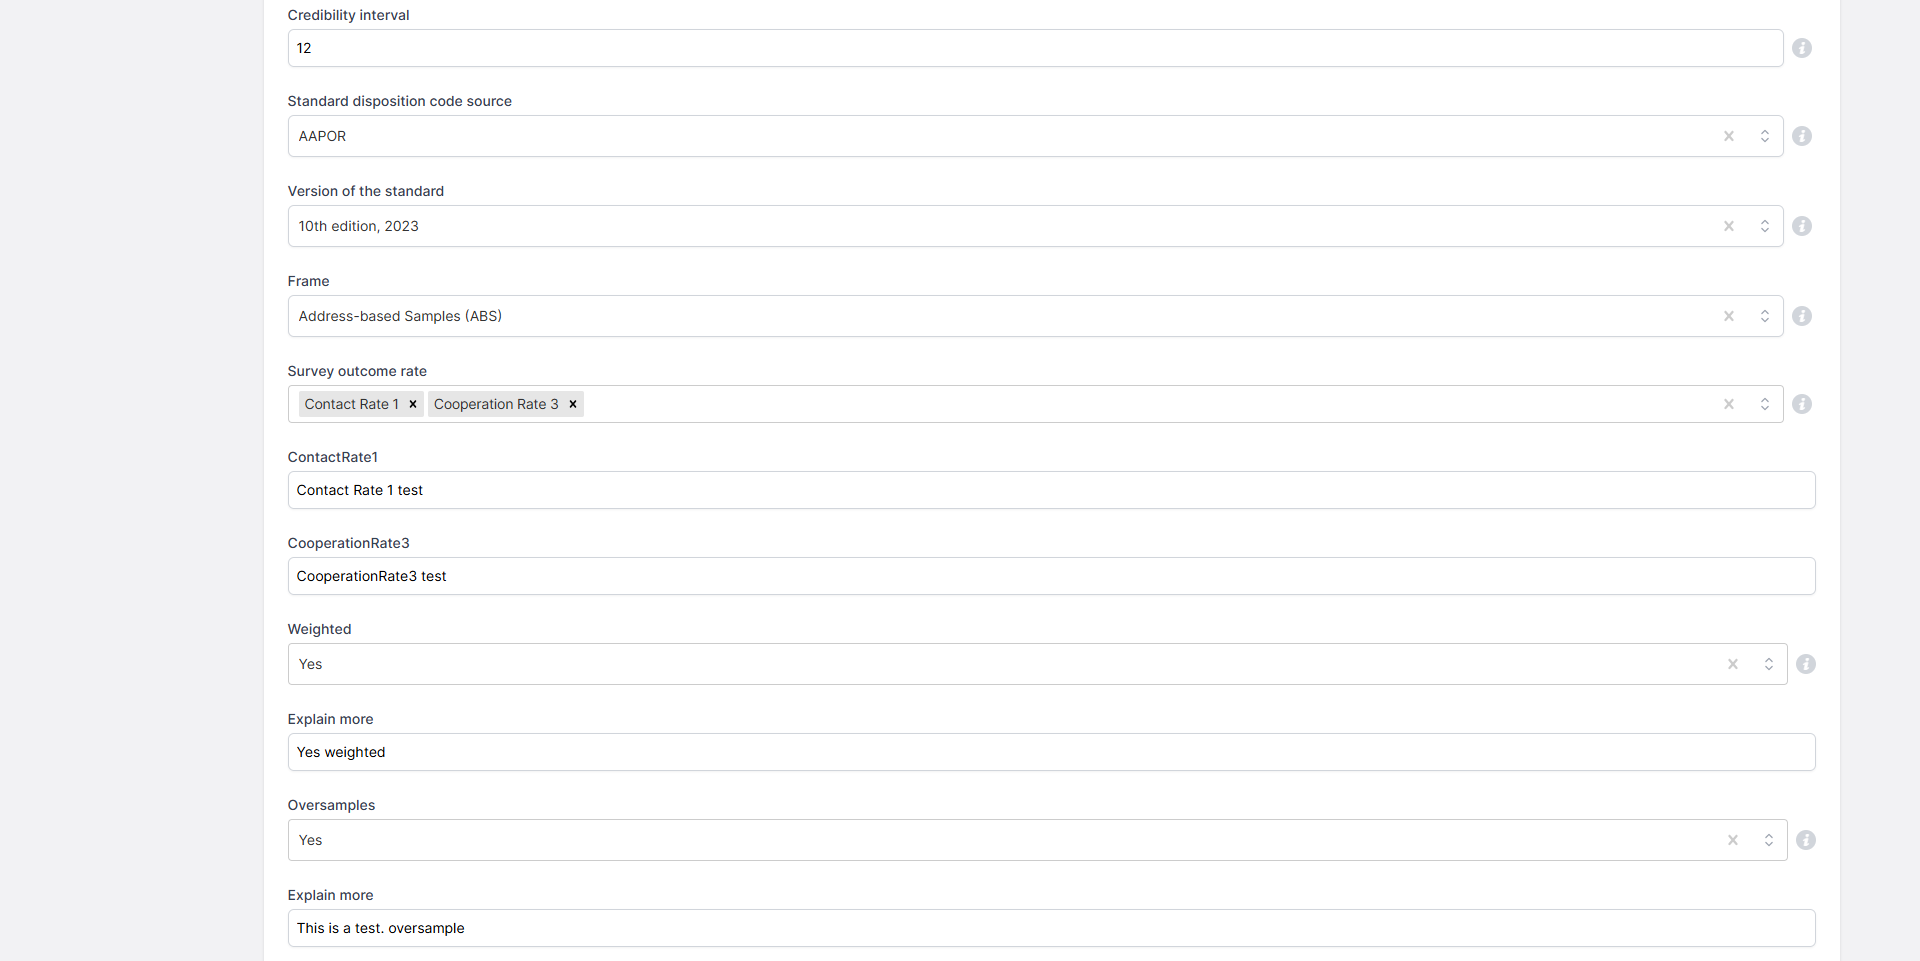
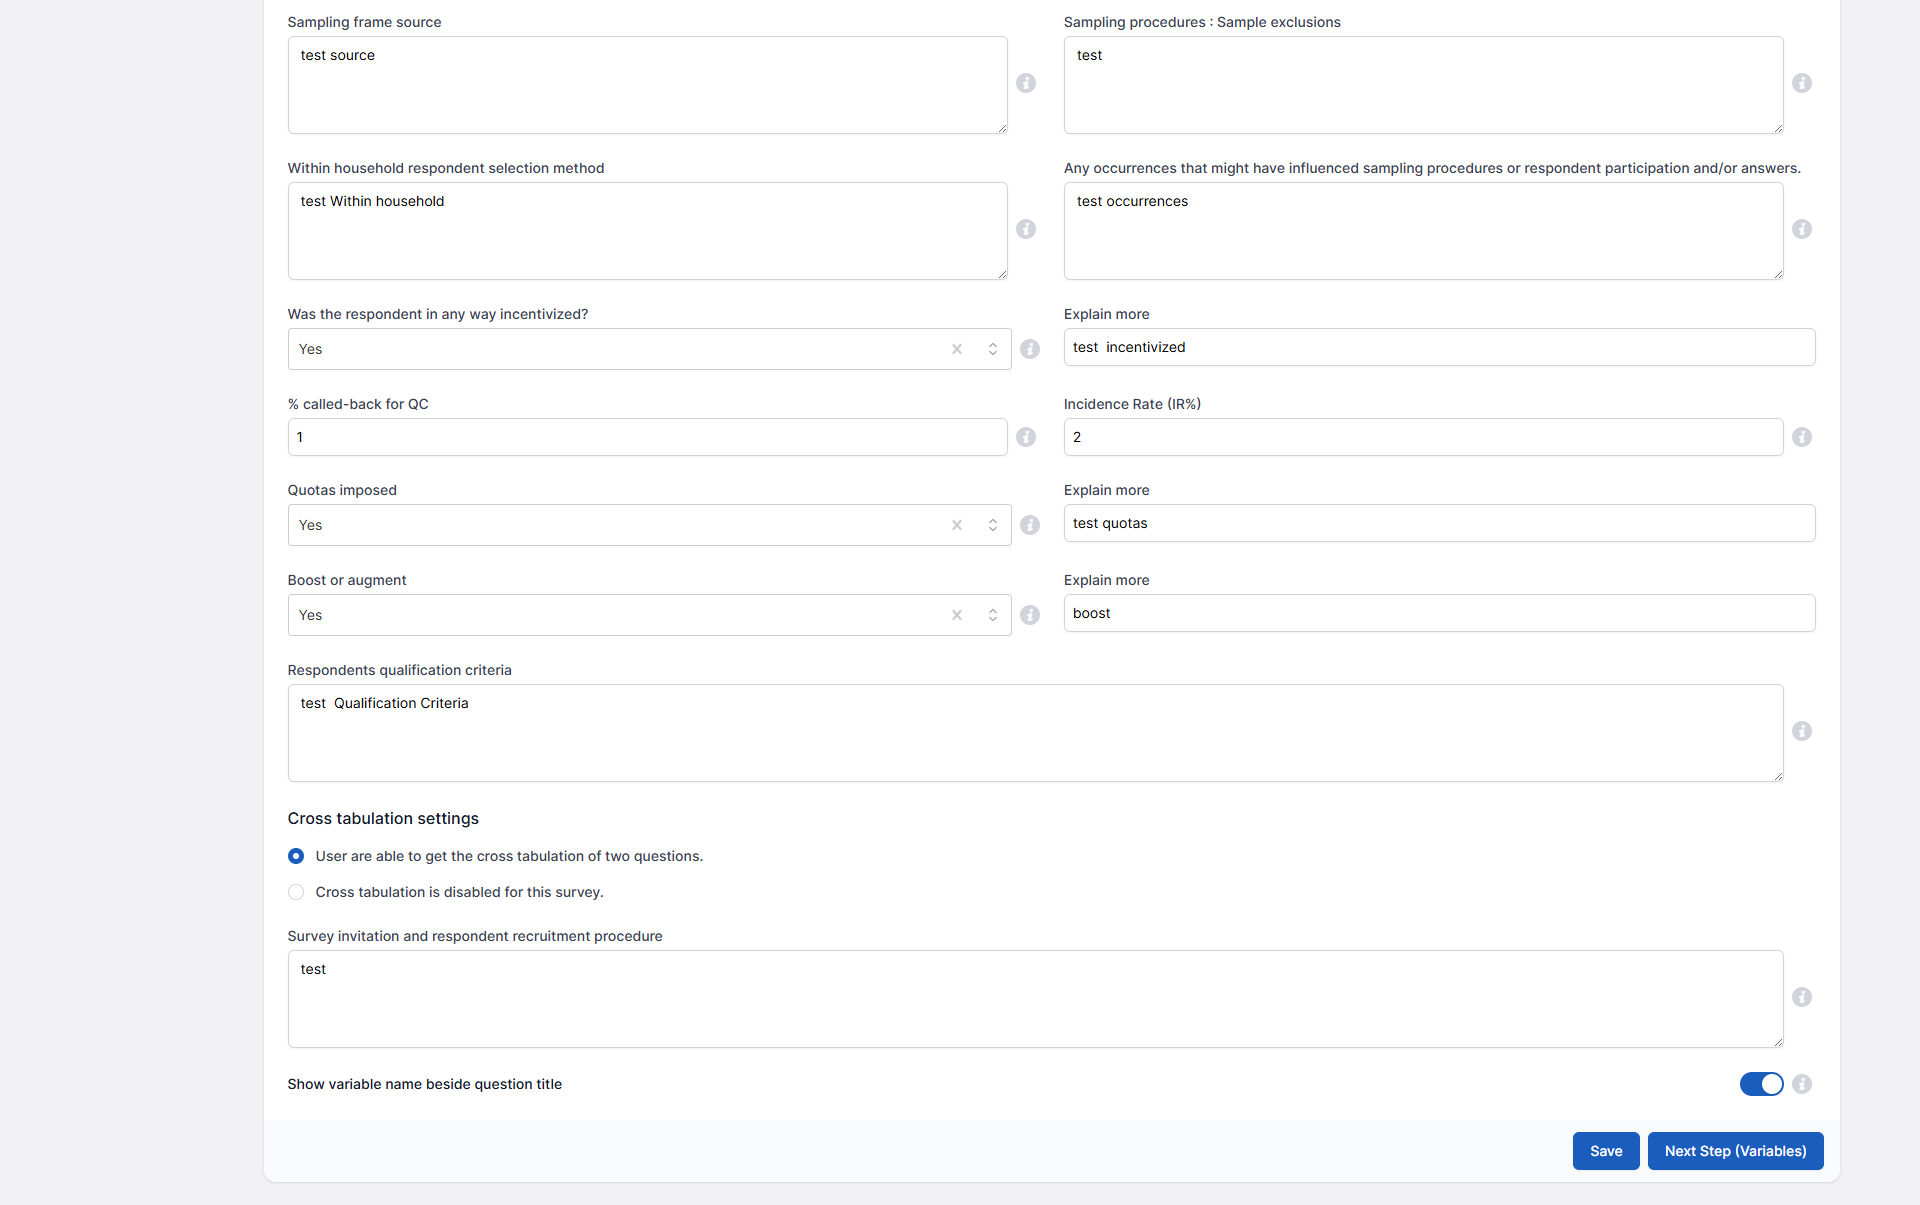
1. Survey Info
- Informing users about your expertise and interests.
- Matching you with the most relevant datasets.
- Enabling users to find, follow, or express interest in your data.
-
Enhancing visibility if you decide to sell your data on VoxDash.
Required Fields
- Sample Size: If an SPSS file is uploaded, this field is auto-completed you must enter the number manually.
-
Margin of Error (MOE): Calculated based on:
- Confidence Level (default: 95%).
- Proportion Percentage (default: 50%). You can adjust these values to fit your research needs.
- For Probability Samples: VoxDash calculates and displays the MOE.
- For Non-Probability Samples: A “Comparable Margin of Error” is calculated with an explanatory note.
-
Sampling Method: Choose between:
- Probability Sampling: Includes random, systematic, stratified, and cluster sampling.
- Non-Probability Sampling: Based on non-random criteria (e.g., convenience or judgment sampling).
- General Population: Describe the target population represented in your survey.
- Respondent Qualification Age: Specify the minimum age for participation (default: 18 years).
- Coverage: Indicate the geographic scope of the survey (e.g., global, national, city-level).
- Collection Date: Match this with the date entered in the general data entry section.
2. Variables
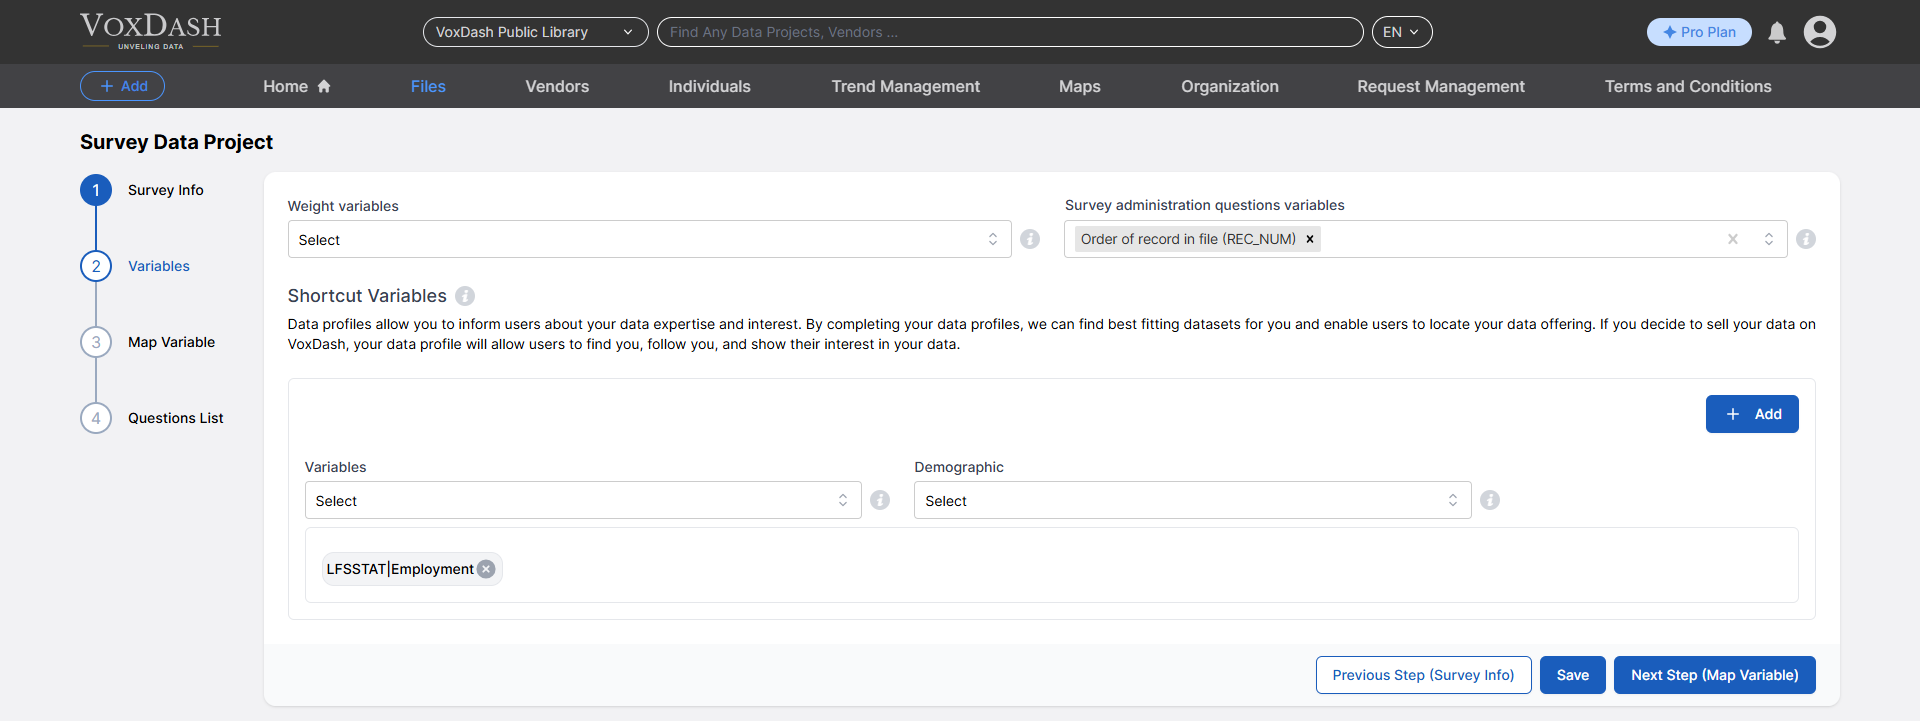
- Add weight variables (if applicable).
- Exclude certain survey questions, such as:
- Questions with only one response option.
- Questions with no response options at all.
- Questions with too many distinct but unimpactful response options (e.g., “Weight” questions).
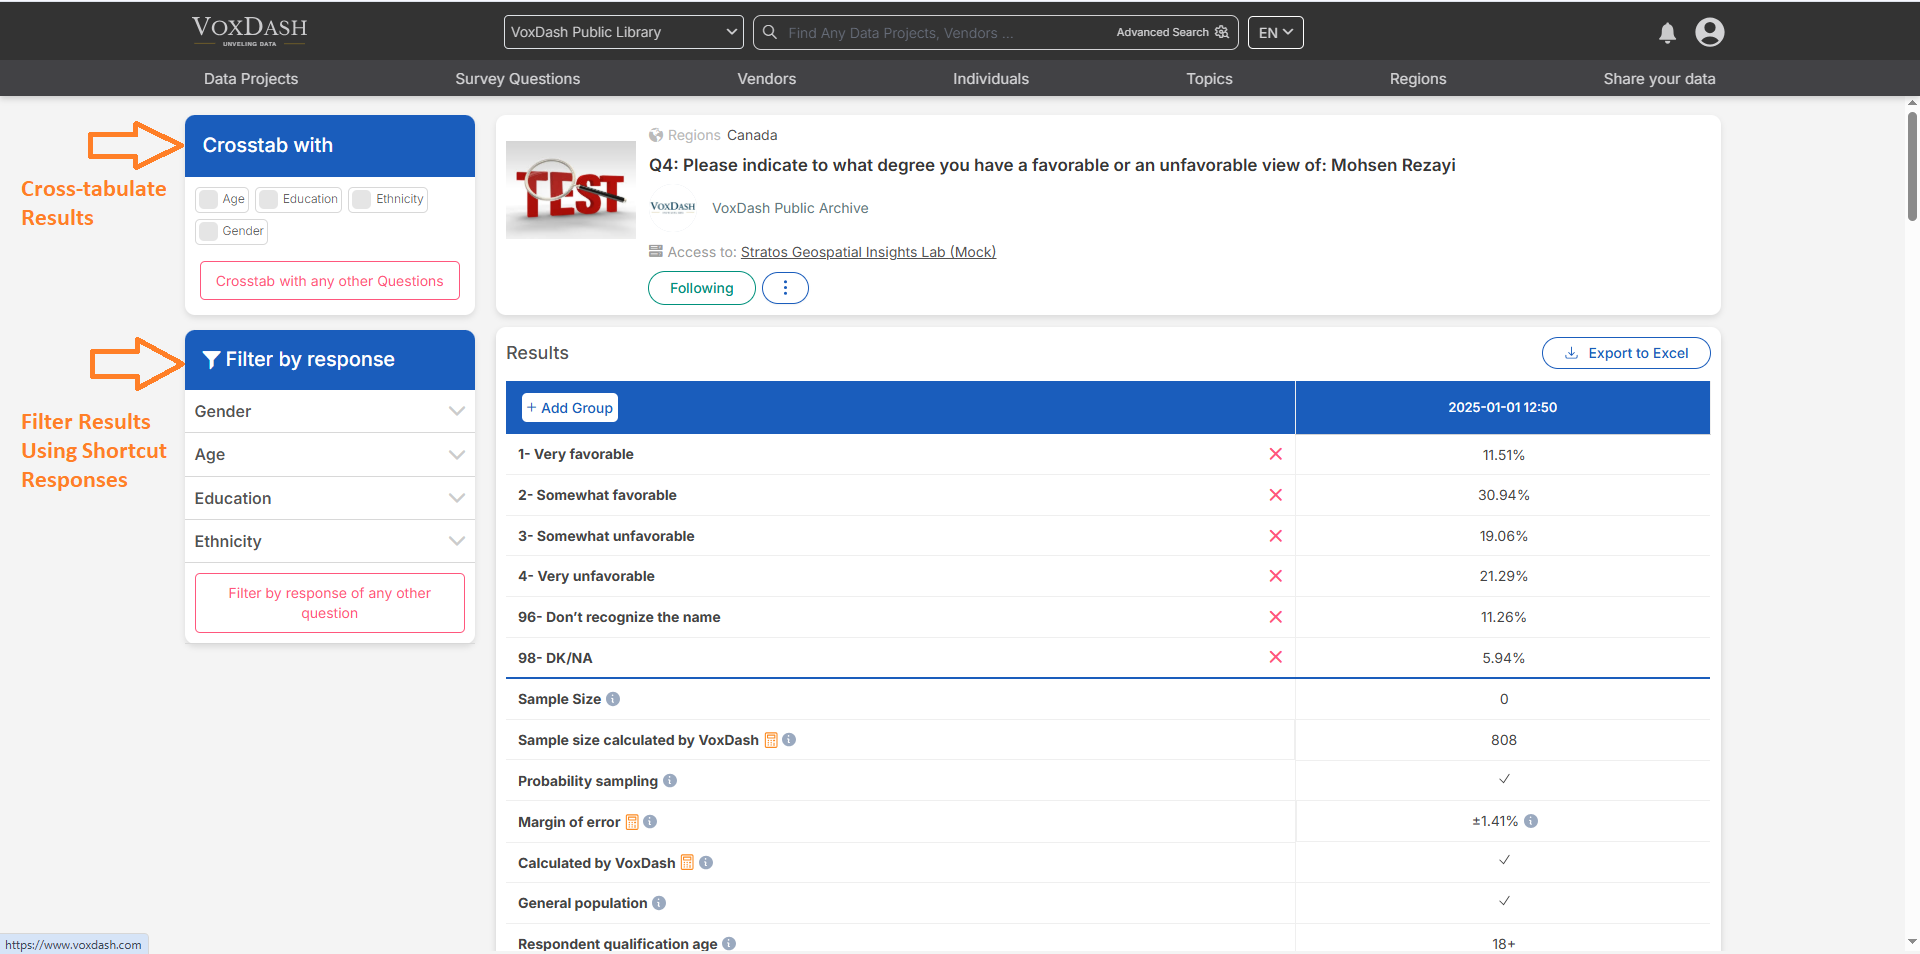
- Cross-tabulate Results: Compare and analyze the displayed results across different variables for deeper insights.
- Filter Results Using Shortcut Responses: Quickly refine the results by applying predefined filters or response categories through shortcut options.
3. Map Variables
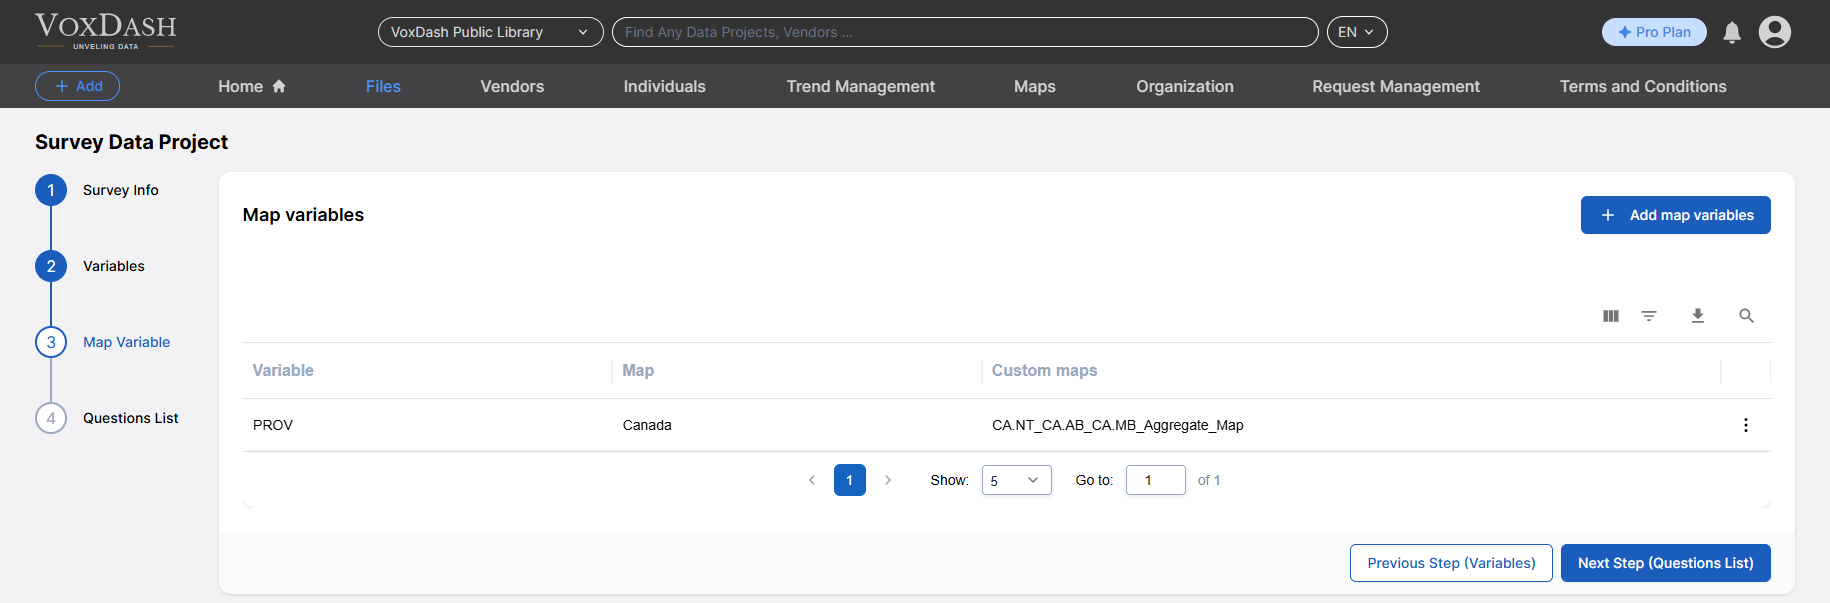
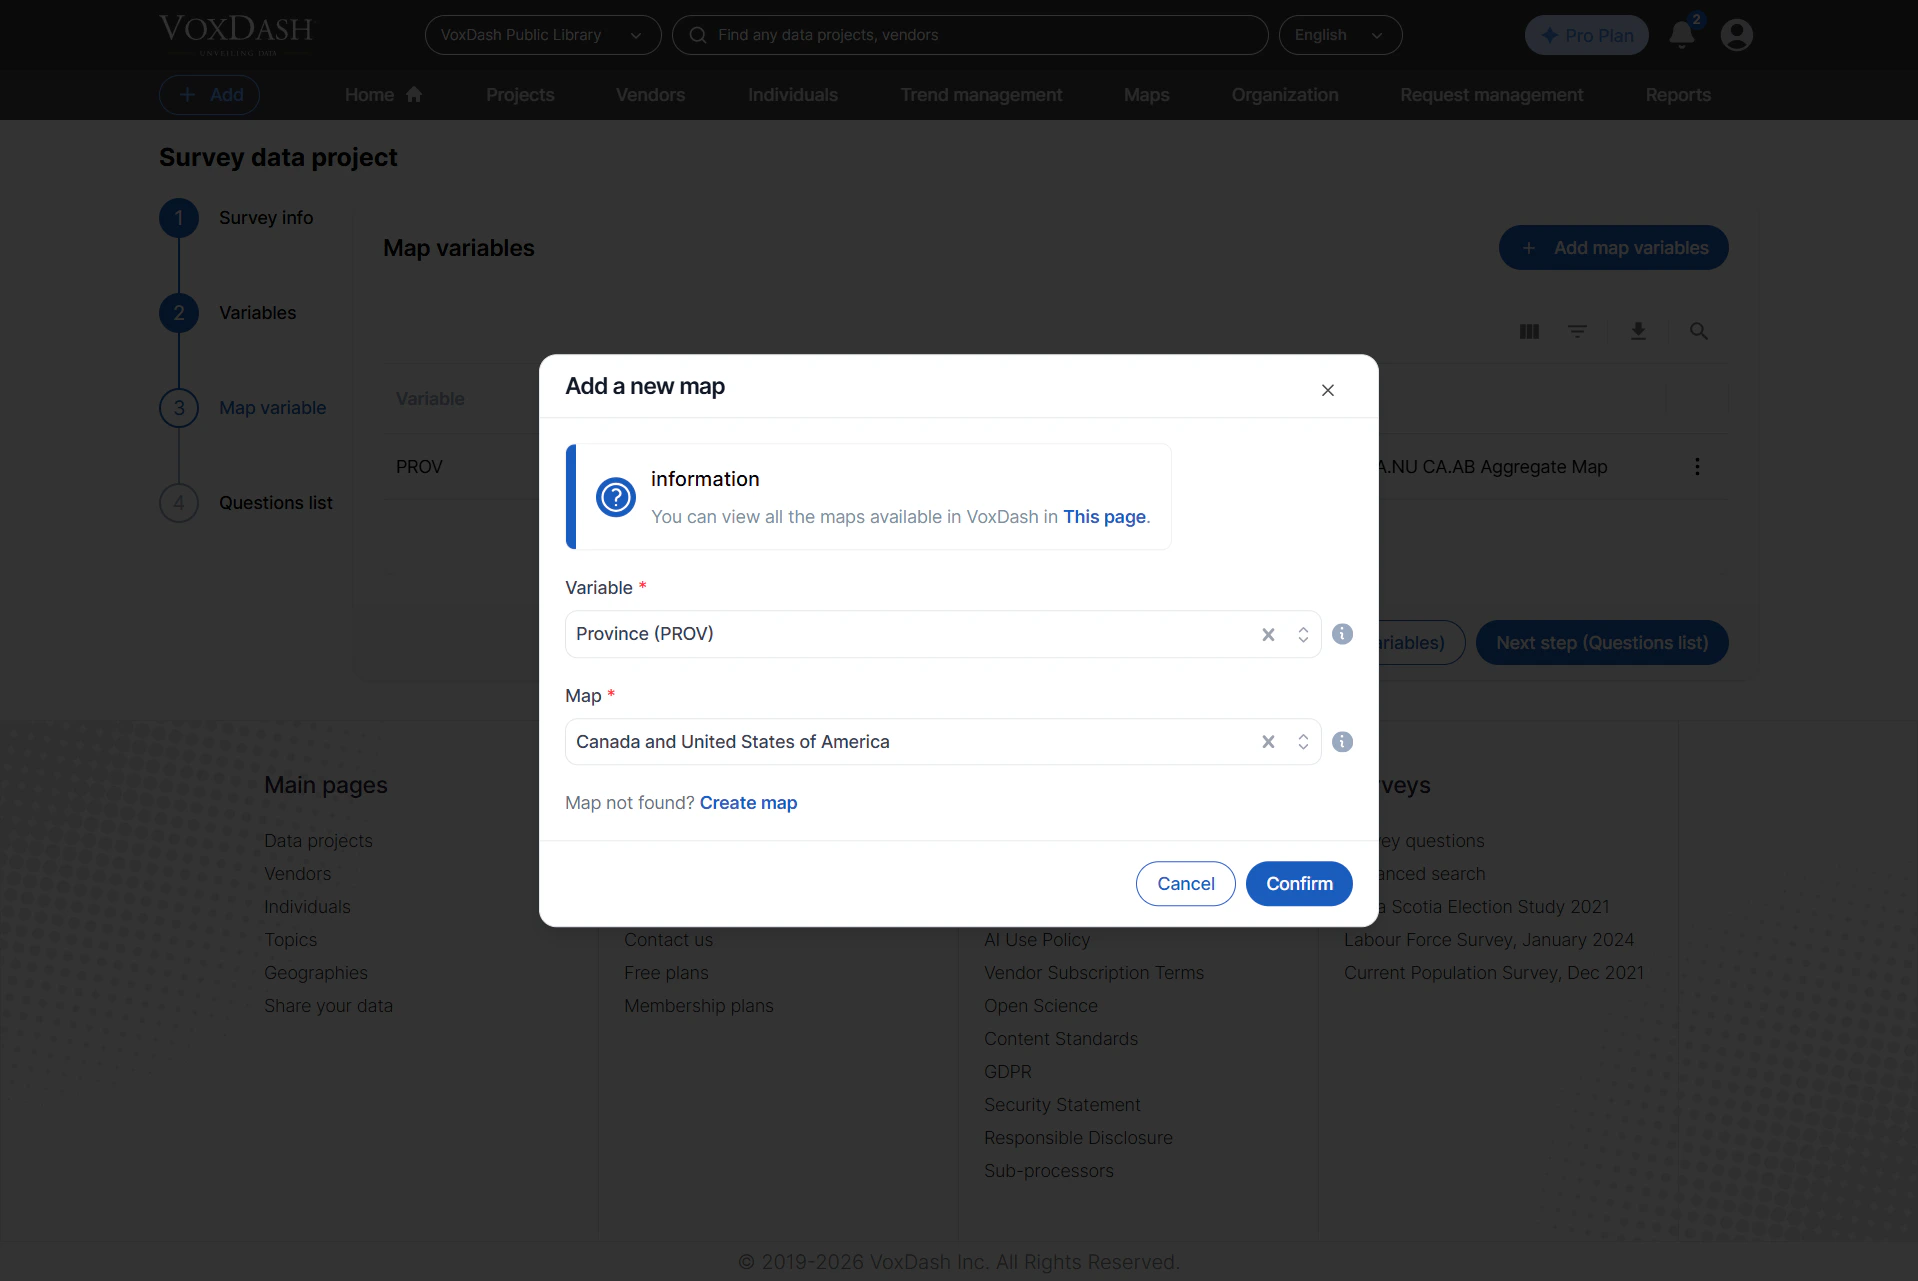
- Click the Add map variables button in the top-right corner to add a map.
- Select the map variable and choose the corresponding map from VoxDash.
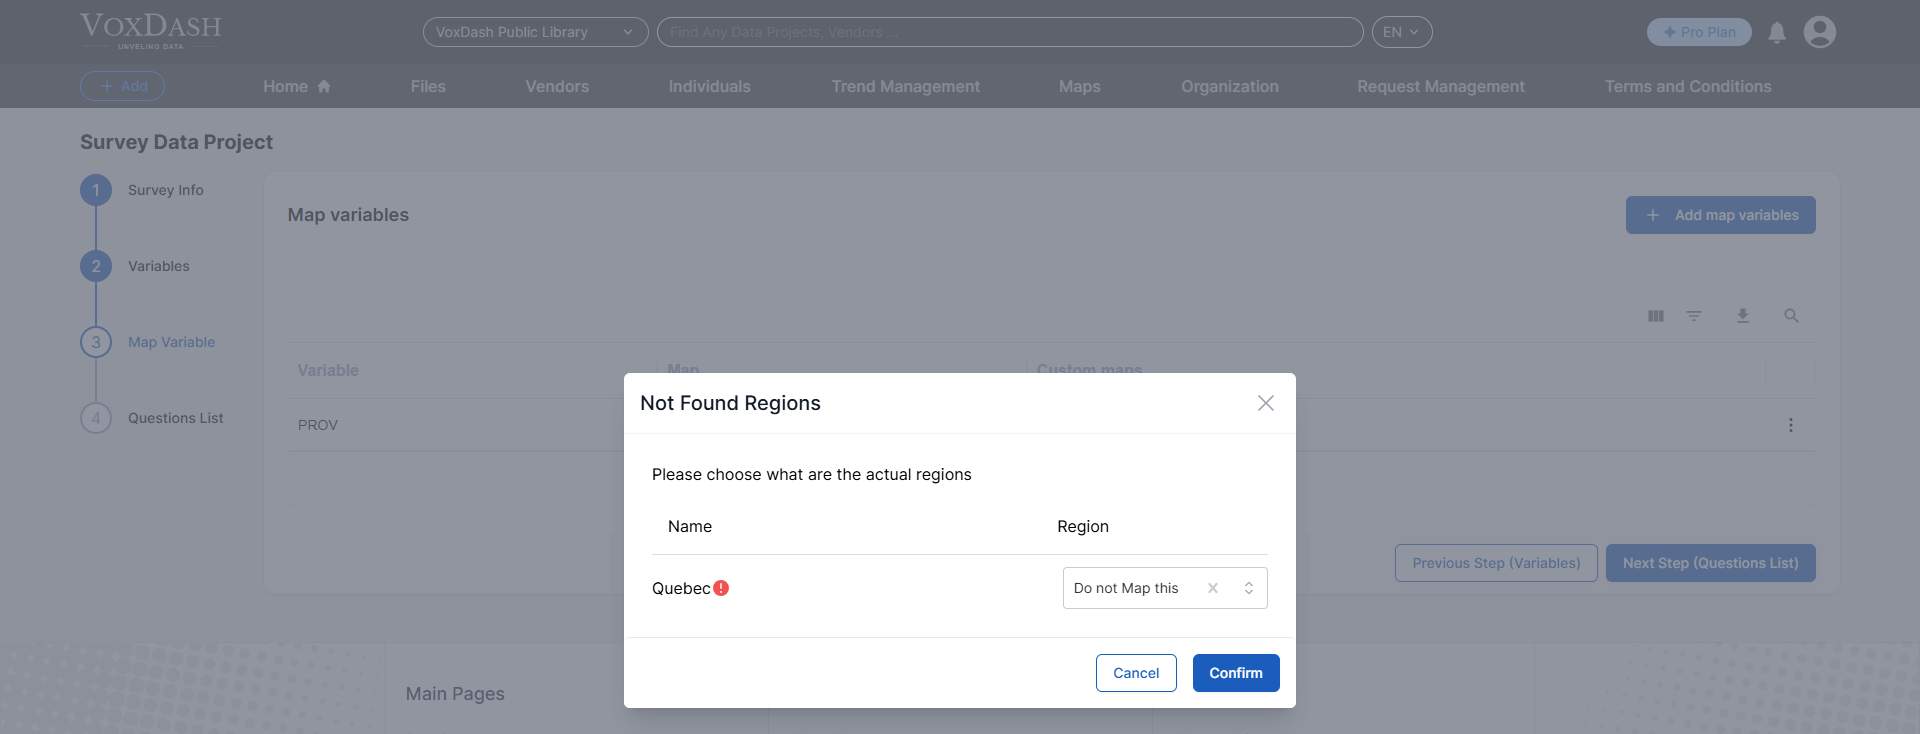
- Match region names if they are written as abbreviations by comparing them with the full region names in VoxDash.
- In cases of mismatched regions, manually re-match them in VoxDash.
- If a region includes options like “Don’t Know” or “Don’t Say,” select Don’t Map in VoxDash.
- Click Confirm to upload the map.

4. Question List
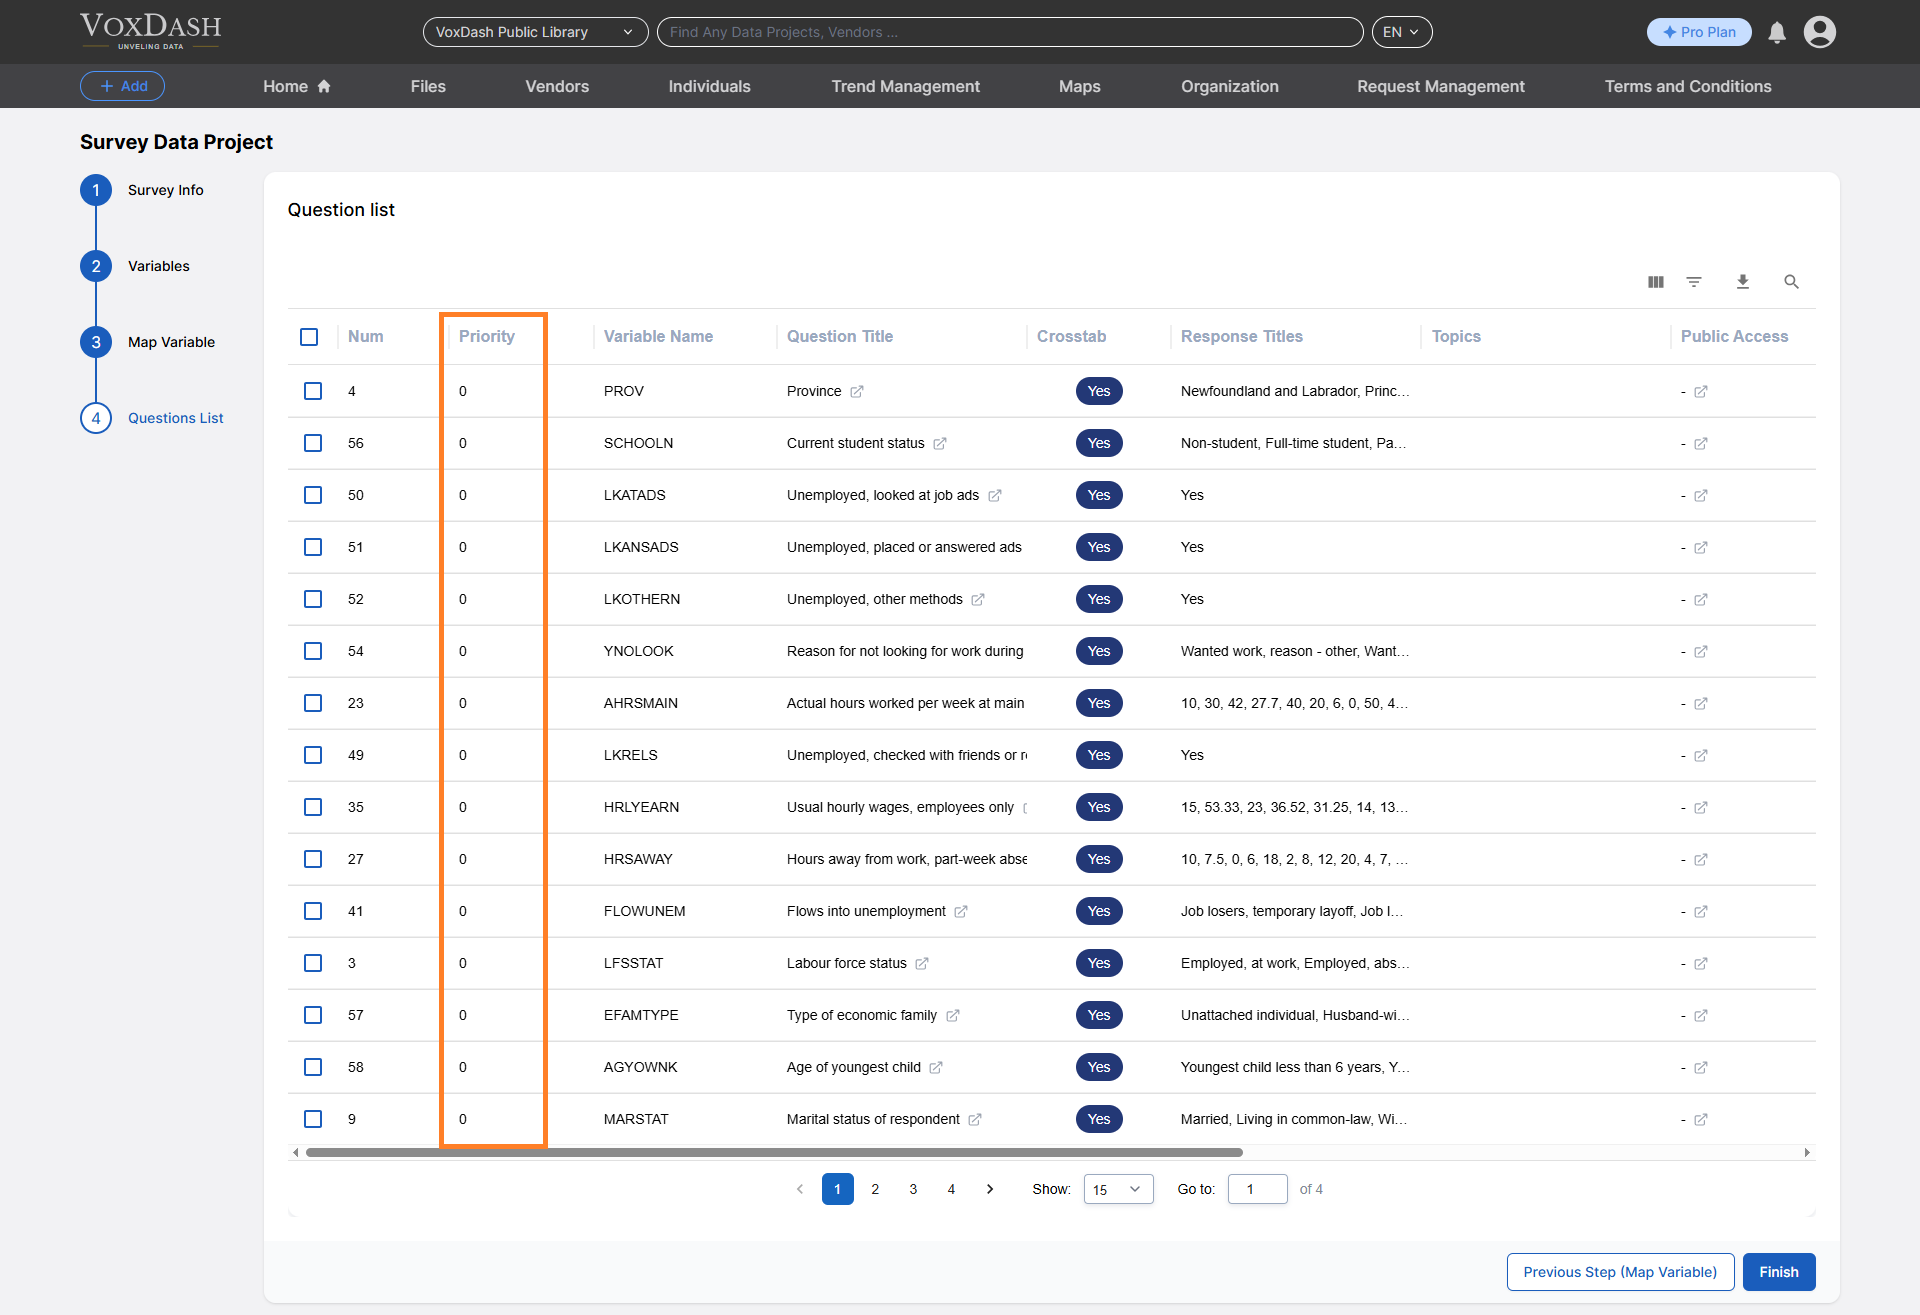
- Review the complete list of survey questions.
- Assign priority to questions so they appear on the main website sooner than others.
- Edit or delete questions.
- Give entity access
- Change the questions’ public access parameters
Summary of Steps
- Navigate to the project list and locate your desired project.
- Open the data entry page by clicking the project name or searching for it.
- Use the Complete Data Entry button to start entering general or Survey-specific details.
- Follow the wizards to complete each section accurately:
- Survey Info
- Variables
- Maps
- Questions List