- Add from the Terms and Conditions section in the Data Project
- Add from the Data Entry Wizard 10, Terms and Conditions for Data Projects
- Add and manage from the Terms and Conditions Page
1. Adding T&C from the Terms and Conditions Section in the Data Project
To add or manage Terms and Conditions directly within the Projects: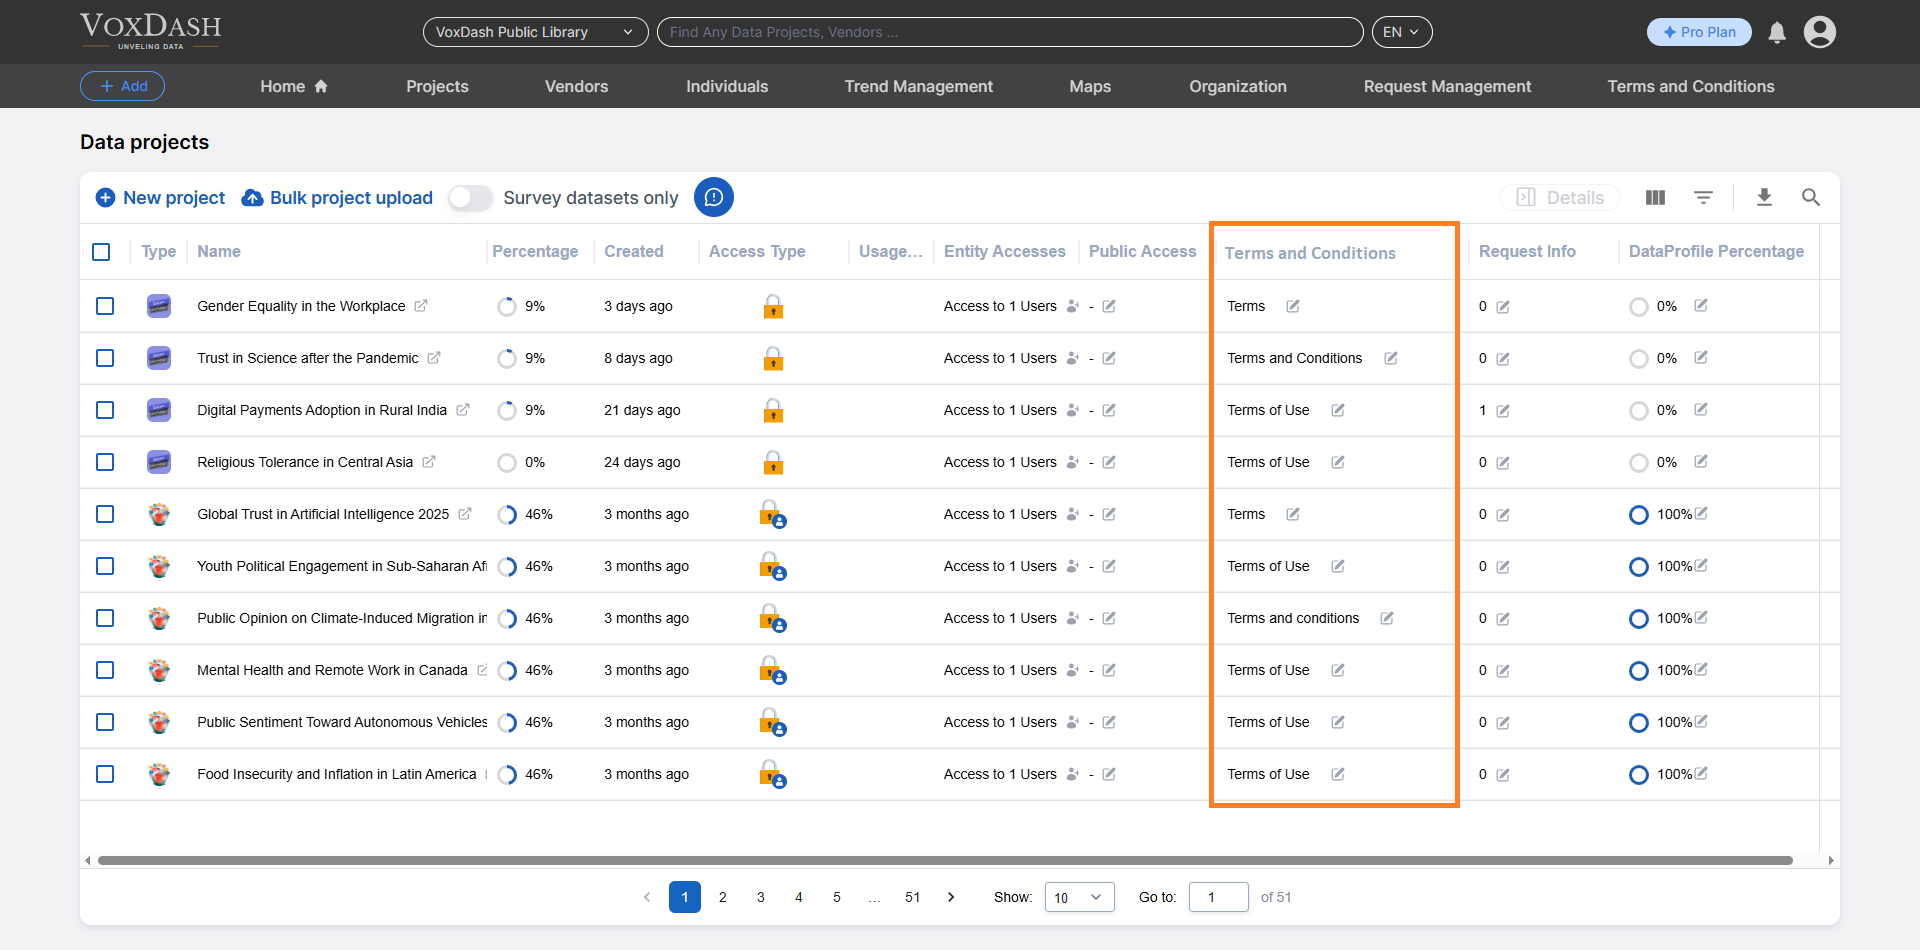
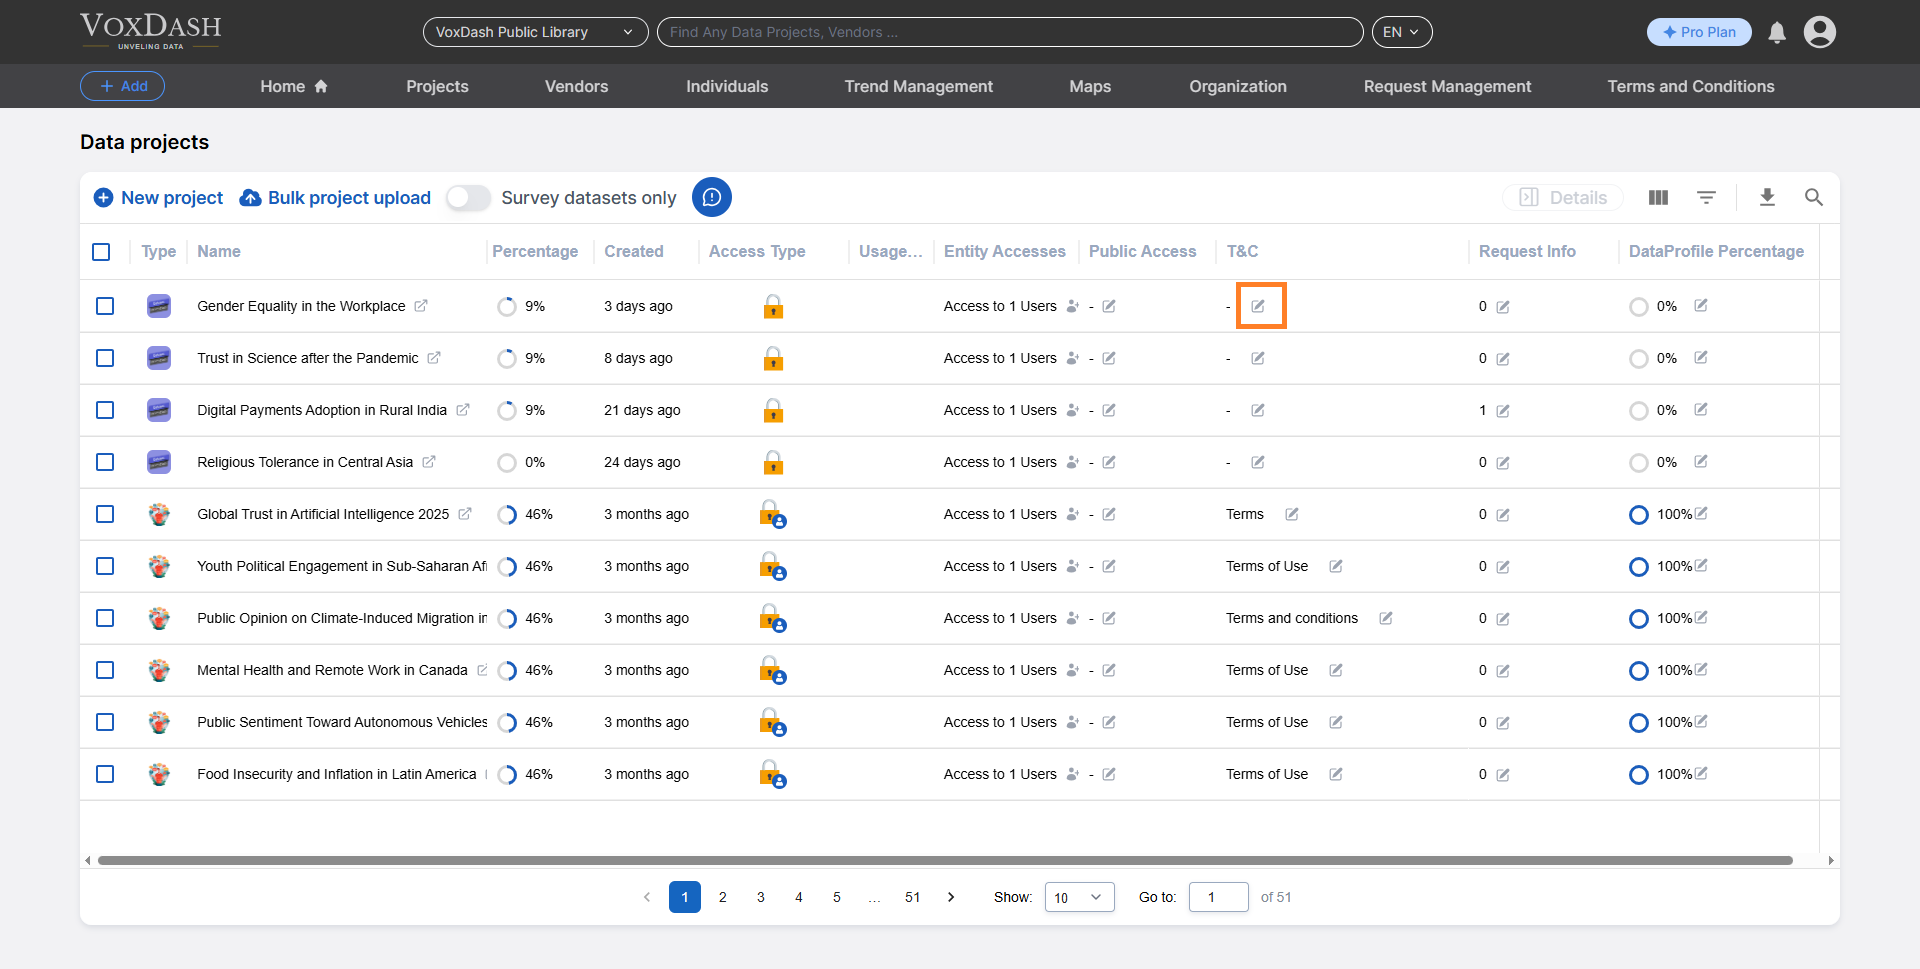
Locating the T&C Section
- Navigate to the Project page.
- Locate the Terms and Conditions (T&C) section from the Data Project table.
- Click the arrow icon next to the T&C entry to open the editing menu.
Add New T&C:
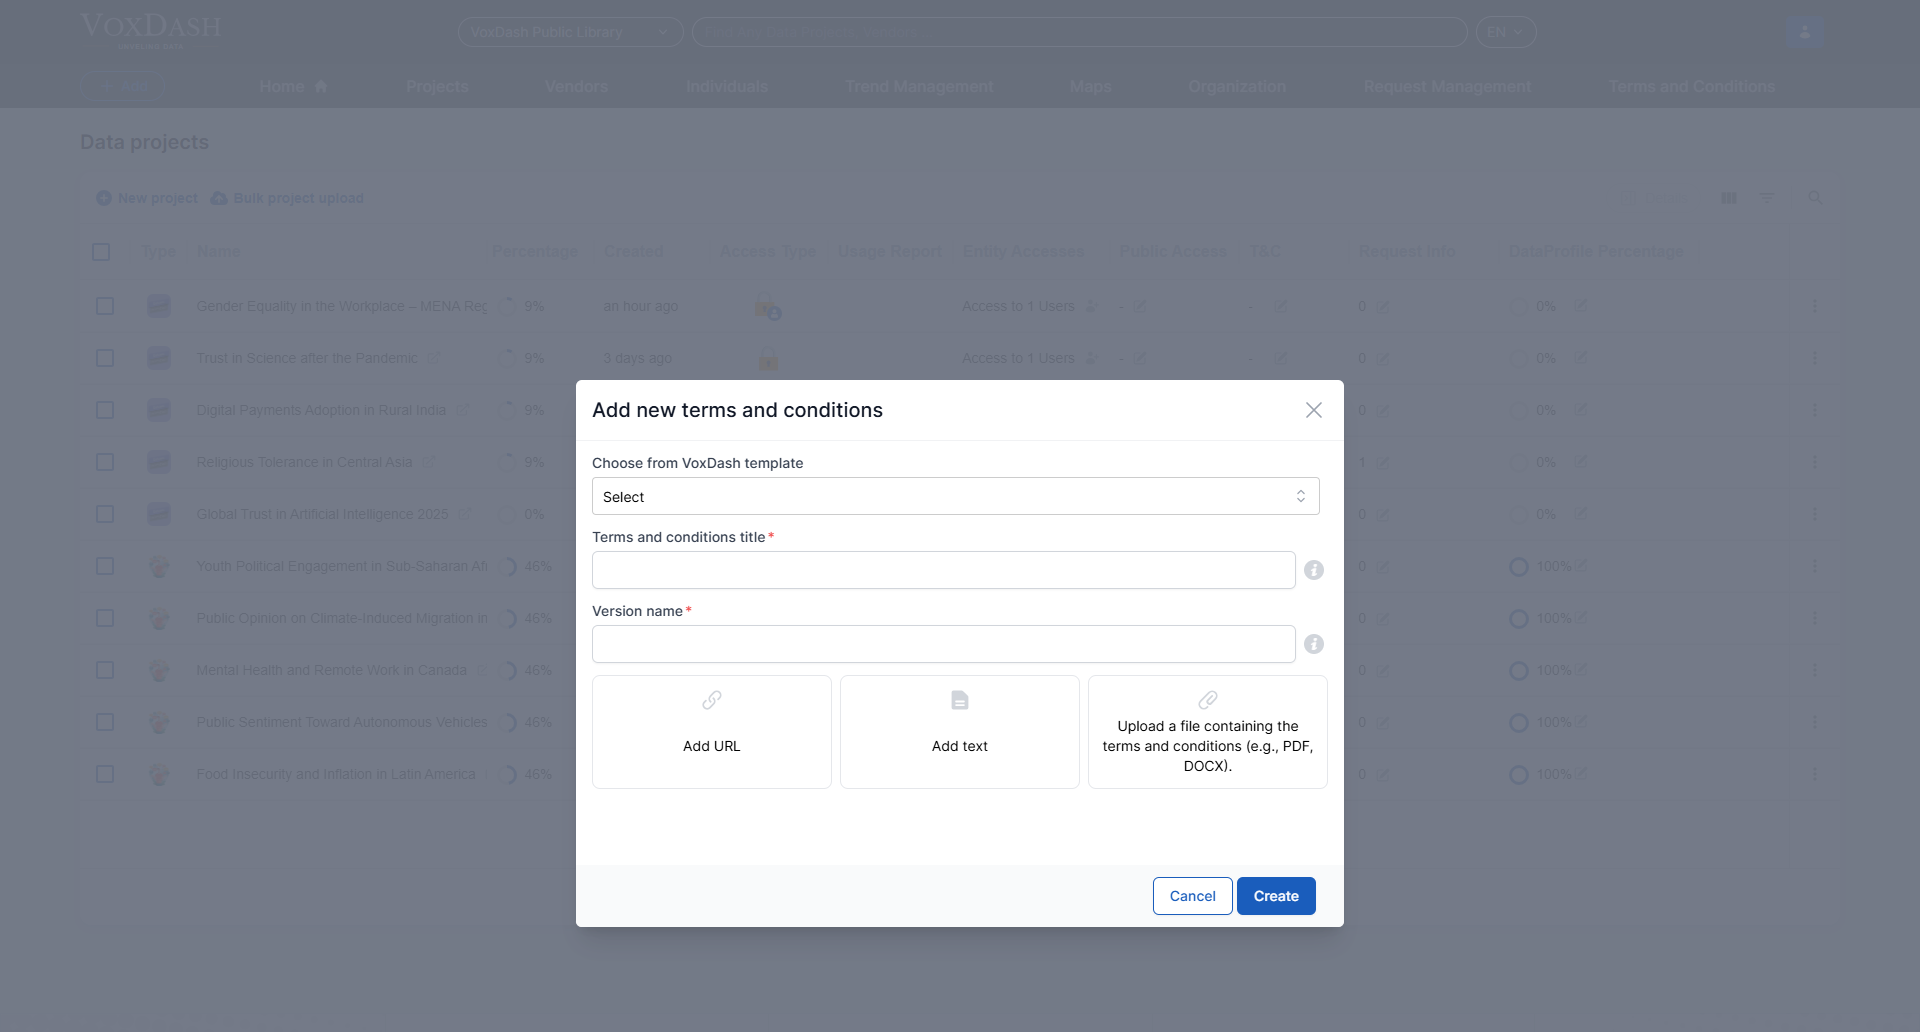
- Click the blue Add new terms and conditions button to open a new page.
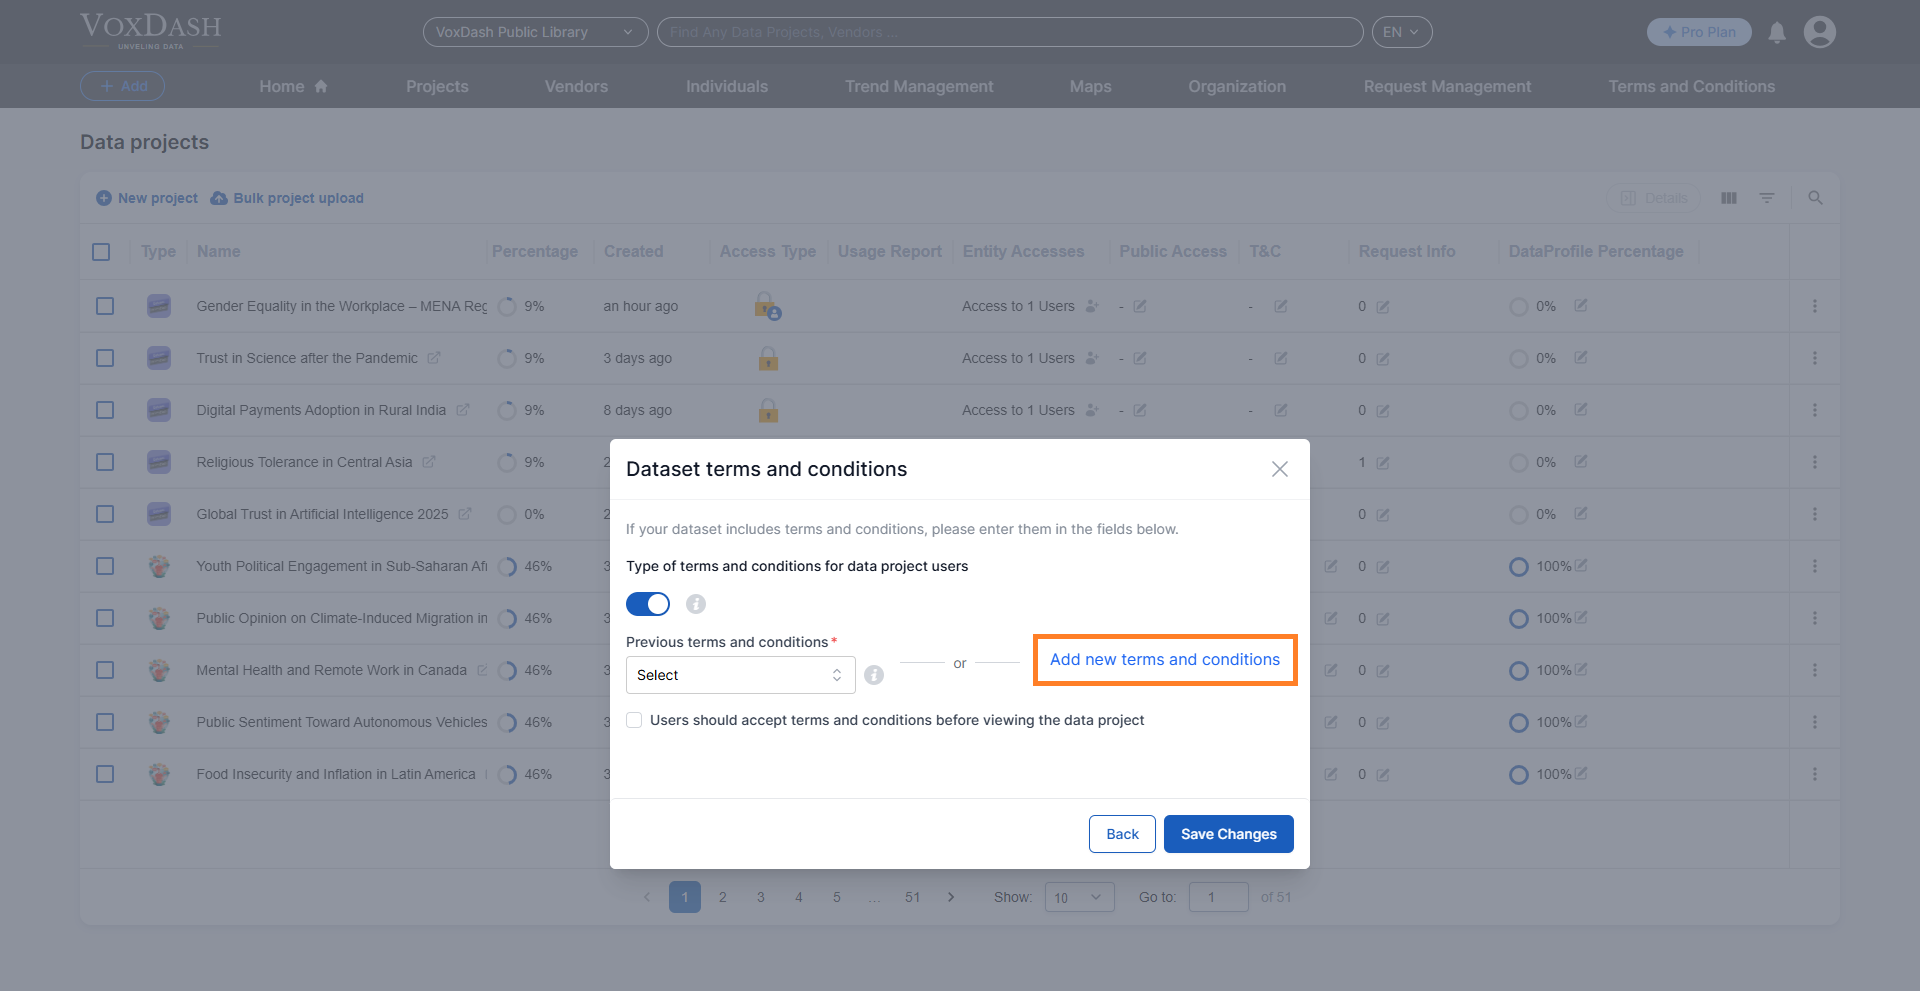
- Complete the Form:
- Add a Title: Provide a descriptive title for the T&C.
- Add a Version Name: Specify a version to track changes.
- Add a URL: Enter the URL linking to the T&C (ensure it’s from the hosting site).
- Upload Documents (Optional): Attach any relevant documents.
- Save Changes:
- Once all fields are completed, click the blue button at the bottom-right corner to save the T&C. By following these steps, you can effectively add or update the Terms and Conditions for your project, ensuring compliance and accuracy.
2. Adding T&C from Data Entry Wizard 10
The tenth wizard in the general data entry process allows you to add Terms and Conditions.Steps to Follow
The process is identical to the one described in the Terms and Conditions Section in the Data Project. Use Wizard 10 to access and add a T&C like the previous Method 1 or use the previously added conditions.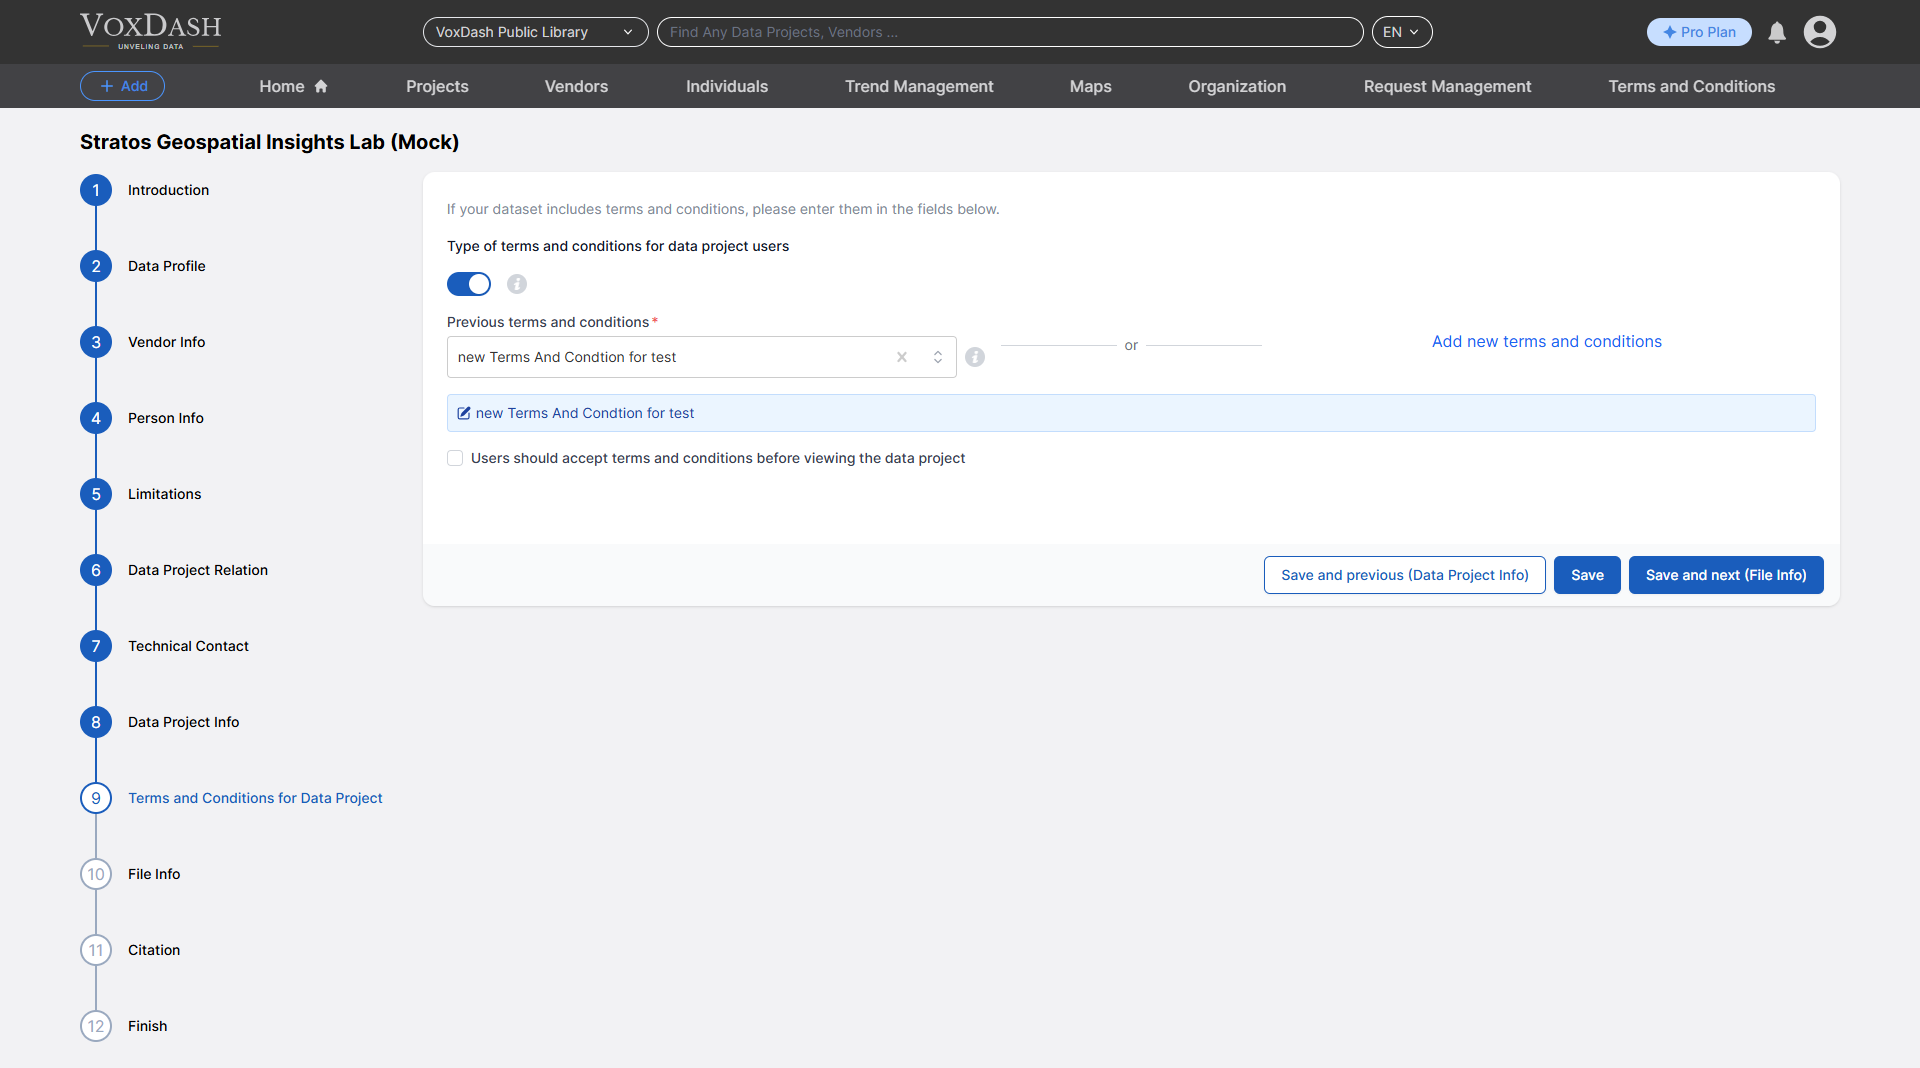
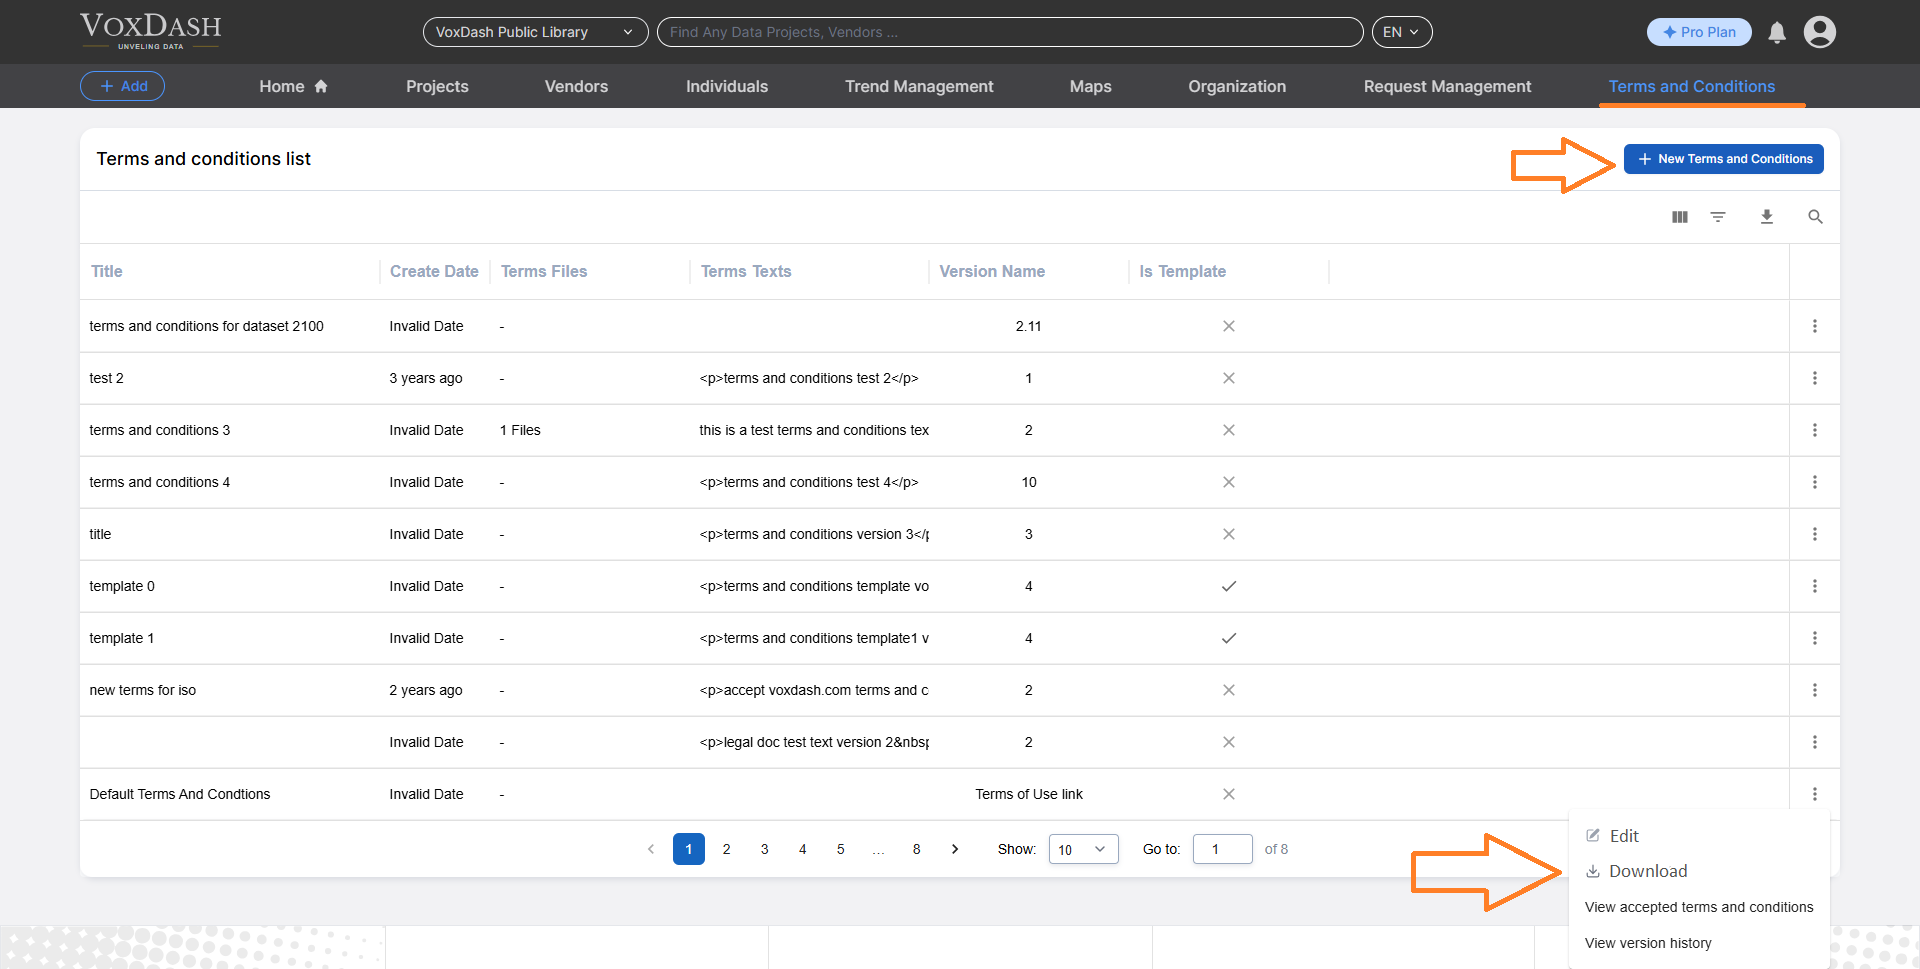
3. Add and Manage from the Terms and Conditions Page
You can also directly add or manage Terms and Conditions through the dedicated Terms and Conditions Page In this page, you can :- View existing Terms and Conditions in different versions.
- Add a new version by following steps similar to those for creating a new T&C file.
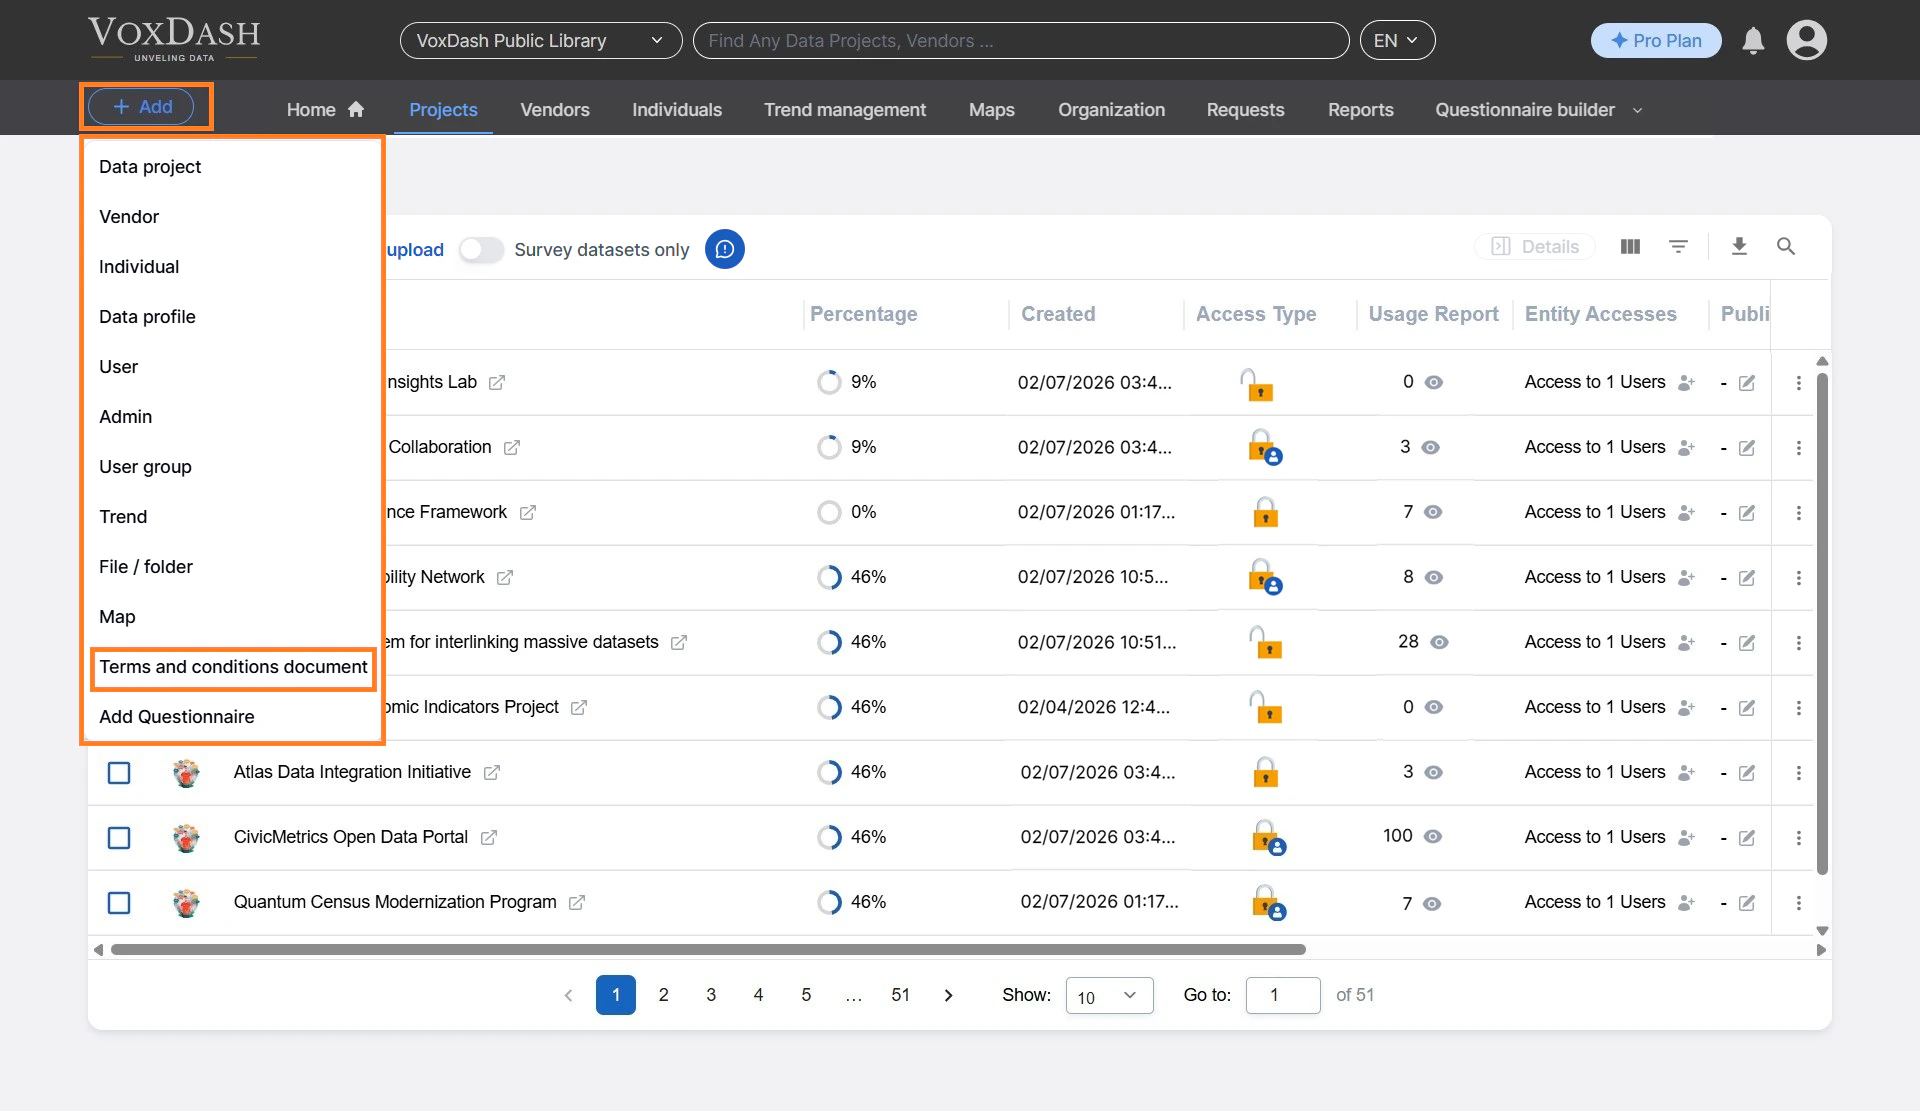
Accessing the Page
- From the Add button in the header choose Terms and conditions documents.
- Search for existing T&C by name.
- Click on a file to view its details.
Adding or Editing T&C
- View or Edit Existing T&C:
- Add a New Version: