1. Adding New Vendors
You have two primary ways to add new vendors to VoxDash:- Through the Data Entry Process: When you’re adding new data entries, you can select the “Vendor” type and fill in the required information.
- Using the “Add New” Button: On the Vendors List page itself, a prominent “Add New” button (typically located at the top) allows you to quickly create a new vendor profile.
2. Understanding the Vendors List Columns
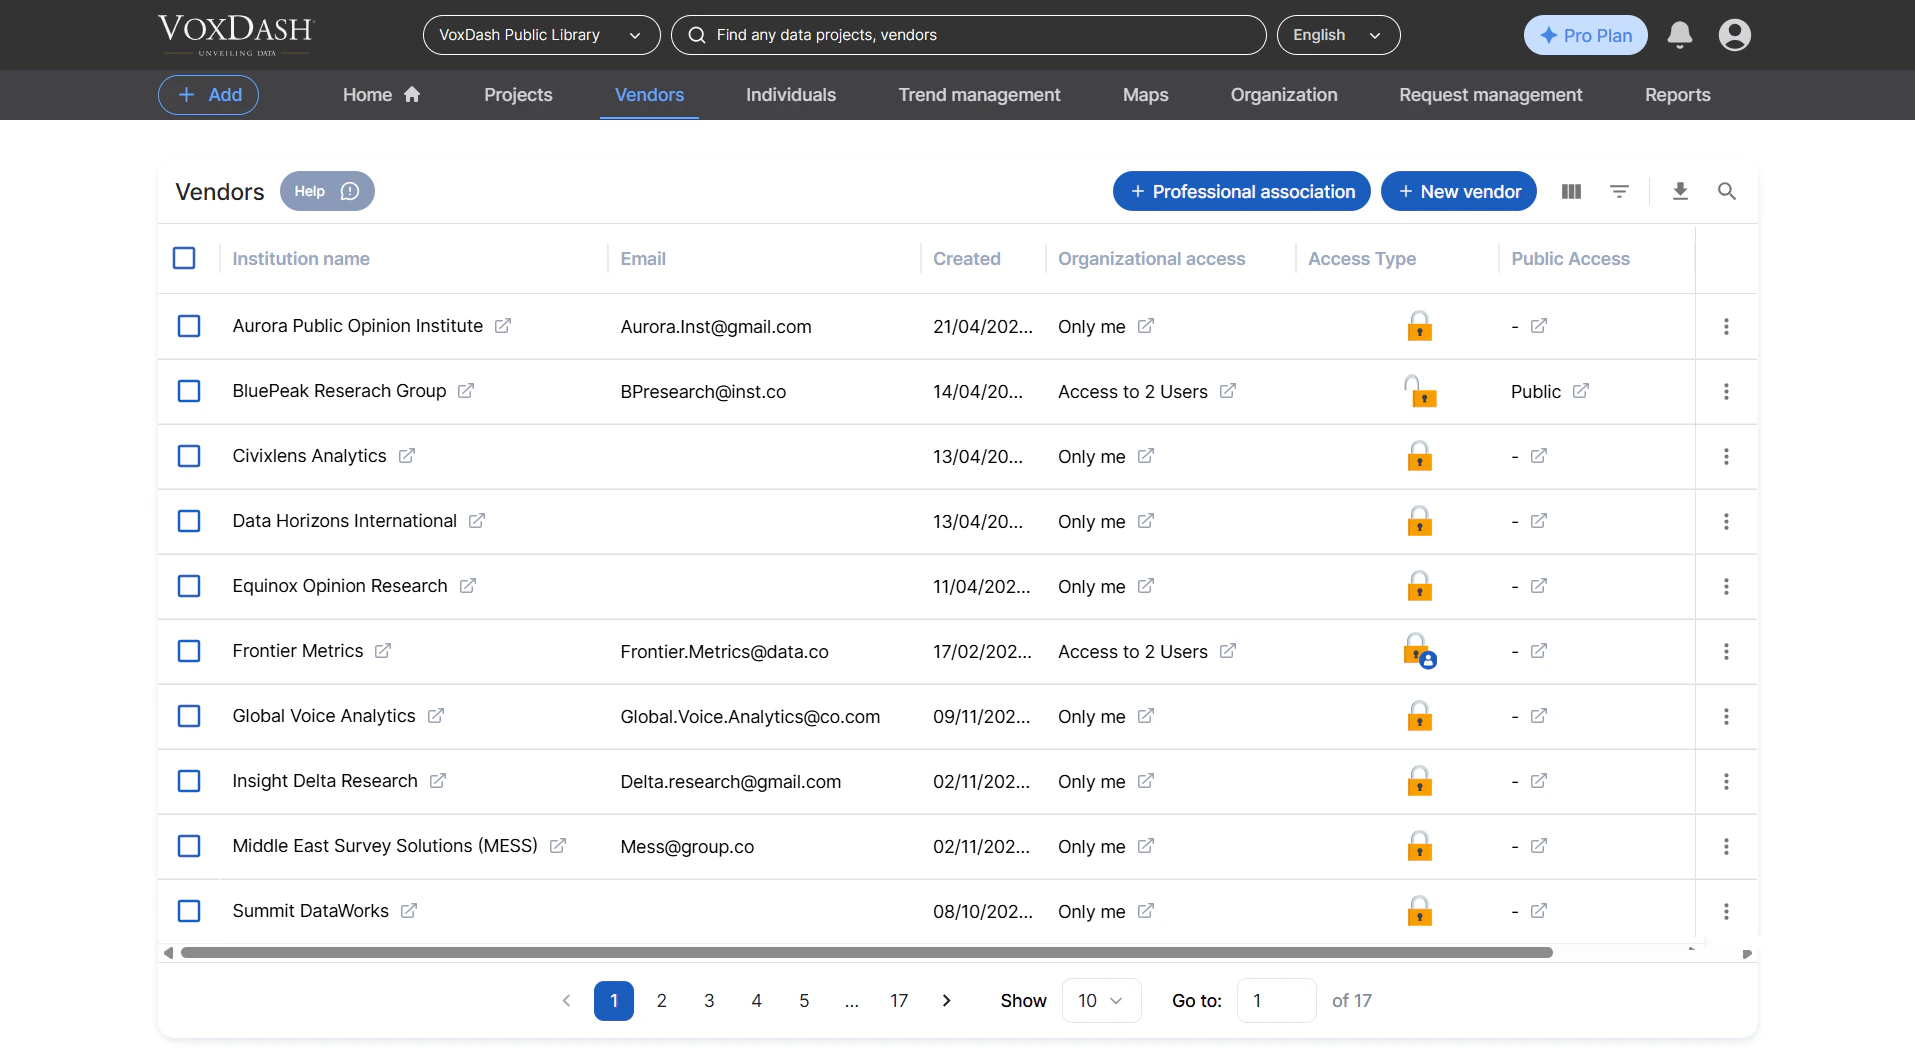
The Vendors List displays key information at a glance. Each row represents a vendor, and the columns provide essential details:- Institution Name: The official name of the vendor or professional association.
- Institution Email: The primary contact email address for the vendor.
- Created Date: The date when the vendor profile was first added to VoxDash.
- Organization Access: This indicates whether the vendor’s data is accessible within your organization.
- Access Type: Specifies the level of access granted to the vendor’s data (e.g., Public, Private, Shared).
- Public Access: A quick toggle to show if the vendor’s information is publicly visible.
3. Managing Access Levels
You have full control over how vendor data is shared.- To Change Access: Simply click on the “Access Type” or “Public Access” indicator for the desired vendor. VoxDash will present you with options to update the access level immediately. This ensures your data privacy and sharing policies are always upheld.
4. Vendor Actions Menu
For each vendor in the list, you’ll find a menu (often represented by three dots or a gear icon) that provides access to powerful management tools:- Edit: Update any of the vendor’s details, including their name, email, or access settings.
- Delete: Remove the vendor profile from VoxDash. (Use with caution, as this action may be irreversible.)
- View Report: Access specific reports related to the vendor, such as usage statistics, performance metrics, or survey results associated with them.
- Audit Trail: Review a log of all activities and changes made to the vendor’s profile. This is invaluable for tracking who did what and when, ensuring accountability and data integrity.
5. Finding and Organizing Vendors
VoxDash provides tools to help you navigate your vendor list efficiently:- Search Bar: Use the search bar at the top of the page to quickly find a specific institution by name or email.
- Filters: Apply filters to narrow down your list based on criteria like Access Type, Creation Date, or Organization Access. This is useful for quickly pulling up specific groups of vendors (e.g., all vendors with “Public Access”).
- Column Reordering: You can customize the layout of the list by dragging and dropping column headers. This allows you to arrange the information according to your priorities, making it easier to view the data that matters most to you.