Configuring Required Fields for Datasets
-
Navigate to Your Data Projects:
From the Data Provider Panel, locate and click on Data Projects. -
Select a Request Info:
Find the specific data project for which you want to define required fields. Click on the pen icon. -
Define Required Fields:
On the “Accepted Fields” configuration page, you can:
- Add New Fields: Click Add Field to create a new data collection point.
- Specify Field Type: Choose from options like
Text,Email,Dropdown,Date, etc. - Enter Field Label: Provide a clear, user‑friendly name for the field (e.g., “Organization Name”, “Purpose of Use”, “Contact Email”).
- Mark as Required: Toggle the
Requiredoption toYesfor fields that users must complete to access the dataset. - Add Descriptions/Helper Text: Include brief explanations to guide users on what information to enter.
-
Save Changes:
Once you’ve defined all necessary fields, click Save Configuration to apply them to the data project.
Viewing Submitted Information (Accepted Fields Table)
After users have submitted the required information to access a dataset, you can view these submissions in the File Manager.-
Access the File Manager:
From the Data Provider Panel, go to File Manager. -
Locate the Relevant Data Project:
Find the data project in the table. -
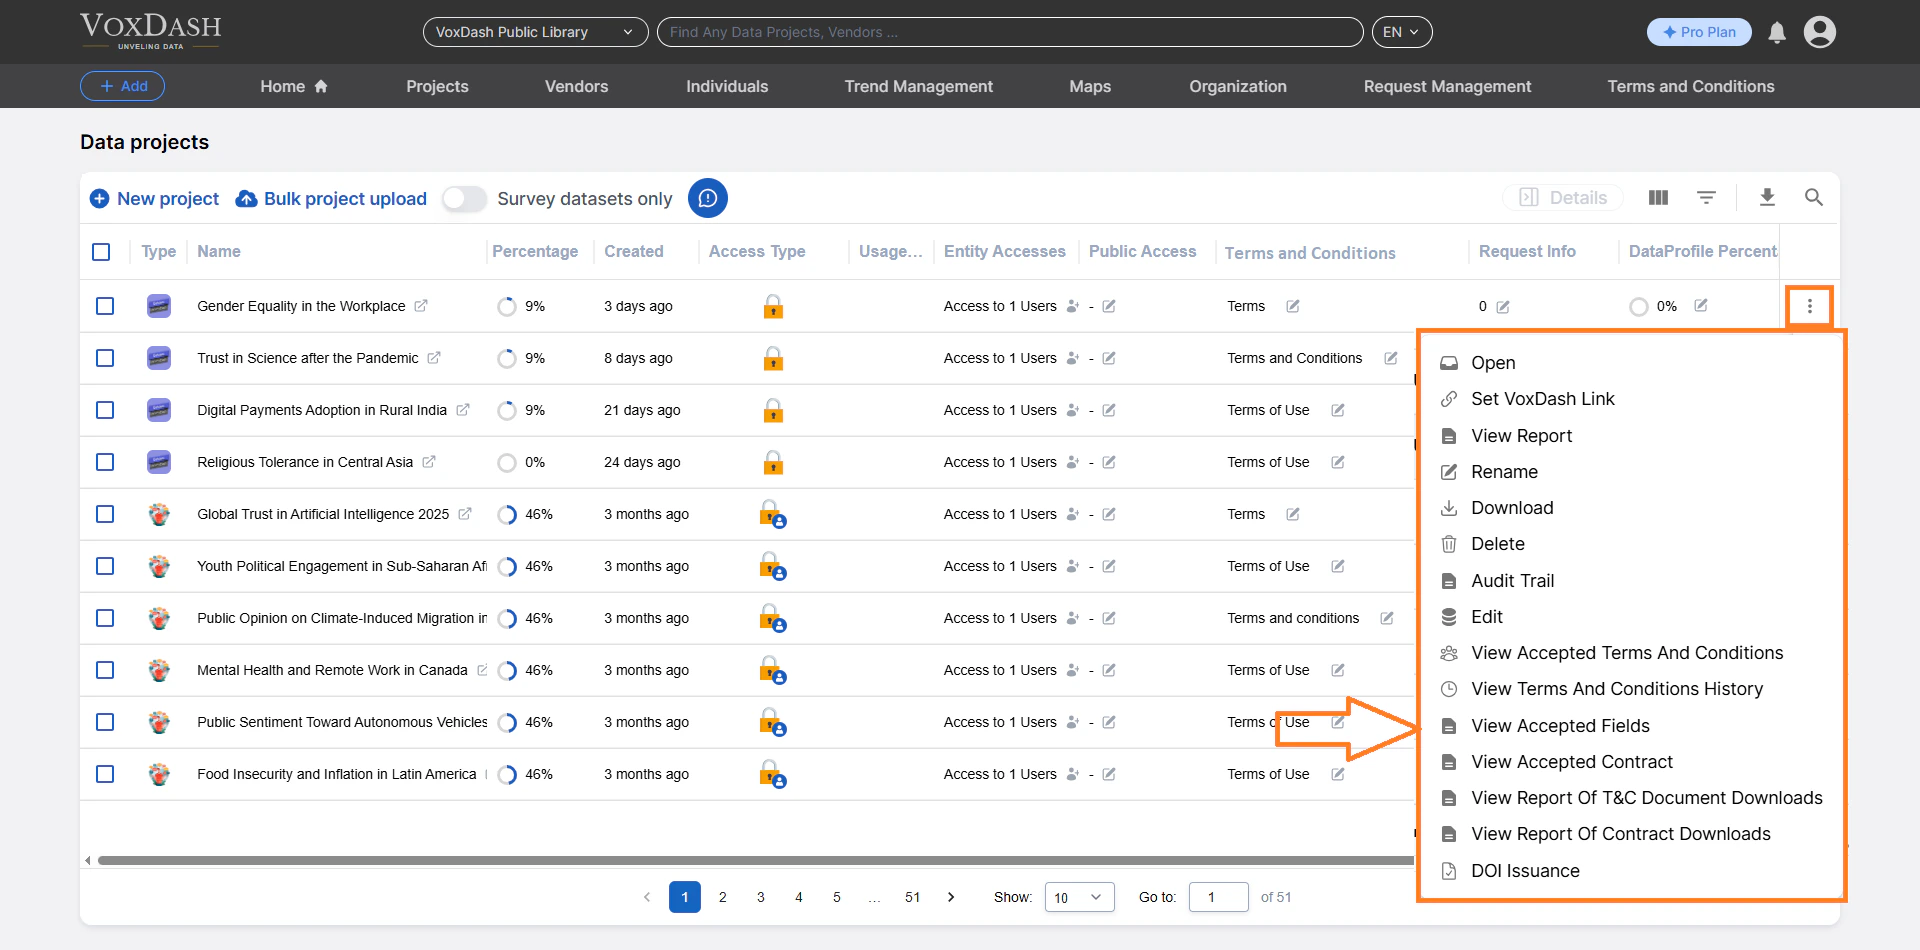
View Accepted Fields Submissions:
Click the menu icon (three vertical dots ⋮) next to the data project name.
Select View Accepted Fields.
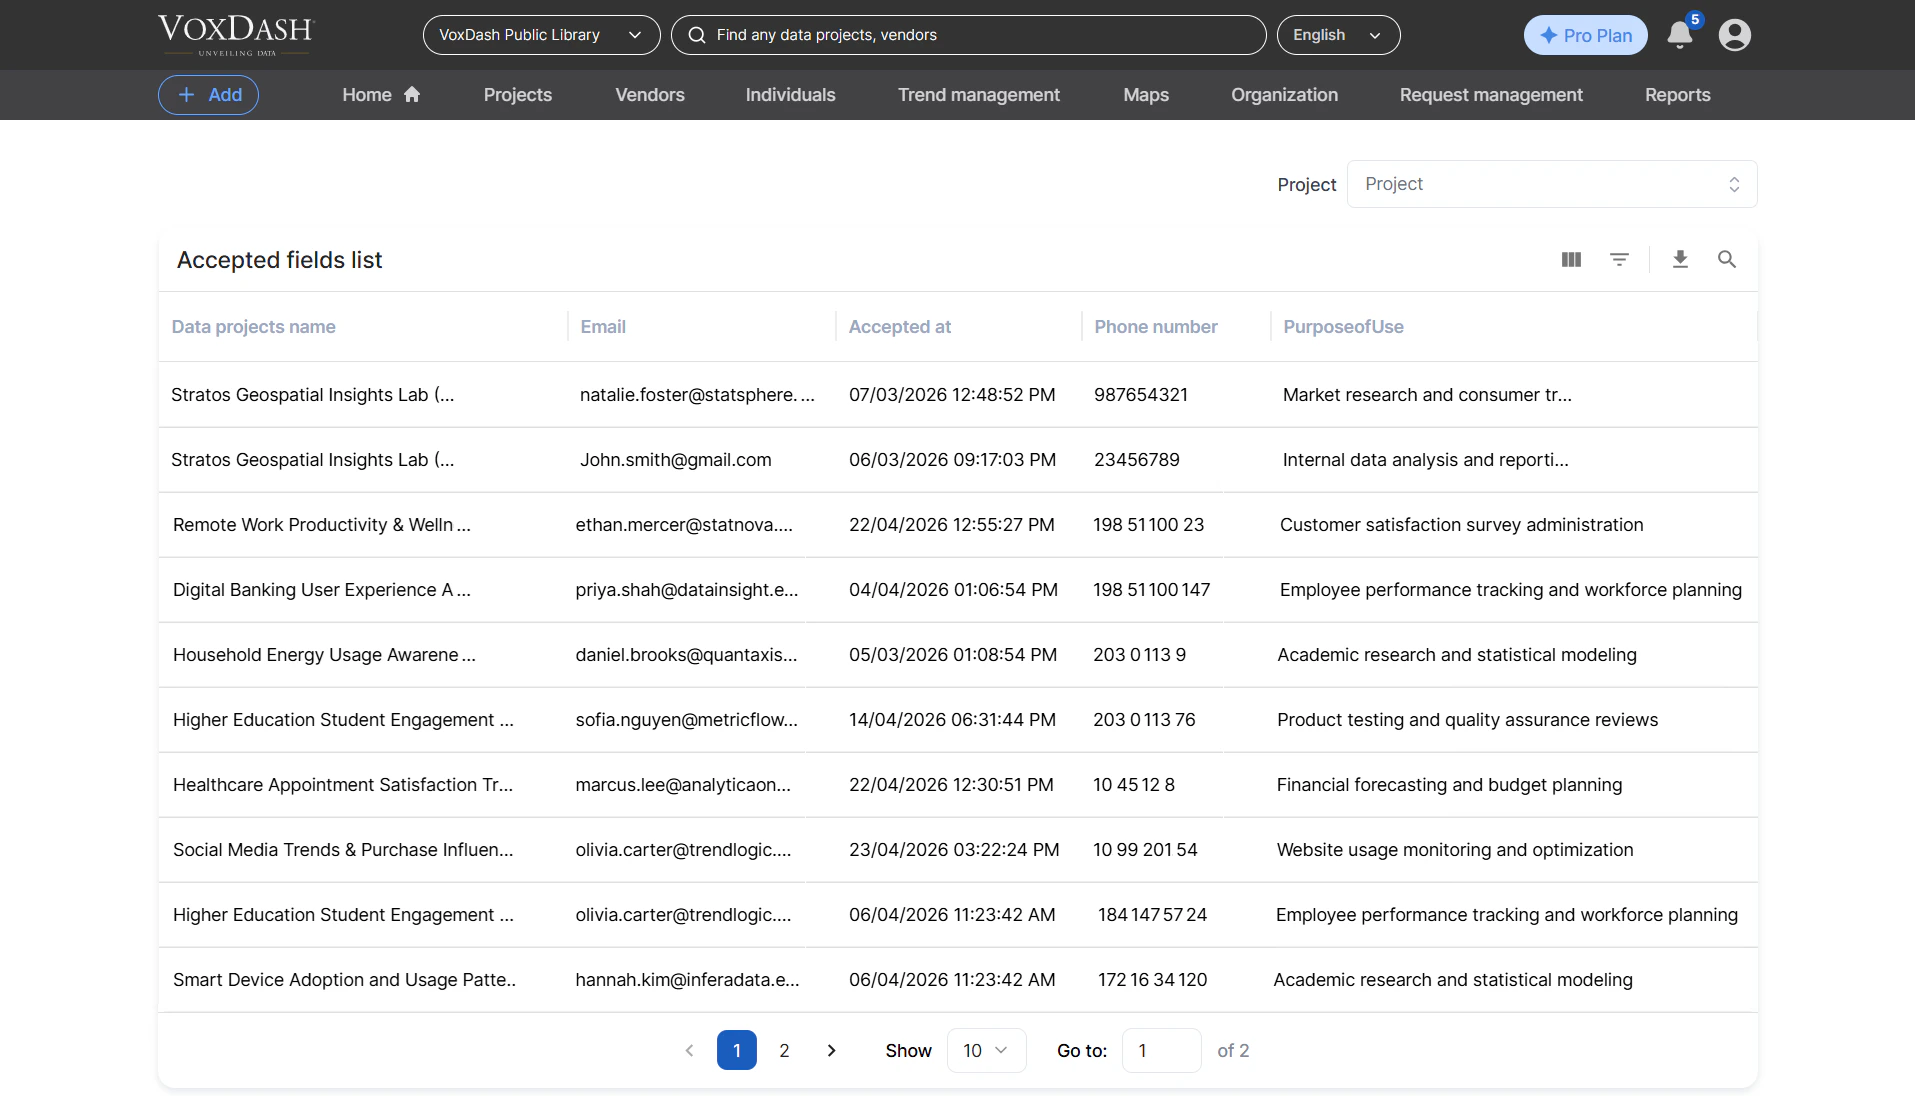
This action opens a table displaying all submissions related to this data project.
- Data Project Name: The name of the dataset for which access was requested.
- User’s Email: The email address of the user who submitted the request.
- Acceptance Date: The date and time when the user submitted the required information.
- [Other Required Fields]: Columns corresponding to each field you defined (e.g., “Organization Name”, “Purpose of Use”, “Contact Information”).